Rigs + Gear: Keep Your Cool with AC Maintenance
Enjoy the Soothing Breezes From Your RV's Air Conditioner with These Simple Maintenance Tips
Image Caption: Photo Credit: James Adinaro
I haven’t taken a formal survey, but I’d guess that many RVers would consider their air conditioners among the most essential pieces of equipment. And if you don’t feel that way right now, wait until the beginning of August and let me know what you think then. It’s not that you can’t enjoy RVing without an air conditioner— you can. But you’ll enjoy it more if it’s mild and comfortable inside your RV.
Our home base is in the desert southwest, where for more than three months out of the year, daytime high temperatures are more than 100°F. So for us, a working air conditioner means the difference between enjoying an RV trip or merely surviving it. Since this appliance is so critical for us, I make sure to keep up with a few key maintenance tasks.
For the purposes of this article, we’re going to focus on maintaining roof-mounted A/C units only. If you have a basement air conditioner or a wall-mounted unit, you’ll have to adapt these procedures where possible to fit your unit.
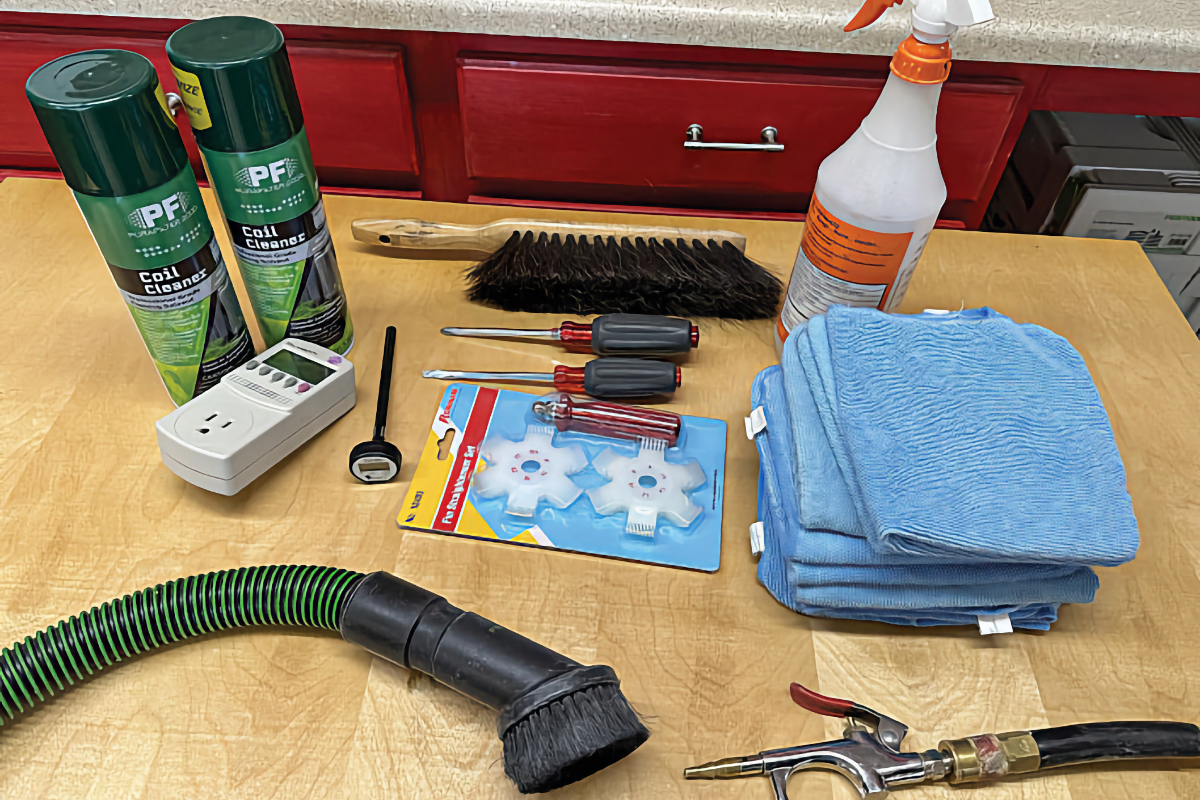
Photo Credit: James Adinaro
One quirk of RV air conditioners is that—unlike the ones in your car or house—they are not designed to be rechargeable. So we won’t be checking Freon pressures or needing the equipment to do so. Usually, if these units develop a leak, it’s more cost-effective to simply replace them.
Finally, it’s always a good idea to consult the owner’s manual for your RV’s air conditioner. It might have additional maintenance steps listed, and those instructions should take precedence over any general-purpose advice.
There are some tasks I perform monthly and some that I run through just once a season or so. If you’re a full-timer, you may want to increase the frequency of these checks.
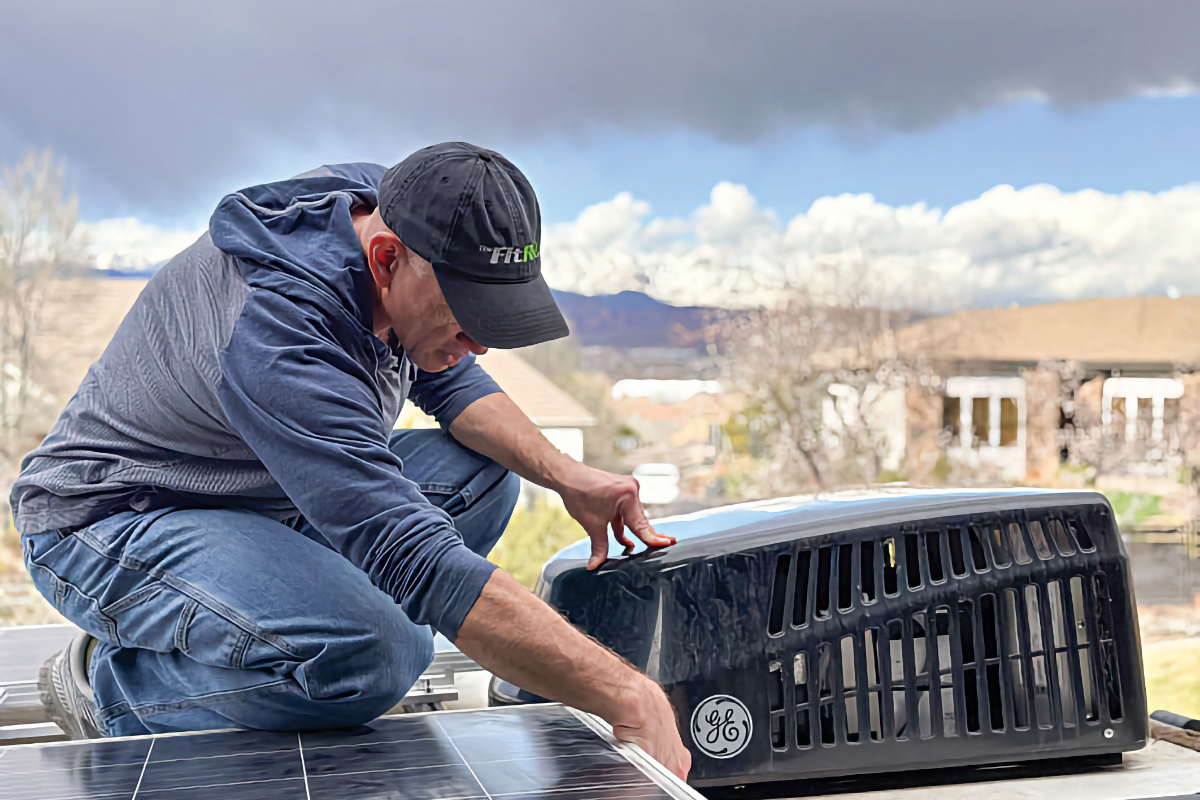
Photo Credit: James Adinaro
Every Month
Clean the air filters! The air conditioner works by pulling air from your RV’s interior through a filter, passing it over chilled coils, and returning that chilled air to the interior. The air-conditioner’s filters are critical to keeping it performing at its best. Fortunately, checking and cleaning an A/C’s filters is easy.
With the power to the air conditioner off, locate the air intake for the air conditioner. It should have some filters, which are typically held in place with tabs or clips. Simply pop them out and remove the filter. Assuming the filters aren’t disposable, back-flush them under running water until clean. Once they’re clean, let them dry completely before reinstalling them.
We travel with a cat, and I could have built an entirely new cat from all the hair I’ve removed from the filters over the years. Trust me, pet owners, this is one maintenance task you don’t want to neglect. Depending on how much your pet sheds, you may want to do this more than once a month.
While checking the filters is the main monthly task, there are some additional checks I make on the roof unit.
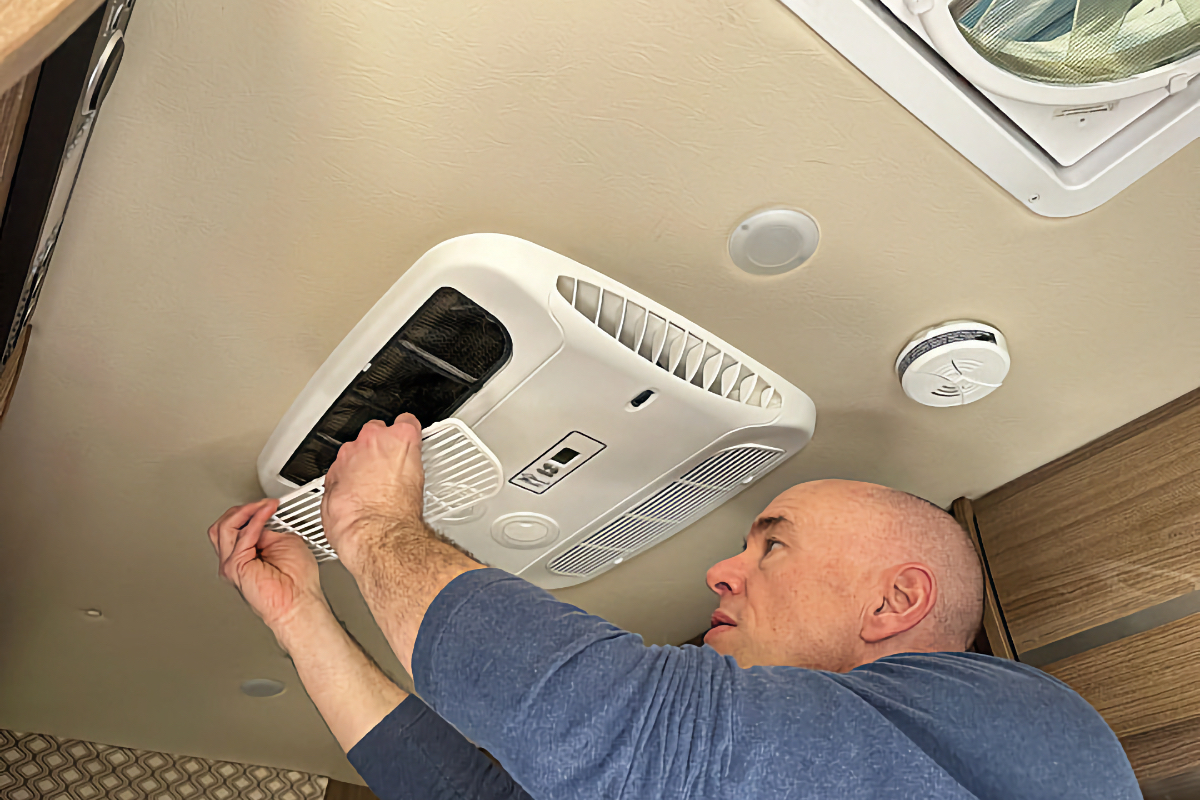
Photo Credit: James Adinaro
First, before getting on your RV’s roof, make sure it is safe. RV roofs are full of obstructions and trip hazards, and they can be very slippery when wet. You don’t want to suffer a fall from your RV’s roof, so play it safe here.
Assuming you can get onto the roof, make sure the exterior A/C unit is clear of any debris. Twigs, leaves, and whatnot can collect around the unit and reduce the airflow to it. If you find any, sweep or brush the debris away.
Then, give the exterior air-conditioner shroud a once-over, looking for any cracks, splits, or other damage. This is a lesson I learned the hard way! Years ago, with our first RV, we were headed into Las Vegas, Nevada, on Highway 93 on a windy day when car after car started trying to get our attention. When one finally did, we realized that the wind had blown the air-conditioner’s shroud completely off, and it was likely sitting somewhere near the bottom of Hoover Dam.
Fortunately, replacing an air-conditioner shroud is pretty simple, and the Camping World in Las Vegas had one in stock. We were back on the road in a few hours, but the whole experience could have been avoided with a simple visual check.
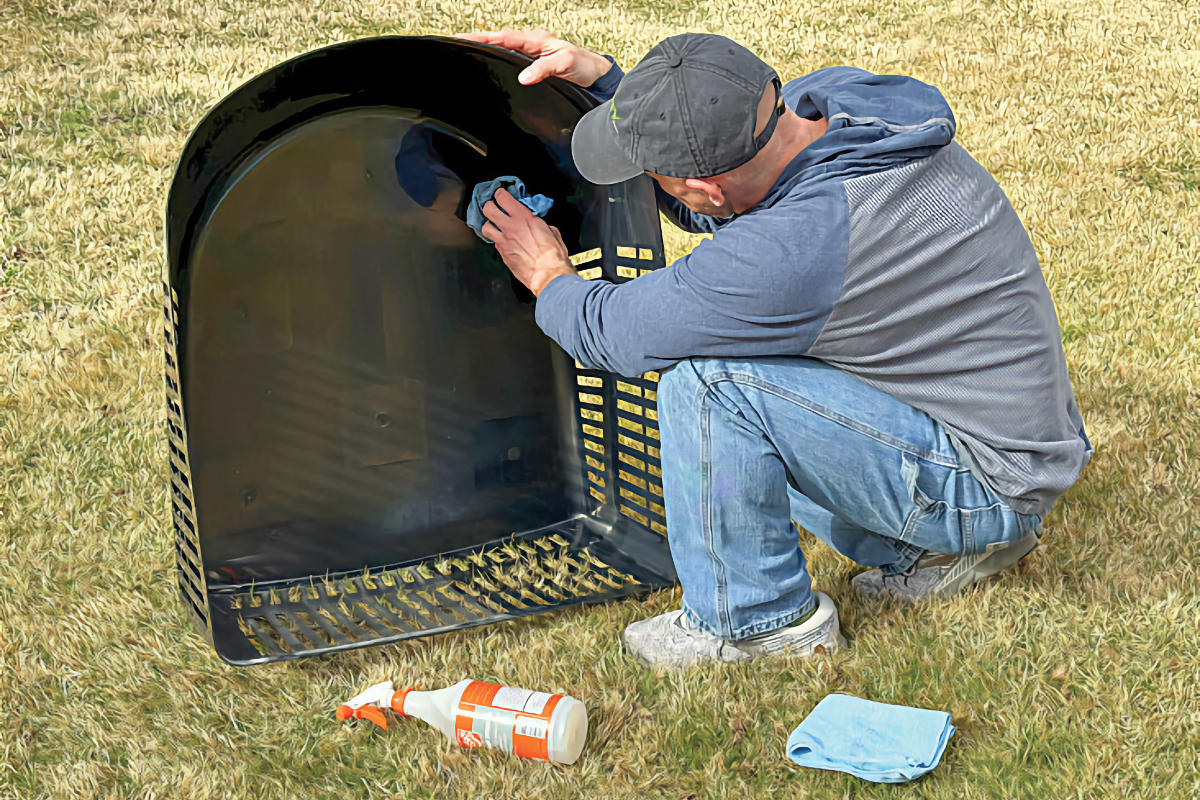
Photo Credit: James Adinaro
Once a Season
Once per year, usually in the spring, I run through the following extra steps in addition to the regular monthly steps. This yearly routine will take a bit longer, but barring any problems, you should be able to get it done in an hour.
Start the same way by turning off all the power and making sure you can access the roof safely. Then, after cleaning any debris from around the air conditioner, take a few extra minutes to check the gasket that seals the bottom of the A/C unit to the roof. This seal works by compression, and since it’s what keeps water from coming in the A/C roof opening, you want it to be in good shape. It might be tough to see (a flashlight helps), but where you can make sure that there are no tears or other damage to this gasket.
Once you’ve inspected the shroud for damage, remove it. These shrouds are usually held in place with four screws. With the cover off, clean the inside (be on the lookout for wasp nests and the like) and the outside with a damp microfiber cloth. Set this aside until you reinstall it later.
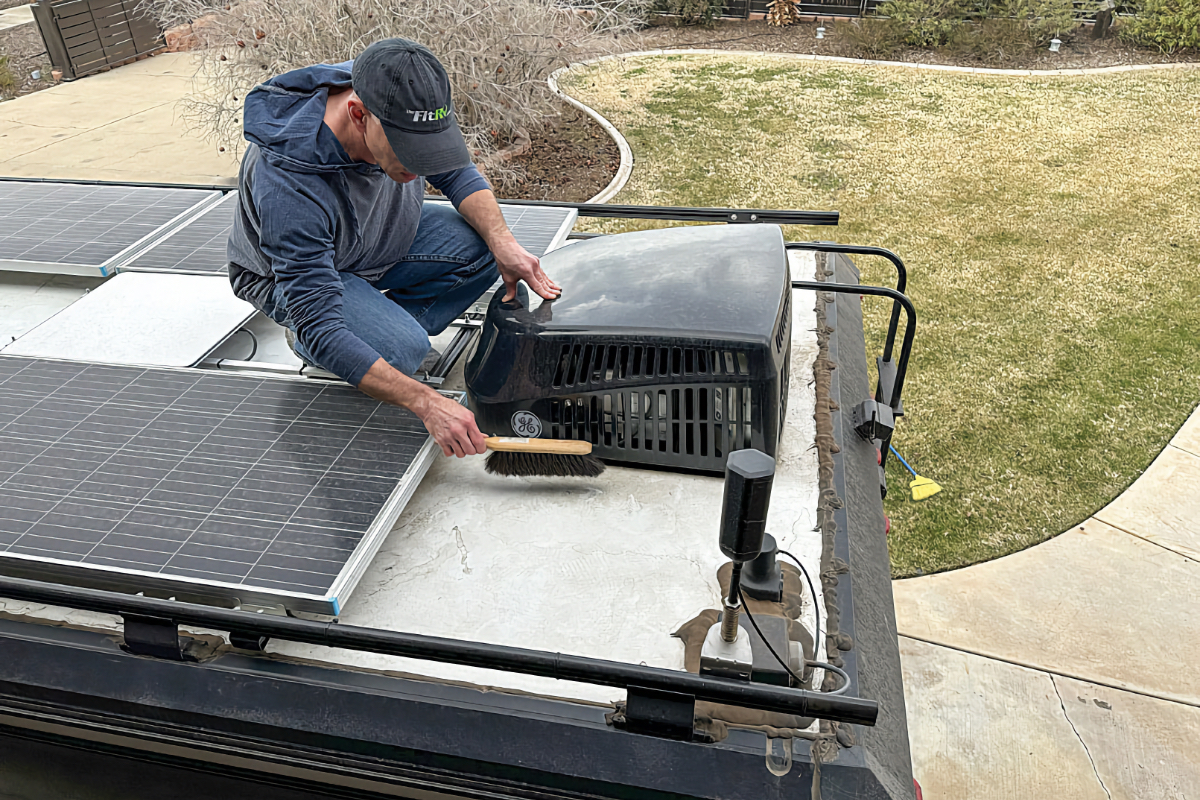
Photo Credit: James Adinaro
With the cover off, locate the drain holes on the unit, and make sure they are clear. All that water that comes off the roof unit runs through these drain holes, so you don’t want them clogged. Also, remove any debris you find inside.
Clean the fan and the condenser coils (the set of coils and fins facing the rear of the RV). You can use a shop vacuum with a brush, or compressed air if you have access to some. Be careful around the fins, as they’re very delicate, and you don’t want to bend them and restrict the airflow through the unit.
If the coils are very dirty, there are commercial coil cleaner products available. These are interesting, as they’re sometimes touted as “self-rinsing.” (Those that are self-rinsing will only be that way on coils that produce condensation. Those are the evaporator coils—the “inside” ones. We haven’t gotten to those yet). For the condenser coils, you can rinse the cleaner off with gently running water.
If you do find any bent-over fins, use an air-conditioner-fin-straightener tool. These are rather like combs for the fins on the A/C unit. You’ll need to select the tool with the comb spacing that matches the air conditioner’s fins, but once that’s done, their use is pretty obvious: You just gently comb the fins straight.
The A/C unit will have an interior cover that separates the condenser and evaporator coils. This is what separates the “outside” air from the “inside” air. The evaporator coils are on the inside, so to get to them, you’ll need to remove the cover. The cover on your unit may be screwed on, or it may be a press-fit foam part.
Once this cover is off, you’ll see the evaporator coils and the fan that moves the inside air. There may also be a temperature probe stuck into the evaporator coils. This is a freeze detector, and it’s important. If you remove it, or it falls out, be sure to put it back before closing everything up.
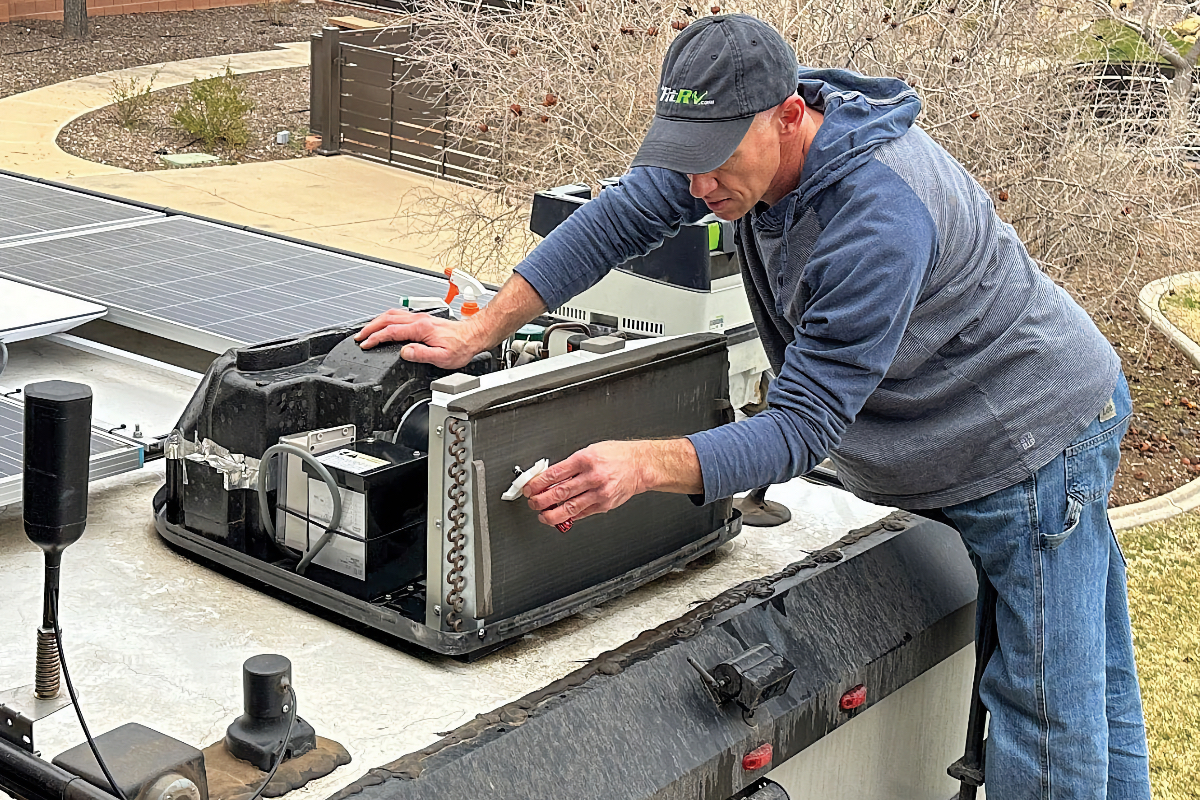
Photo Credit: James Adinaro
Clean these coils and the fan the same way you did the outside ones, with either a vacuum or some compressed air. If you need to go the extra step with coil cleaner, you’ll want to stuff a towel or something into the opening that leads down into your RV. You don’t want coil cleaner dripping down into your rig! The condensate that forms will rinse these coils off when you start the air conditioner back up, so you don’t necessarily need to rinse them. Straighten any bent fins as needed.
Finally, check the motor and/or the manual to see if the motor requires any oil. Those that do will have the proper oiling procedure spelled out in the manual.
With that done, put the coil cover back on, replace the shroud, and head inside the RV.
On the inside, you’ll want to clean the air-conditioner filters as normal, but there’s one more check I like to make.
The air conditioner is held to the roof of your RV with (typically) four bolts, one at each corner of the opening. You’ll want to check the tension on these bolts and make sure they haven’t worked their way loose. You may have to remove the interior air-conditioner cover to access them. They should all have approximately equal tension. If they don’t, you’ll want to torque them to the recommended specification in the owner’s manual. On our RV’s GE air conditioner, for example, the bolts need to be torqued to 45 (+/-5) inch-pounds.
Running through these steps is all I do to keep our RV’s air conditioner breathing easy all summer long.
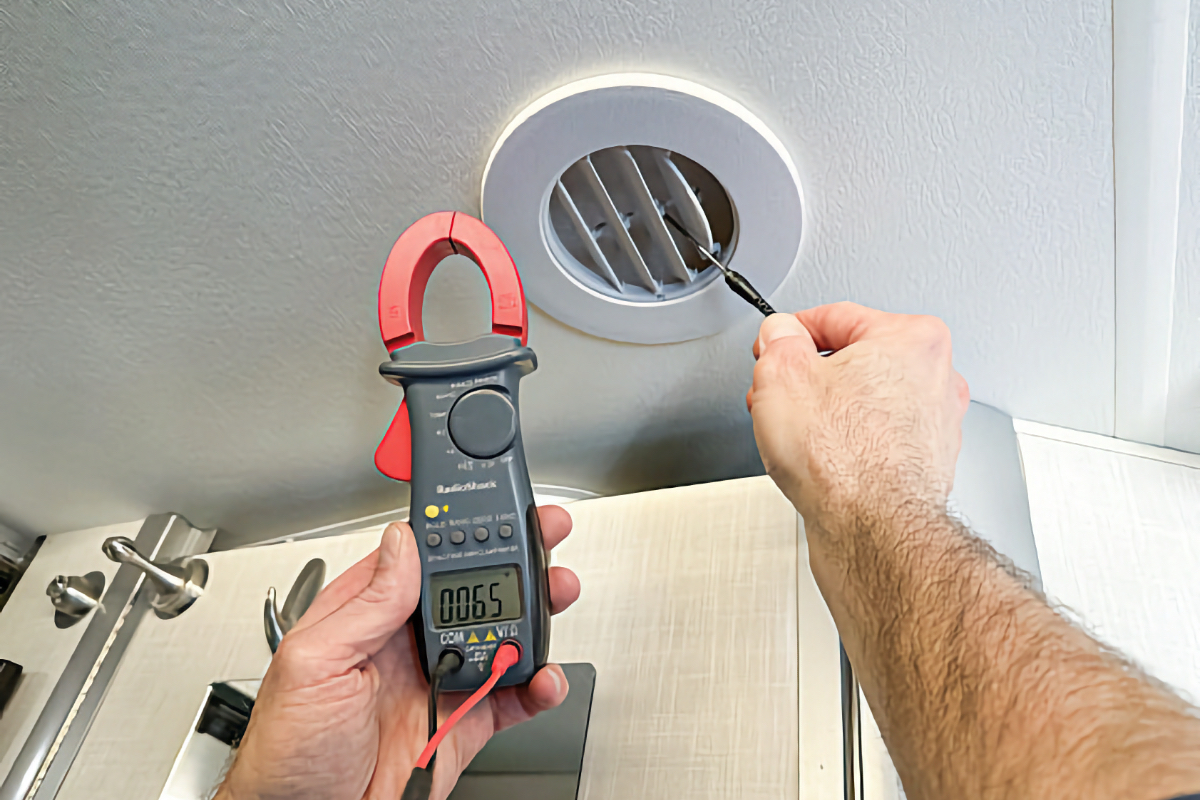
Photo Credit: James Adinaro
Testing Performance
If you’re concerned that the air conditioner might not be working properly, there’s an easy way to check that with just a probe-style thermometer. Most RV air conditioners are designed to cool the air in your rig about 16–20°F below the interior ambient temperature without the A/C running.
To check this, wait for a hot day, turn on the air conditioner, and let it run for about 15 minutes. Then, measure the temperature of the air going IN to the air-conditioner’s return duct. Write this down. Then measure the temperature of the air coming OUT of the distribution box or ductwork.
Subtract the initial temperature from this number. If you’ve got a temperature difference of about 16–20°, the air conditioner is working to spec. If not, and the steps in this article don’t help, it may be time to take your RV in for A/C service.