Lessons Learned from a DIY Solar RV Install
Image Caption:
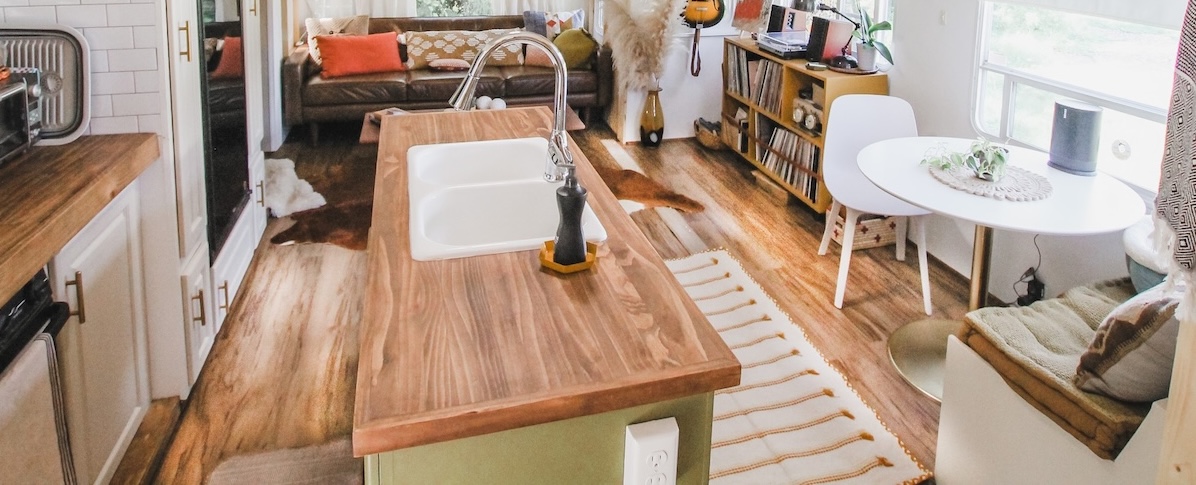
Last fall, our family embarked on a journey across the United States in our 30-foot Winnebago travel trailer. We knew our trusty Toyota Tundra and Winne Minnie Plus would keep us safe on the road and in the wild. But there’s always room for improvement, and one modification we decided to make before departing was a completely self-contained power system that included solar panels for charging a lithium-ion battery bank.
The project took about 50 labor hours and a healthy budget. When completed, we felt confident knowing we could generate our own power. This would allow us to journey into the most beautiful and untamed parts of the country while maintaining the safety and comforts of home. Little did we know, we’d soon be putting our hard work to the test.
Always Field Test First
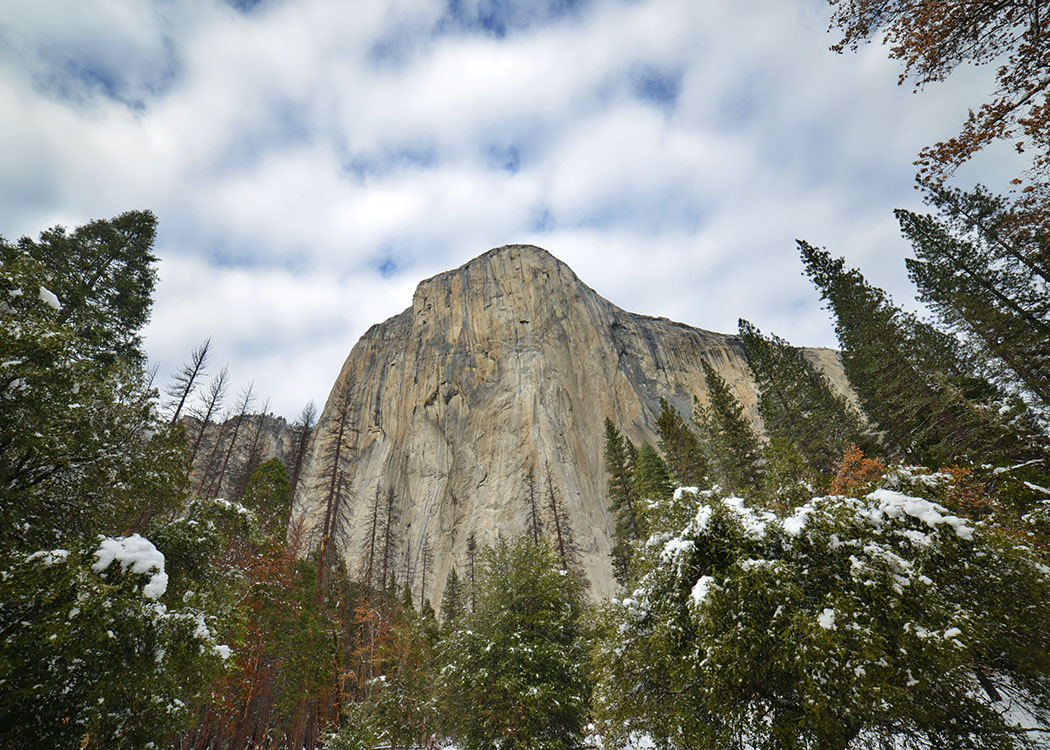
The first real field test of our self-contained power system was in Yosemite National Park in December. As you might have guessed, Yosemite in winter isn’t an optimal scenario. Let me explain how we found ourselves field testing our only means of power in snowy conditions in the semi-wilderness that is California’s Yosemite Valley.
This occurred on the middle leg of our cross-country trip. We’d spent the fall meandering northwest through the Teton Valley in Wyoming, across the sand dunes in Bruneau, Idaho, and through Oregon’s eastern high desert. During this trek, we were lucky to camp at many well-appointed RV resorts and also had sunny boondocking days. We’d been so busy enjoying the full hookups, Wi-Fi, hot tubs and saunas — along with the sunshine and a full battery charge — that we neglected to confirm whether or not our next stop in Yosemite had power. We discovered that bit of crucial information only after we pulled up to the campground gate. The ranger asked with eyes round and full of concern, “You didn’t know that Yosemite campgrounds are dry camping only?” I confidently responded, “Don’t worry, sir, we have a whole off-grid power system!”
We learned a very important lesson during our stay in Yosemite: testing DIY modifications is critical to your ability to stay safe in challenging camping conditions.
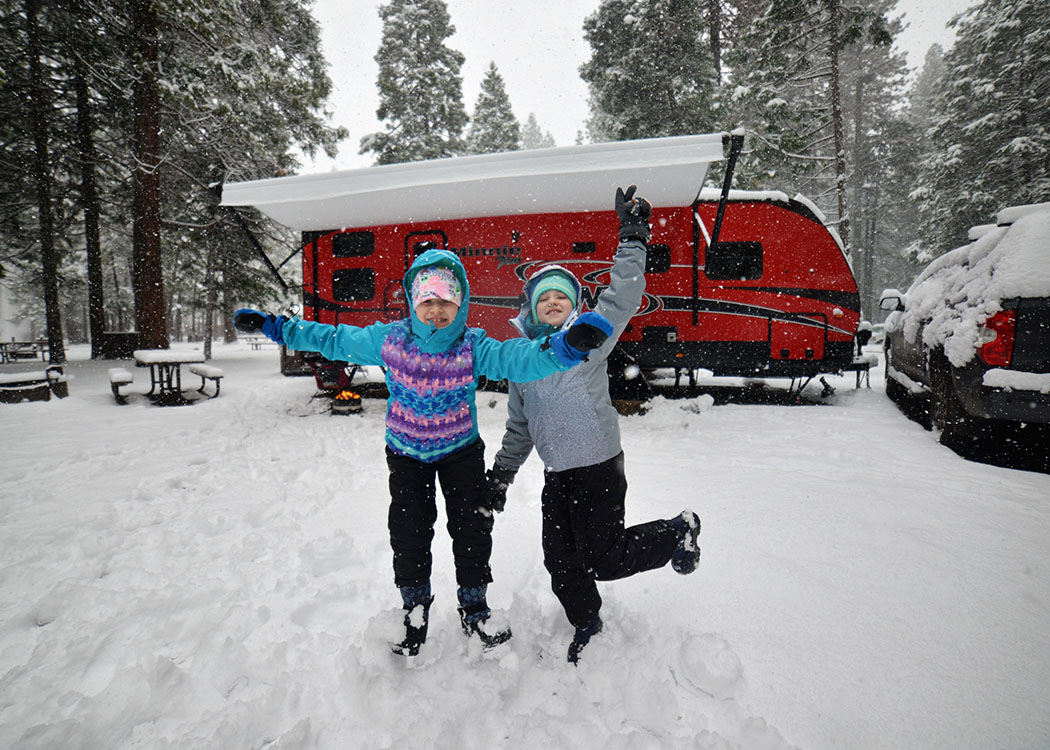
Despite cold temperatures and power challenges, we had an amazing time field-testing our DIY solar system in Yosemite National Park. Photo: Alaina Elliott
Components You Need
OK, before we discuss the next episode of our Yosemite adventure, let’s get into the basics of installing a solar system.
While implementing our DIY system, we fell into the same confusion that afflicts many of our fellow DIYers: “So we understand that we need solar panels and we need batteries, but what else do we need?” The biggest mistake we made was not understanding the difference between the solar charger and the inverter/charger. Initially, we did not purchase a solar charger because we thought that the inverter/charger we purchased included the solar-charger functionality. That turned out to be a mistake. We soon realized we did need both an inverter/charger and a solar charger.
Here’s the complete list of solar rv system components:
1) Solar Panels — Do the math for what you need. We went with a 400-watt setup and have enough roof space remaining to double that if we choose.
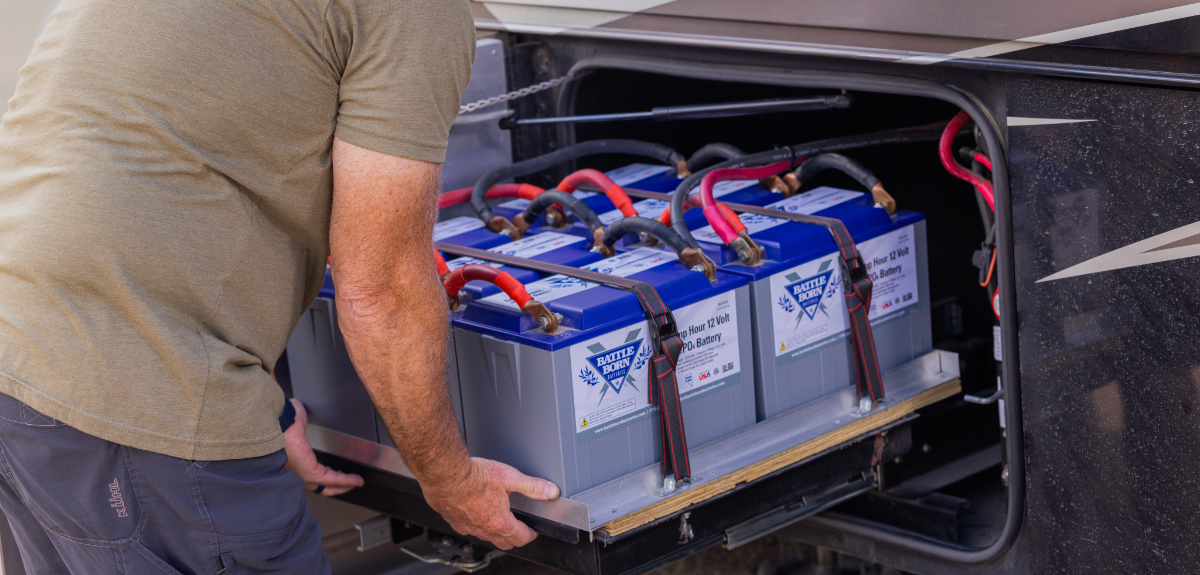
2) Batteries — After a lot of research, we went with LiFePO4 lithium-ion batteries. They’re much more efficient (and expensive) than lead-acid batteries because they can be discharged to much lower levels without risk of damage. This means that if you have a 100-amp-hour lithium battery, you will get nearly 100 amp-hours of power. This compares favorably to a traditional lead-acid 100-amp-hour battery, where getting 50 amp-hours is a good outcome.
3) Inverter/Charger — This is the core of your battery system. It converts 12-volt DC battery power to 120-volt AC power. You need one of these to run your AC-powered equipment, like the microwave or coffee maker, from battery power. You also need one of these to charge your batteries when plugged into shorepower. We went with a 3,000-watt inverter/charger, and this provides just enough horsepower to allow us to run the microwave while we watch television. However, it’s not enough to also run a hair dryer while running the microwave and a TV. Breakers will flip for sure in that scenario.
4) Battery Cables — Do not skimp on battery cables. Get the correct size as specified by your inverter/charger. You can blow fuses and even cause a fire if your battery cables are undersized. Our system required 4/0-gauge battery cables.
5) Solar-Charge Controller — The solar charger functions independently from the inverter/charger. The solar charger is connected directly to the batteries and enables the charging of the batteries by harvesting power that the solar panels generate. The solar-charge controller ensures that your batteries charge within the specifications they were designed to charge in. The charge controller ensures that the batteries are not overcharged and keeps them topped up via a “float” routine when they are fully charged. You must have this component if you want your solar panels to be able to charge your battery bank. You need to be as efficient as possible in harnessing that energy from the sun. Consider purchasing the most expensive charge controller you can afford. Every watt you harvest counts when you depend on your off-grid power system.
Solar RV Components You May Not Need
There are a few items we chose not to include in our system. Because we elected to disconnect our RV’s ability to receive a charge from the truck’s alternator, we did not need to install a battery-isolation manager. Because we chose LiFePO4 batteries and did not worry about damage caused by low voltage, we did not purchase a battery guard used to automatically disconnect the battery at a certain low voltage. Lastly, we chose our inverter/charger’s install location for its easy access. That allowed us to forgo purchasing the remote-control add-on because we could just turn it off and on manually at the inverter itself.
Running Air Conditioning and Heat on Battery Power
There are lots of tips and success stories about enabling RV air-conditioning units to run off battery power. It can certainly be done with the help of some type of easy-start soft starter, which will ensure you don’t blow fuses during the first phase of starting the air conditioning. We had to stop and ask ourselves if it was worth it. The air-conditioning system pulls a tremendous amount of amps and would drain our battery bank very quickly. The only way to work around this is to have a much, much larger battery bank than is required to run the rest of your AC-powered systems. If we chose to go with top-of-the-line lithium-ion batteries, we would have been looking at north of $10,000, just for batteries. If we attempted traditional lead acid to reduce costs, we wouldn’t have had room on the rig.
As we progressed through our solar research, we decided to discard any plans to try to run the air conditioning off the batteries. We saved a lot of time and money by instead designing a trip that kept us in cool weather where we would need only our MaxxFan system and open windows to stay comfortable.
What about heat? The battery bank has no trouble handling the furnace. Because most RV furnaces run on propane, the electrical demands are very low. The only electrical requirement is a small draw to keep the pilot light running. The takeaway here is that you can plan to be in cold weather on batteries only, but consider that your boondock planning should keep you out of the heat of high summer as well.
Freedom from a Generator (But You Still May Need One)
Prior to arriving at Yosemite, our power system had worked so well that we hadn’t even considered that we might need a generator. We spent many nights boondocking in Walmart parking lots with no hiccups, so having a generator seemed like a waste of precious cargo space. But thanks to our cloudy and snowy experience in Yosemite, we gained an appreciation for having power at the pull of a starter cord. We’ve also come to deeply understand why most RVers dislike generators as a necessary evil.
We became generator owners when we realized we couldn’t risk another cloud-blanketed day in the shadow of Glacier Point. Our solar panels generated 10 to 20 watts and only a few amps of power, which was not remotely enough to provide a lasting charge to the battery bank. Clearly, that ranger at check-in understood that our solar gear was inadequate for those conditions.
So on the morning of day three, we made an emergency run out of Yosemite Valley on California Route 140 heading west. At the time, Route 140 had a road-condition status of R1. For native Floridians like ourselves and others from warm climates, R1 means snow chains are required but snow tires are allowed. We had neither, but we do drive a 4×4 Toyota Tundra, so we decided we could make it. Shortly before 10 a.m. on a snowy morning, the whole Home While We Roam crew set out to obtain a generator in Merced, some two hours away.
We were triumphant in our return to the valley at around 4 p.m. with our newly acquired generator. But this new piece of hardware — like the evil beast it is — quickly wiped out the levity from our moods. The generator started nicely on first crank after being filled with fuel and oil. Oh, but the noise! Its engine’s roar ruined the winter tranquility that came with being one of only two RVs in the last open section of Yosemite’s snow-covered Upper Pines Campground.
Prior to this, for the first two days of the visit, the only noise we’d added to the environment was the laughing of our children and the barking of our dogs. Then we found ourselves dependent on a roaring machine that slurped dirty petroleum products with no regard for where its next feeding might come from. Thankfully, the National Park System has the good sense to know these beasts can’t be left to run free and must be contained to morning and evening exercise sessions only.
On day three of our nine-day stay, we realized why the solar lovers prefer off-grid power to combustible engine-generated electricity. It isn’t about saving the earth and being the best “you” you can be. It’s about preserving the freedom that you seek from being in a remote destination in the first place. You begin to live by generator hours. You don’t dare wake and go for a hike because you might miss the full two hours needed to charge, meaning you may not have heat when night falls. Instead of looking forward to a snowy visit to the meadow in front of El Capitan, you wish the snowstorm will break so you can make yet another journey over R1-rated Route 140 westbound to the closest fuel station, 35 minutes away.
The generator is the giver of heat but robber of freedom. It’s something to contemplate as you consider a DIY RV solar project.
Half Dome in a winter-wonderland Yosemite National Park. Photo: Alaina Elliott
What Lessons Have We Learned Living on Solar?
Hands down, the greatest benefit we’ve received from our self-contained power system is freedom. Can we demonstrate a return-on-investment for the system install versus savings from more boondocking?
If we didn’t say it was challenging, we wouldn’t be honest. This power system was expensive! But it gets a lot easier to justify when we consider the nonmonetary benefits of our solar-powered energy system. About 99 percent of our trips don’t involve the weather conditions we experienced in Yosemite, and this is where solar really shines. Very soon after the weather in Yosemite challenged our solar power system and won, we were back out to the Pacific coast, staying on Ventura, California’s Rincon Parkway with no campsite electricity and had no troubles.
We never worry about getting a generator out and chaining it up to the rig or annoying our neighbors with generator noise. We never worry about having coffee in the morning or being able to microwave a snack for the kids. As long as the sun is shining, we feel a freedom unique to life in a self-contained solar-powered RV.

Home While We Roam
Home While We Roam is an Atlanta, Georgia-based family who love RV life. They’ve traveled more than 15,000 miles around the United States with their red Winnebago Minnie Plus travel trailer in search of simpler living, deeper family ties and epic adventures! Find them on Instagram @homewhileweroam.