If you drive a Class A diesel motorhome, eventually you are going to experience an air leak. An air ride motorhome has a complex system of hoses, tanks, bags, connectors and an onboard compressor that keeps the air bags at proper height and maintains the pressure necessary to operate the air brakes as well. Since the compressor runs continuously as you drive, a small leak is usually overcome by the refilling of the tanks – but a larger leak will leave you stranded.
In a correctly operating system, a short stop for dinner, or even after a few hours or days, the system should be at or near normal air pressure. Even a week or two can yield good pressure as you restart the coach if the system is really “airtight.” If you start up after a few hours or days and are greeted by the chassis low air alert, the likely cause is an air leak. Fixing the leak is not usually as hard as locating it, but if you can find it, you can probably fix it.
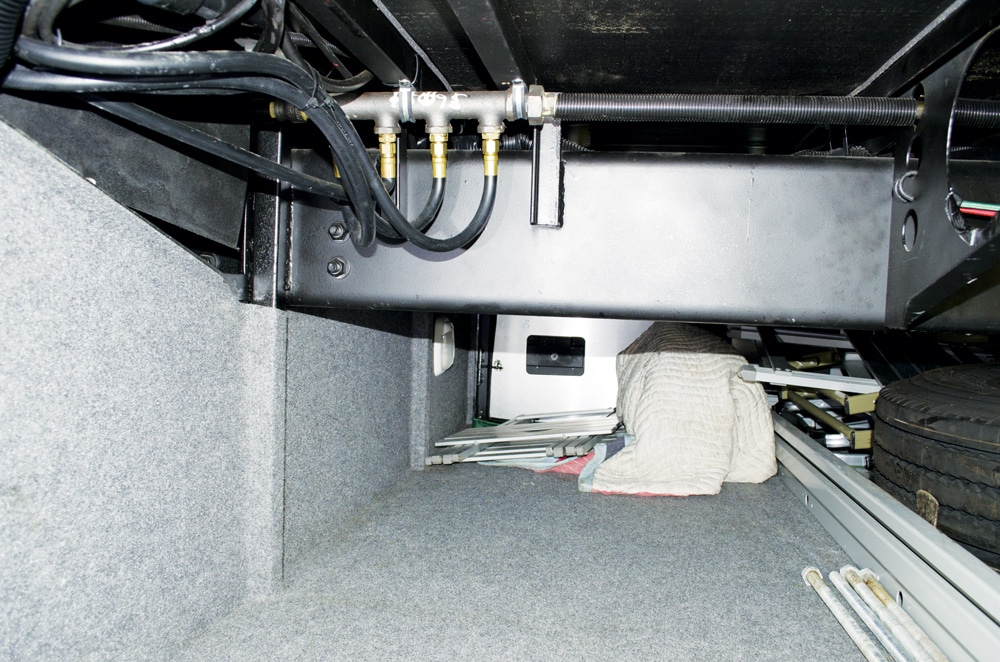
1. After cleaning out the basement storage bay where the leaking air line was thought to be, and chocking the tires to prevent the coach from moving, the real work could begin.
There are numerous causes for air leaks, and they can emanate from a variety of sources, but if you do a little investigation of your own, you can likely identify all but the smallest of leaks. This particular coach when new could sit a week or more and never leak down enough that the low air alert would sound. But lately we noted that an overnight or long rest stop resulted in the pressure dropping to a point where the low air alarm would sound on start up. It never caused an operational issue, as the pressure stayed up while the engine was running, so we knew that it was a fairly small leak and hopefully one that we could find.
After returning from our last trip, we shut down the coach, and while unpacking the storage bays, the sound of leaking air could be easily heard. Since the sound came from the basement, that is where the search began. With nothing other than some courage, a flashlight and reading glasses, it was time to end this annoyance.
When searching for a leak such as this, the coach will need to be aired-up. So if you have been parked a while, you will need to run the engine until you hear the air dryer valve activate. This will ensure the system is at max pressure and will make locating the leak that much easier.
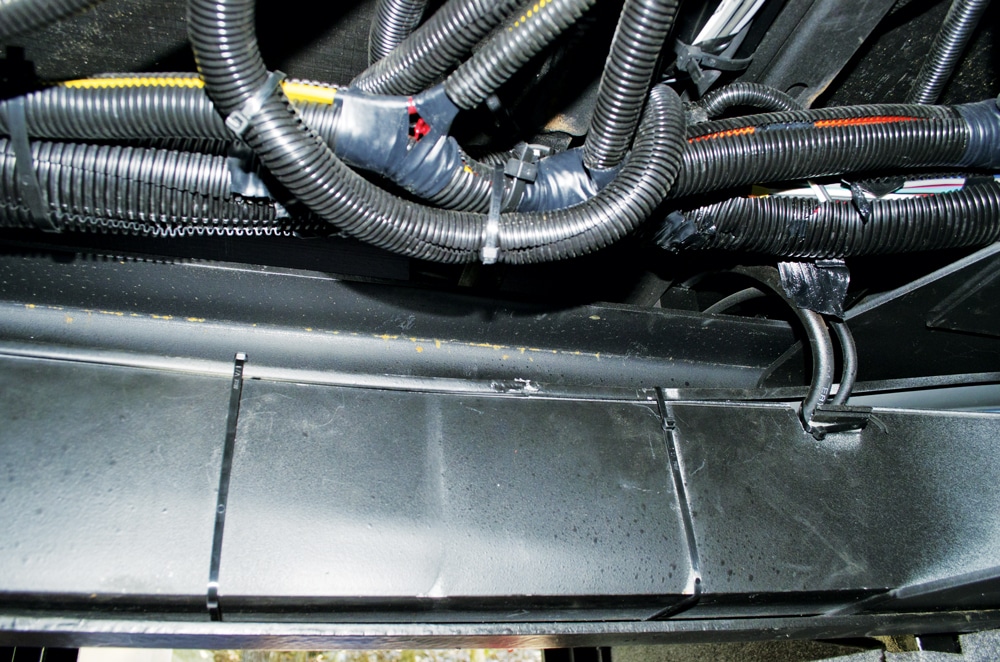
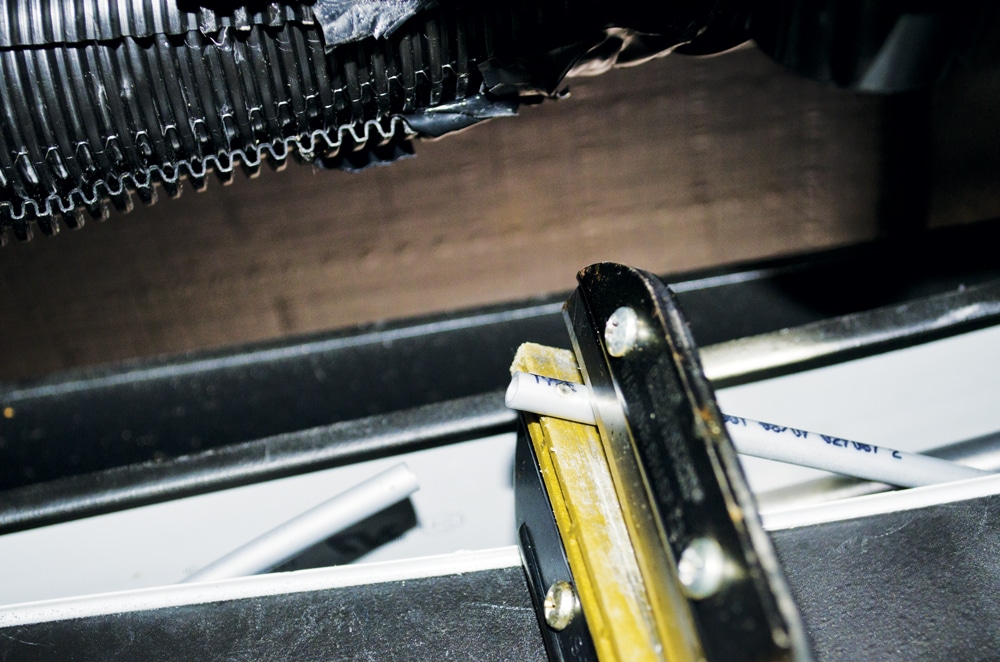
2. The first step was to locate the general area of the air line tray and then cut open the cable ties holding the lid of the tray that houses the air lines.
The first step was to unload the storage bay where the leak was heard in order to get access to the “tray” that usually houses all the air lines. These lines route from the compressor in the rear of the coach to the front where the air tanks, front air bags and brakes are located. Most chassis manufacturers use some form of a tray or a large wiring loom to protect the plastic air lines, and they usually locate them along one of the frame rails.
After 20 minutes of unloading, the first thing noted was that we carry too much stuff that we never use, but that’s the topic of another article. The next thing noted was that the storage bay was in need of a good cleaning, so out came the shop vacuum. With the bay clean, entering and exiting could be made without the risk of a stray fishhook making an unauthorized catch. With the coach at full air pressure and the storage bay cleaned out, the leak could be pinpointed, and as expected it was inside the basement.
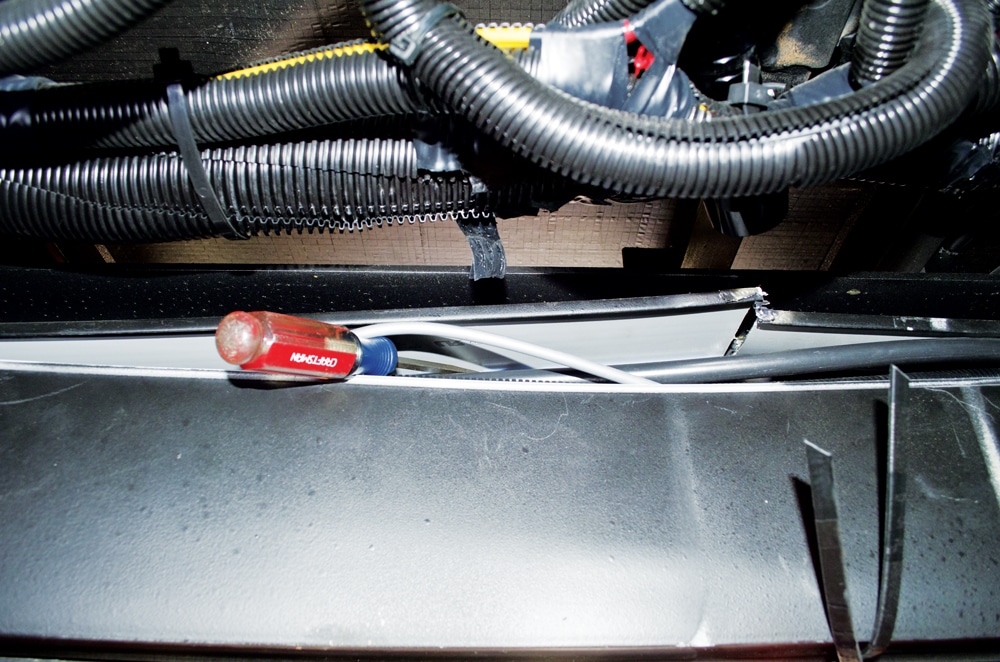
3. Since the tray is located at the top of the frame rail, getting inside is very difficult. The only access you will have is to reach into the tray and carefully move the various air lines around until you hear the sound of the leaking air change. Then you will know you are moving the right one. Once you locate the correct hose you will have to fish it out to the top so you can repair it; usually there is enough slack in the hose to do this without damage. While the hose is still in the tray you can hopefully feel the escaping air with your fingers so that you are sure you located the right one. In instances where you can hear the leak but can’t see it, a spray bottle containing a water/soap solution can be a great help. Once the leak is located, use the air reservoir tank manual water drain valve (if available) or a manually accessible air pressure release valve to bleed air pressure from the system before cutting into any pressurized lines or unscrewing any pressure fittings – or serious injury could occur.
Every leak may not be as easy to find as this one, and every repair may not be a failed hose, but from our experience, it is usually a leak in a hose, a failed fitting or valve. Using the steps in this article, you should be prepared to tackle an air leak and keep the air bags from leaking down, just as we did.
After our repair, the coach stayed at normal pressure for almost a week, which is more than enough to meet our criterion of a tight air system. If you have a failed valve, or other, more serious problem, you may require professional assistance, but many of those annoying leaks can be fixed at home or even on the road.
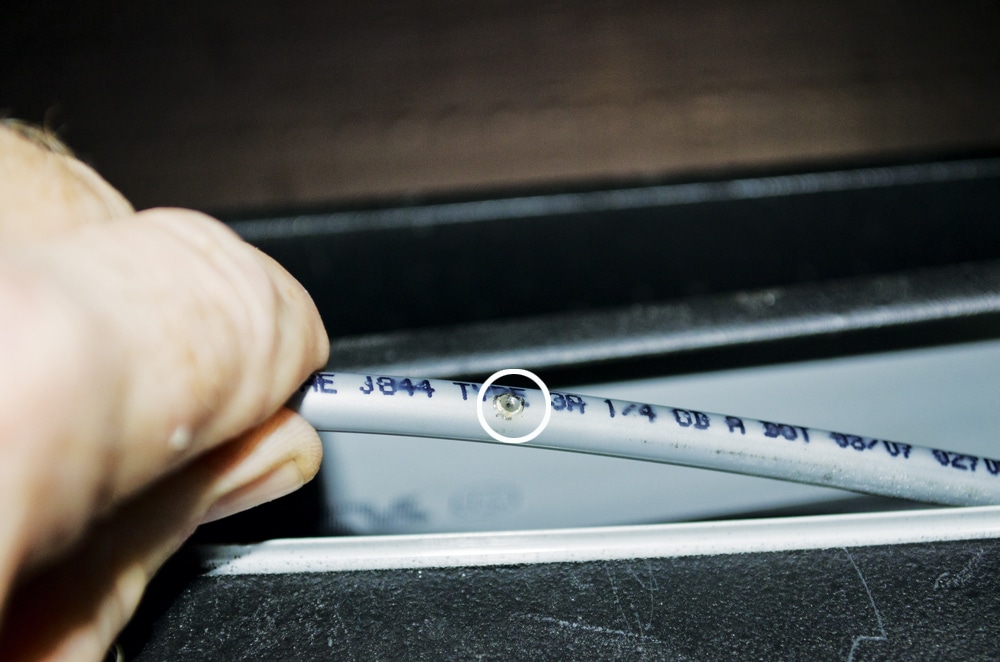
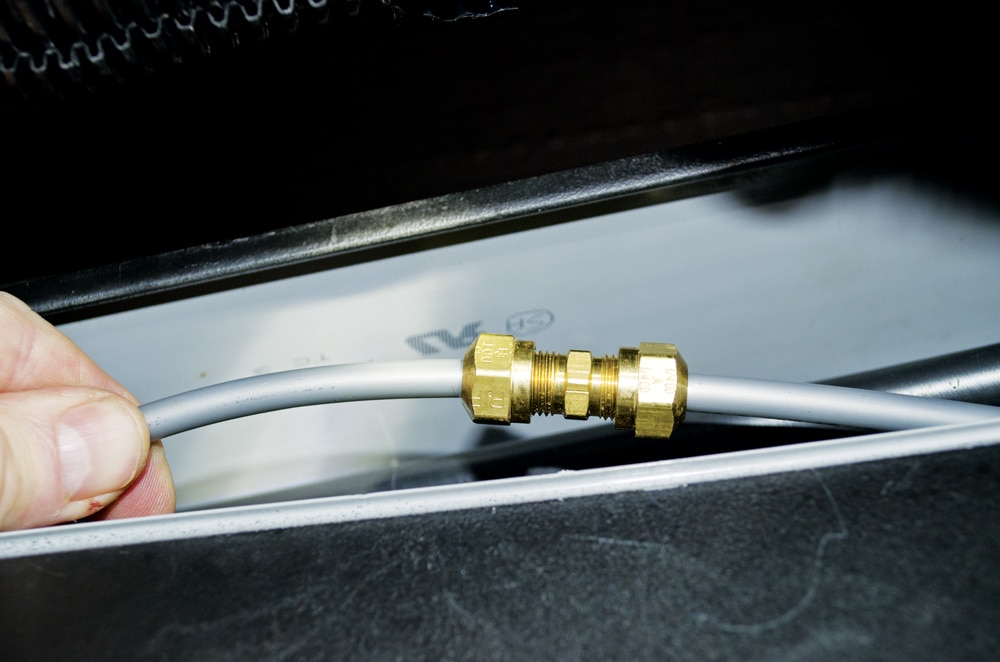
4. After pulling the hose outside the tray, you can start the repair procedure. First, you need to locate the defect that is causing the leak. Here, you can see that this pinhole in the air line was the culprit. In order to make a clean cut, we used a Craftsman Handi-Cut razor cutter because it will produce a crisp cut without crushing or leaving any frayed edges.
 5. Both sides of the defect were cut leaving two ends of the airline free. Try to cut as little as possible so the hose is not too short to be rejoined.
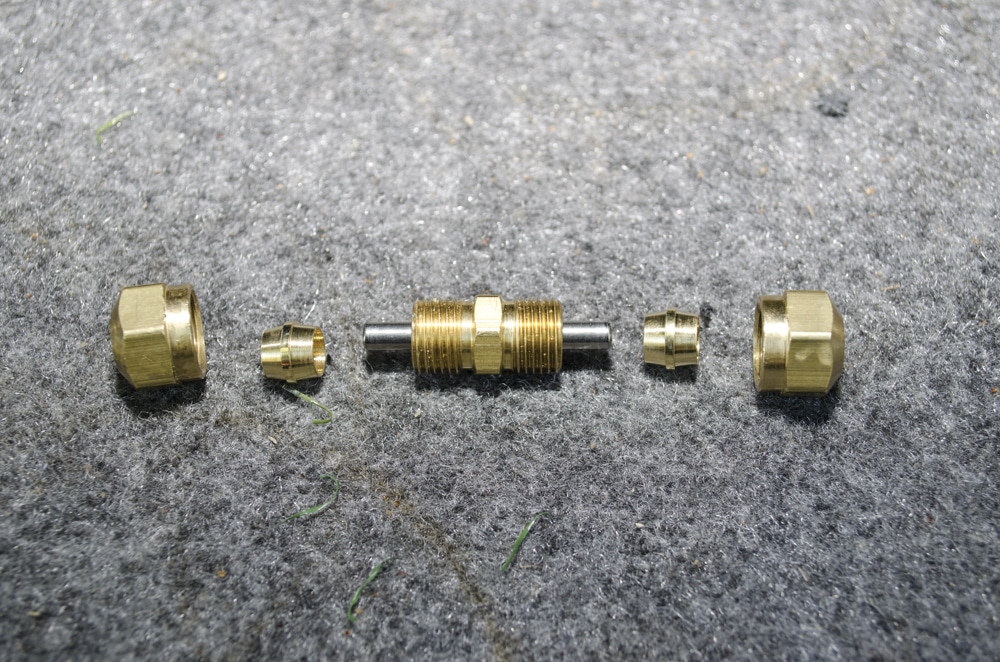
6. There are a variety of inline hose repair unions available at most industrial supply houses or truck parts stores. We selected an inline brass union (DOT rated) that uses ferrules and wrench flats for easy tightening. Notice the inner tube is steel, which is required for DOT air line use. Most brass fittings at home repair centers are not DOT rated, so make sure you get the proper part.
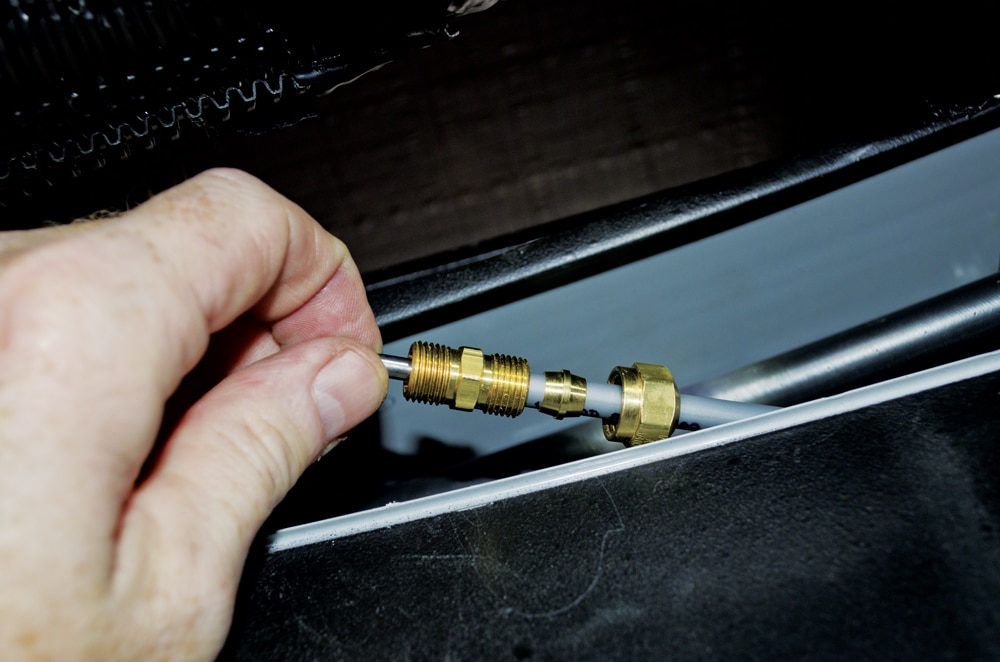
7. First, slide the nut over one end of the hose followed by the ferrule. Then push the air line over the fitting on the main body of the union until it bottoms out. Pull the nut down over the ferrule and tighten with a wrench. Then repeat on the other end. Since the fitting seals on the inside between the ferrule and the hose, no thread sealant is required.
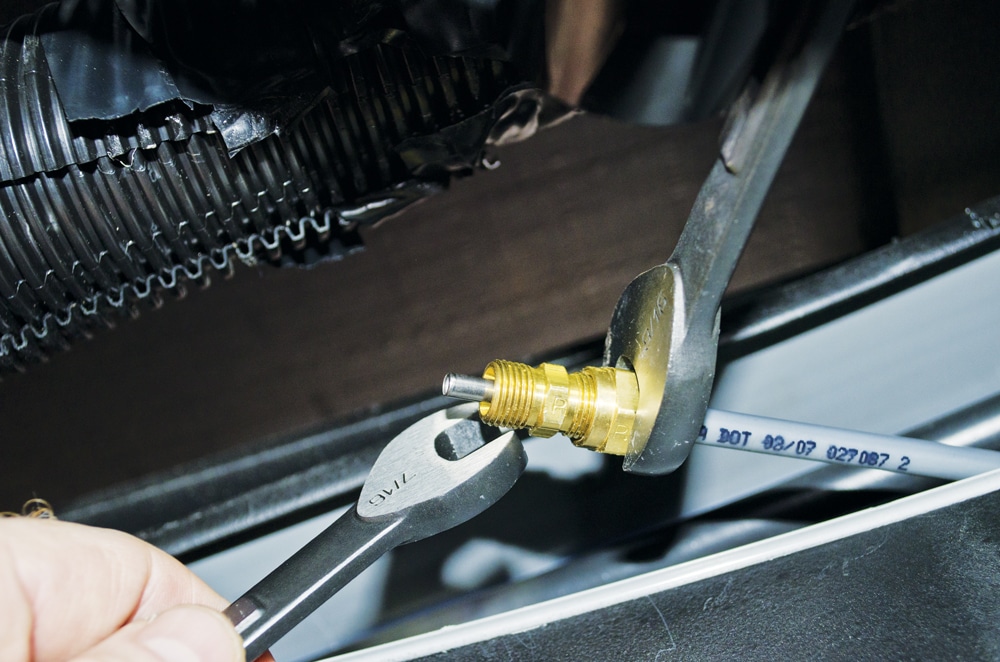
8. After properly tightening one side of the brass fitting it should look like this.
9. Since this large diameter fitting will now reside in a
tray full of polymer air lines, it is important to cover it so that the brass union will not rub against the other air lines and cause additional leaks.
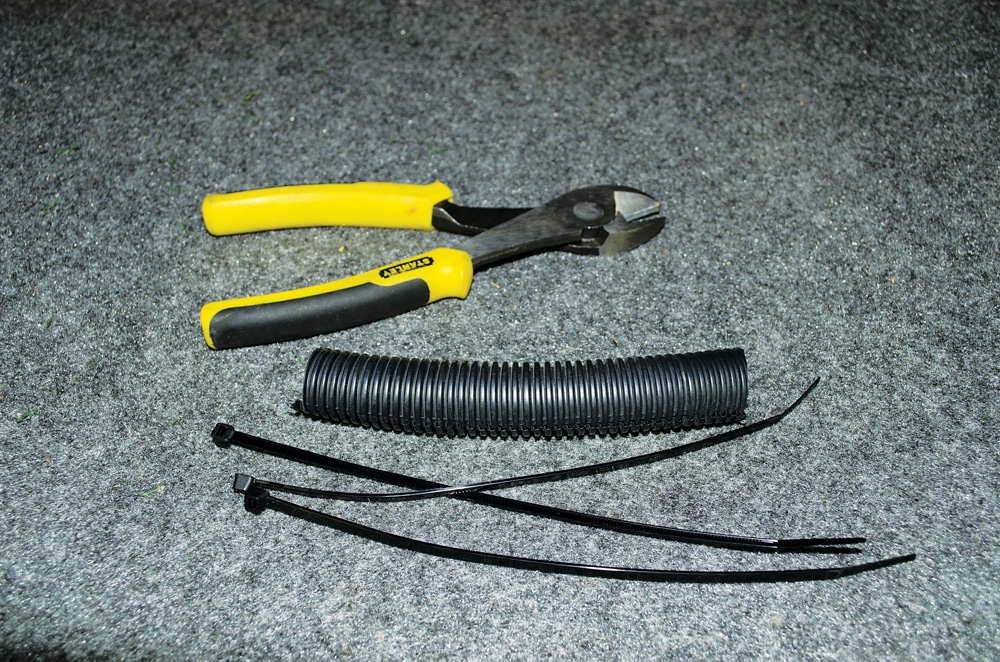
10. To wrap the brass fitting, we used a short piece of plastic wire loom, then secured it with cable ties.
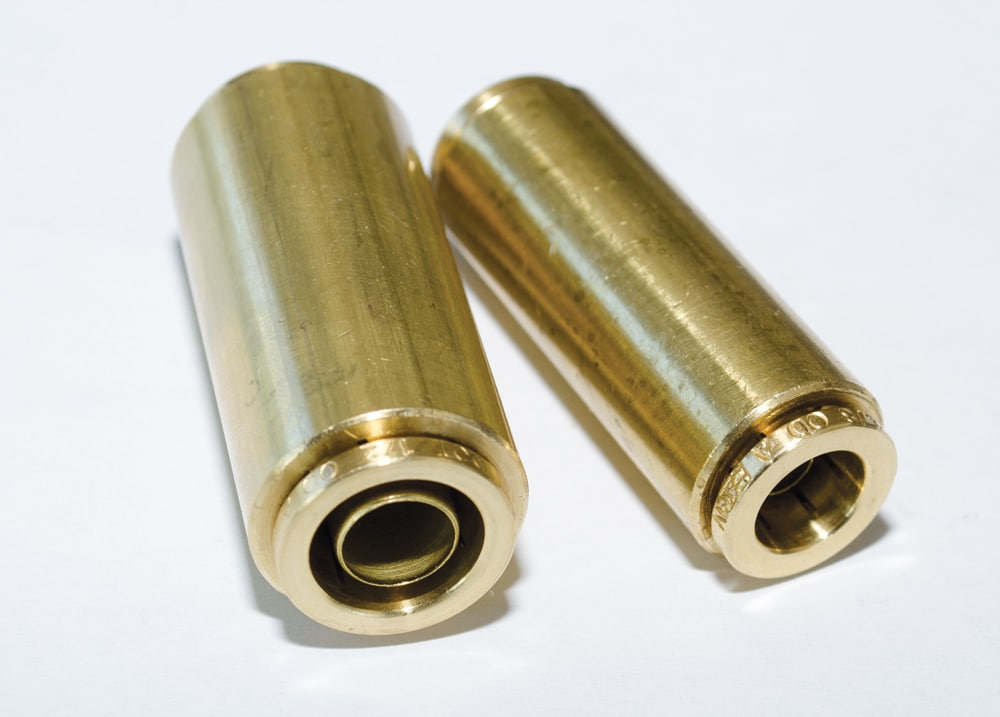
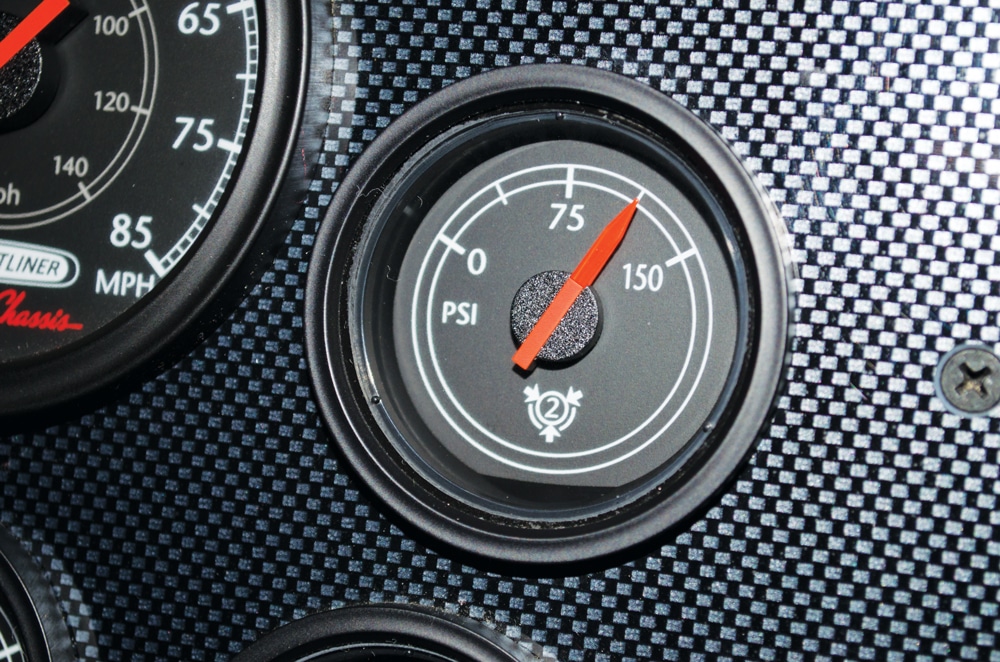
11. Air line repair unions are available in many different sizes and types, including some that do not require any tools. Here is an example of a “push to connect” fitting, made to withstand the high pressure of a typical air line which can reach 150 psi. If you don’t already have any of these in your tool kit, it may be a good idea to obtain a selection (make sure they are DOT rated) of sizes and keep them available. Quarter-inch, 3/8-inch and ½-inch are all very common on motorhomes, and one of each should be in your toolbox for quick repairs on the road.
12. After extended downtime, the chassis air pressure will need to build again, which could take several minutes. Keep that in mind before departing your house or RV park in the early morning to avoid disturbing your neighbors.
 E. Don Smith is a Tennessee-based freelance writer and photographer who has been a frequent contributor to MotorHome since 2006. He is the proud owner of a Tiffin Phaeton coach.