RV Maintenance: Easy Does It
Flow-Rite Products Make it Quick and Simple to Fill RV Battery Cells
Image Caption: Photo Credit: Getty
As RV owners, we are often faced with having to make decisions on which maintenance chores we would rather have a dealer or repair center do and which ones we will do ourselves. In the case of battery maintenance, whether coach or chassis, most RV owners take care of simple tasks like terminal cleaning or checking water levels (on flooded batteries) and adding as needed. While a simple task in the grand scheme of RV maintenance, Flow-Rite Controls’ line of products makes battery water level maintenance on 12-volt and 6-volt wet-cell batteries easier than ever.
Flow-Rite’s Pro-Fill and Qwik-Fill Battery Watering systems allow users to add water from a single point without having to remove caps, spill water, or to even touch or see the batteries in the process. Utilizing individual floats for each cell that automatically shut off fill-water flow when full, these systems make perfectly leveling each cell so simple and foolproof that there’s no reason for any level of DIYer to not add this task to their routine maintenance list.
Installing any of these Flow-Rite kits is simple and requires no special tools beyond a pair of side cutters to cut the rubber hoses to the proper length. Available from Camping World, these kits come in configurations for single 12-volt batteries (MSRP $54.99), dual 12-volt batteries (MSRP $99.99), and dual 6-volt batteries (MSRP $59.99). The required Pro- Fill Handy Pump (MSRP $37.99) is sold separately and works with all Flow-Rite products. Flow-Rite did this to reduce kit price and duplication since most RV owners will end up buying more than one kit.
We installed the Flow-Rite Battery Watering Systems on a 2019 Tiffin Allegro Open Road 36LA Class A motorhome. Since this coach came with a residential fridge option, it has a four 6-volt battery bank on a convenient slide-out tray and a single 12-volt chassis battery under the hood. This required two of the Pro-Fill kits (each does two batteries). For the chassis battery, we only needed one Qwik-Fill kit, although we purchased the dual 12-volt kit so we could install it on our dinghy vehicle’s battery as well.
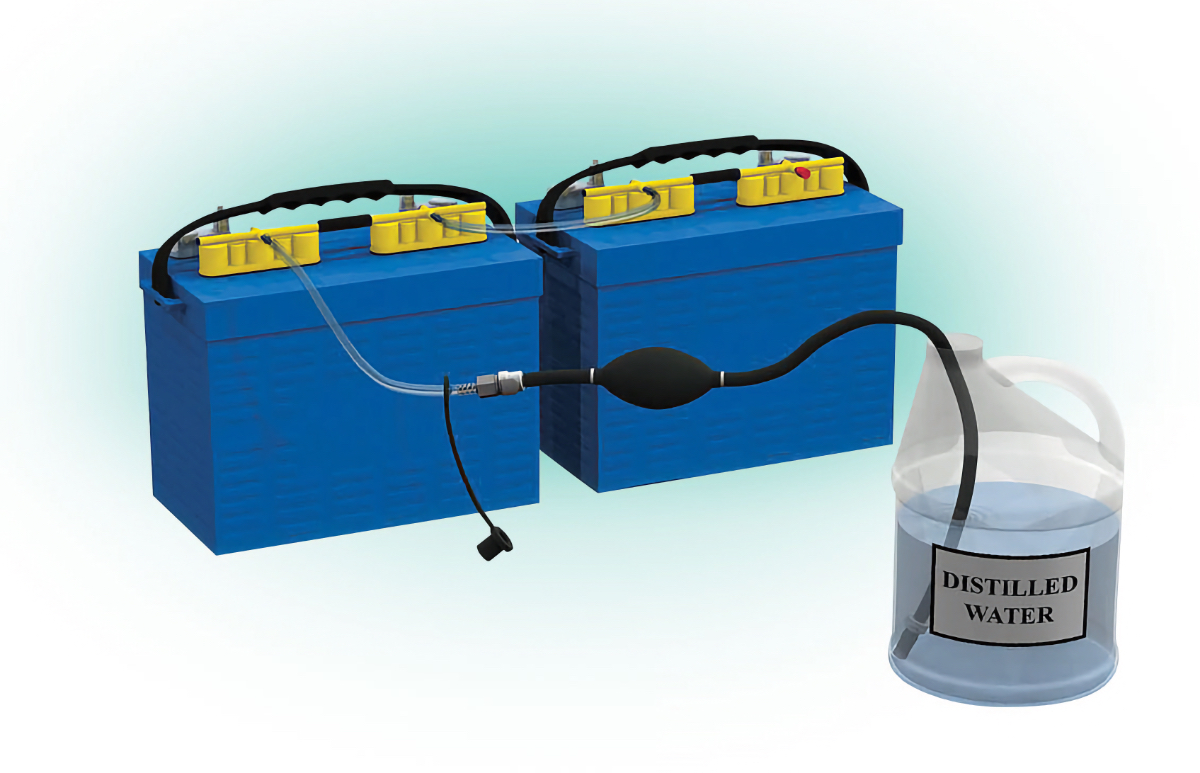
Photo Credit: Flow-Rite Controls
To say that installation was easy is an understatement; following the included well-illustrated directions, it took us about 30 minutes to do all five batteries on our coach. Of course, individual RV design and ease of battery access will determine how easy your installation goes, but while the design of these products is cutting edge, installing them is not rocket science.
One caution, though: Working around batteries can expose you to sulfuric acid and its fumes, which can cause severe burns or respiratory distress. Wearing rubber gloves, using eye protection, and working in a well-ventilated area is advised.
Once we were done with the installation, we connected the Pro-Fill Handy Pump to the fill line quick-disconnect, dropped the other end into a fresh bottle of distilled water, and gave it a few squeezes until the pump bulb was stiff (signifying that all cells are full), and called it a day.
Disconnect the Pro-Fill Handy Pump and store it away until the next battery maintenance interval. We almost felt a little guilty that it was that easy, but no longer having to touch battery caps and trying to see where the water level is in each cell, along with the time saved, is money well spent and a task we no longer dread.
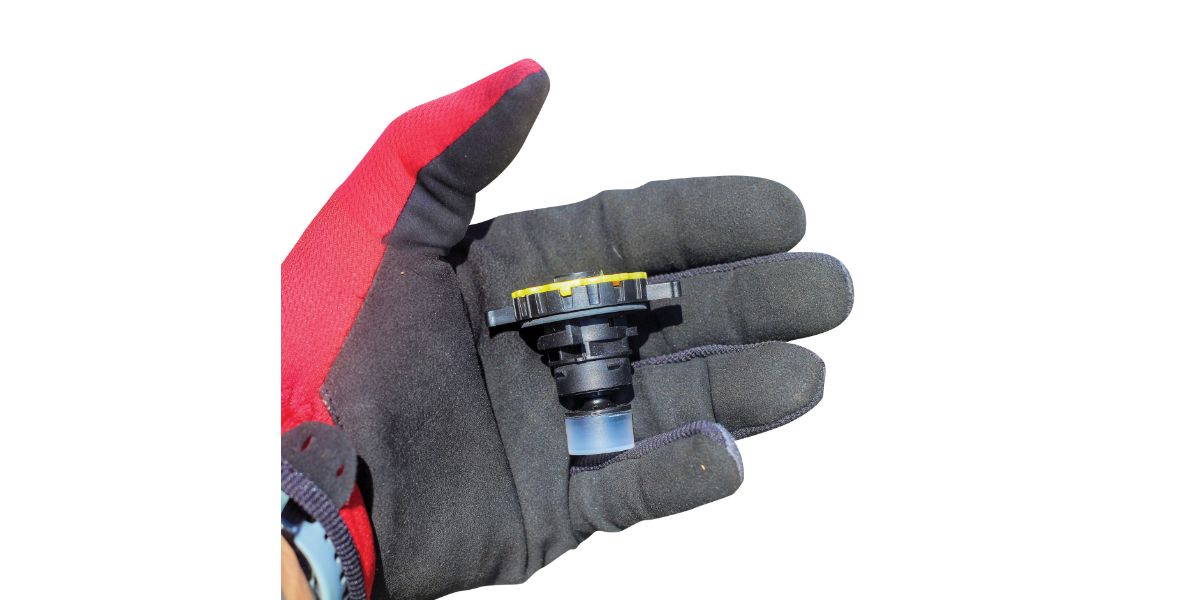
Photo Credit: Rick A. Diaz
1) Here’s where the magic happens. The whitish bulb at the bottom of the Pro-Fill valve is a float. As the water level in the cell rises, it forces the float up and closes the port, thereby stopping water flow. It’s simple and effective, and each cell is guaranteed to have the same level of water inside.
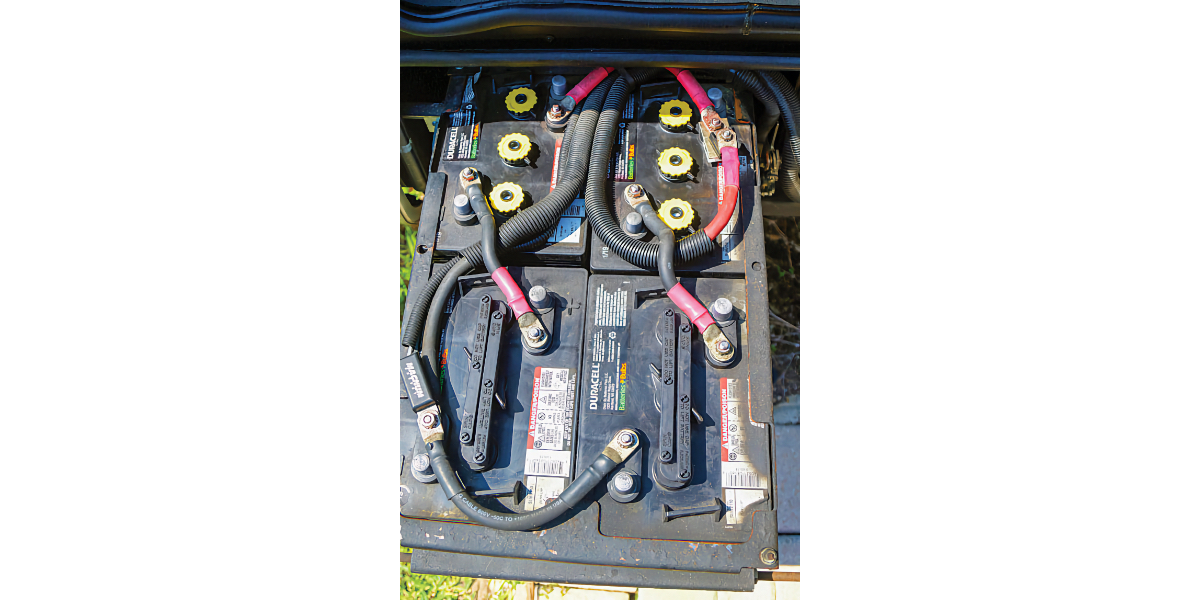
Photo Credit: Rick A. Diaz
2) We removed the stock cap assemblies (still in place on the bottom batteries), wiped off any dirt from the cell openings, and screwed in the Pro-Fill valves. You may have to wiggle some of the battery cables a bit where they cross over the cell openings to get the valves in.
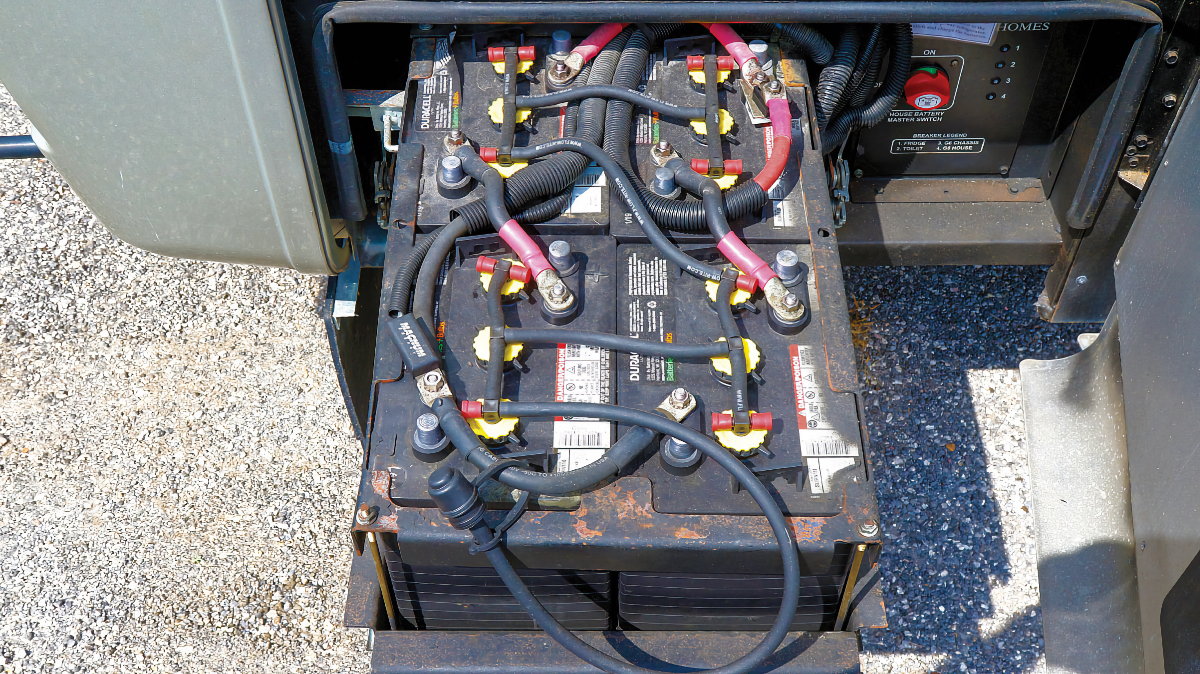
Photo Credit: Rick A. Diaz
3) After a little hose trimming and capping off of unused hose barbs with the supplied red caps, we were done with the 6-volt battery bank. The supply line with quick disconnect is connected to the hose barb in the lower left.
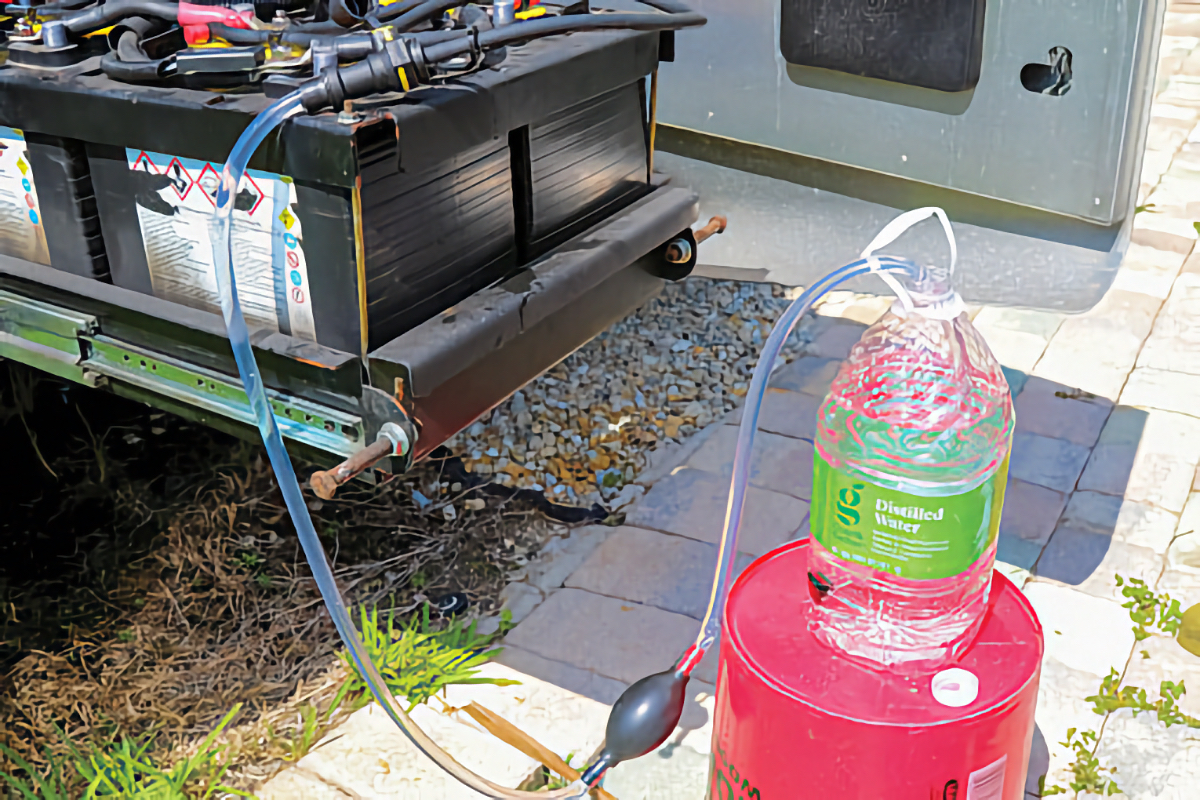
Photo Credit: Rick A. Diaz
4) With the Pro-Fill Handy Pump connected to the supply line, we dropped the other end into a fresh bottle of distilled water. It is important to use distilled water as it does not have dissolved minerals or impurities in it that tap or drinking water may have that can damage the cells of the battery. Keep the source water below the battery level when filling to prevent siphoning.
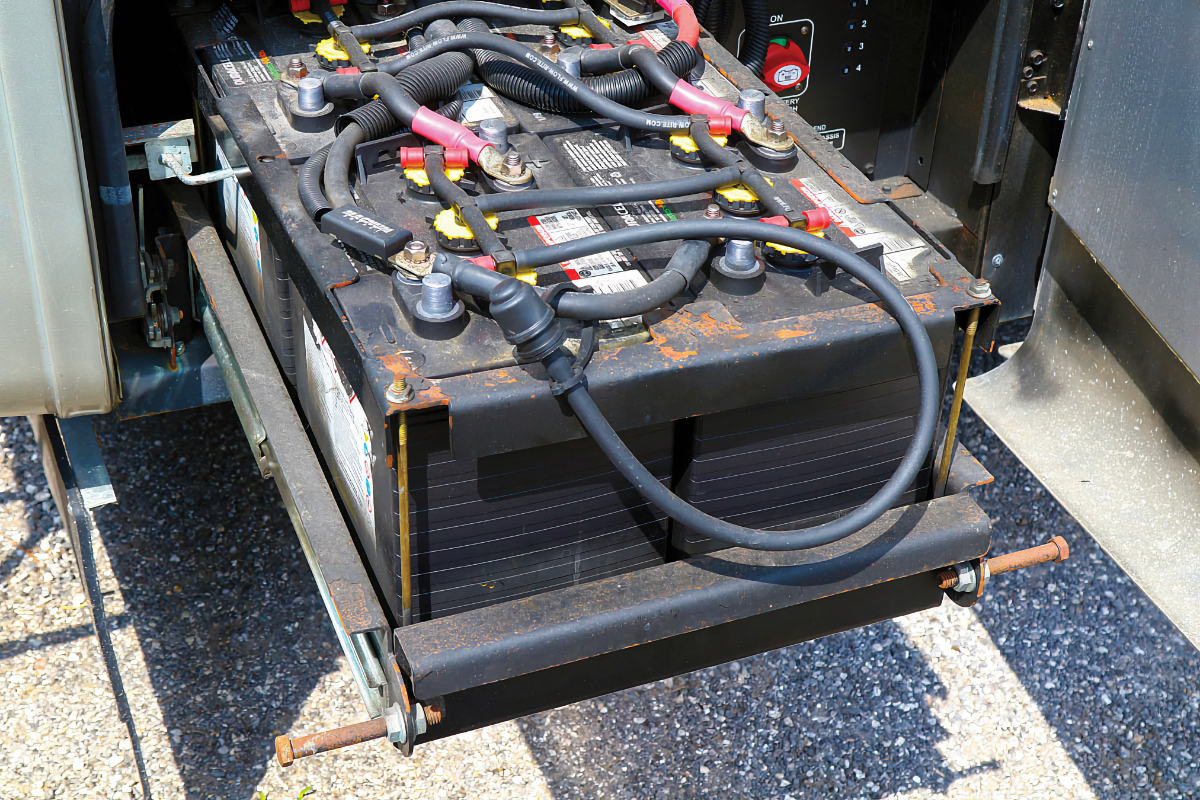
Photo Credit: Rick A. Diaz
5) Once we were done filling, we used the leash on the supply line dust cap to attach it to a battery cable for safekeeping and easy access.

Photo Credit: Rick A. Diaz
6) The 12-volt Qwik-Fill valve manifolds (three cells per manifold) are slightly different in design but function identically to the Pro-Fill’s individual valves. These fit most Group 24 through 31 size batteries.
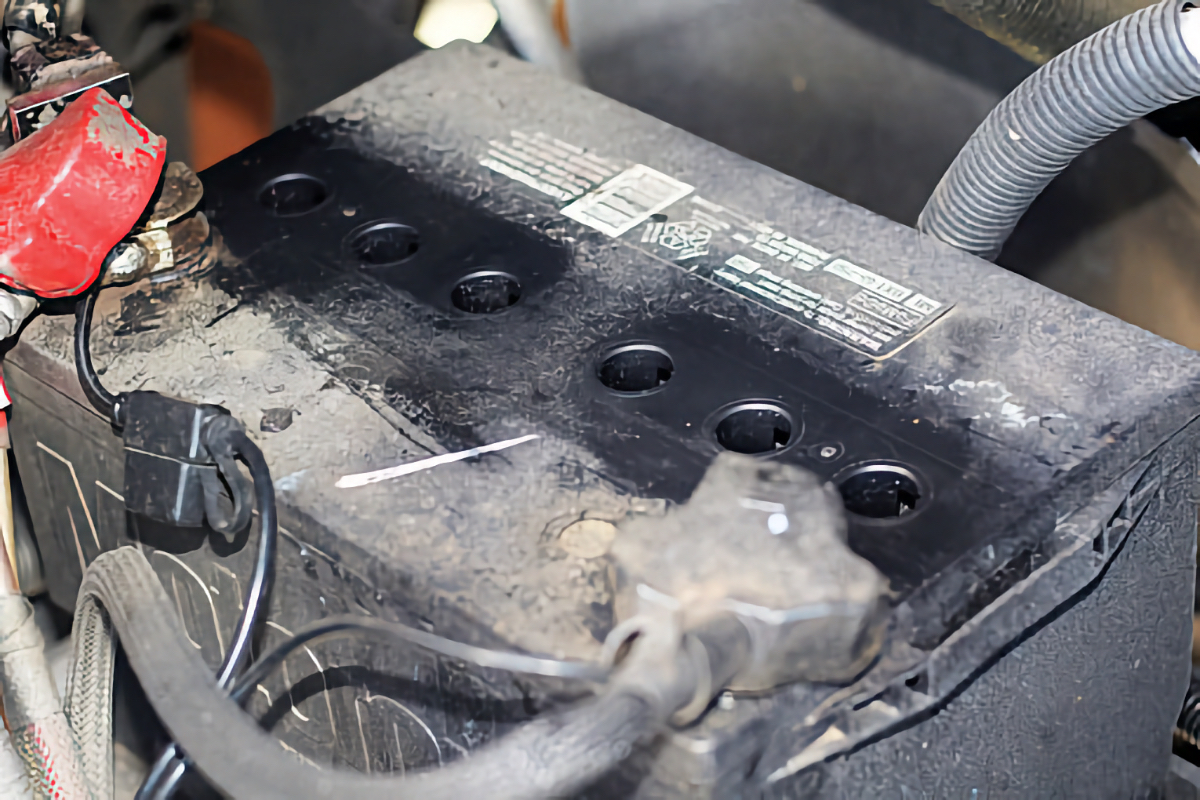
Photo Credit: Rick A. Diaz
7) As we did with the 6-volt batteries, we started by cleaning off the areas around each cell, being careful not to push any dirt or debris into the openings.
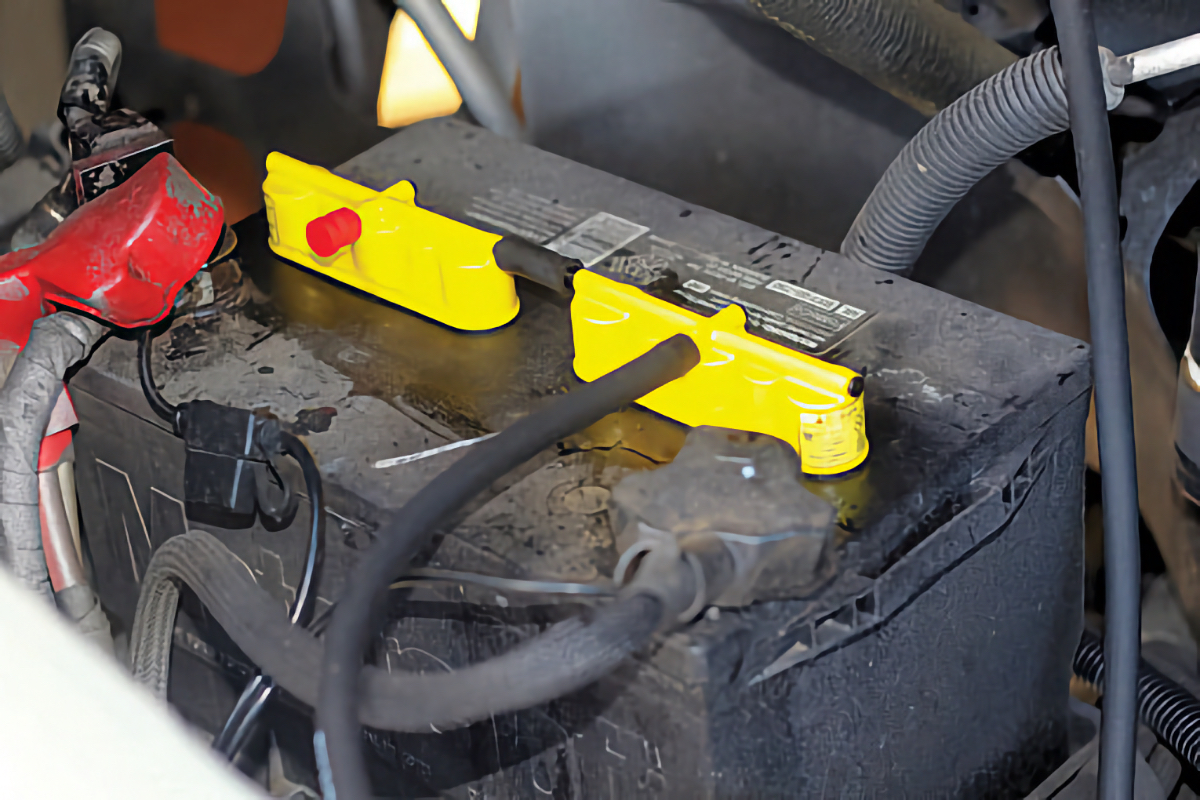
Photo Credit: Rick A. Diaz
8) Using two of the Qwik-Fill valve manifolds per battery connected by a short length of included hose cut to size between them, we capped off the end hose barb and connected the supply line to the remaining hose barb. If you have a dual 12-volt battery bank, you would simply daisy-chain the Qwik-Fill valve assemblies together with more of the hose.
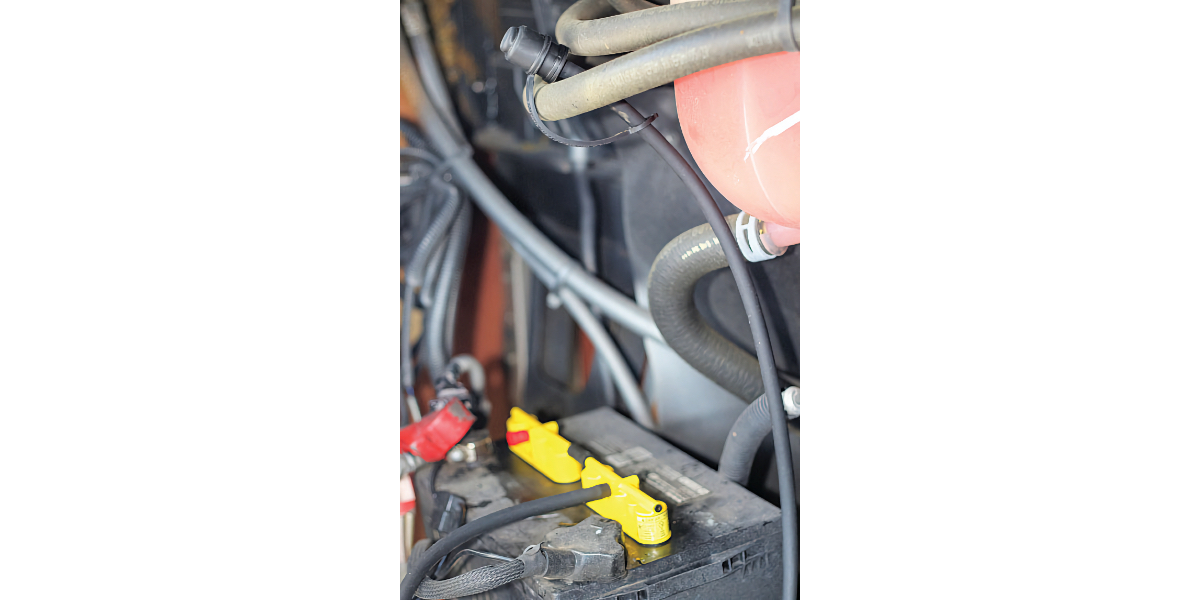
Photo Credit: Rick A. Diaz
9) Once again, we used the leash on the supply line dust cap to store the supply line up and out of the way on a hose inside the Allegro’s engine bay.