How to Tame Your Motorhome’s Suspension
Simple DIY Additions to Improve the Ride and Handling of the Ford F-53 Chassis
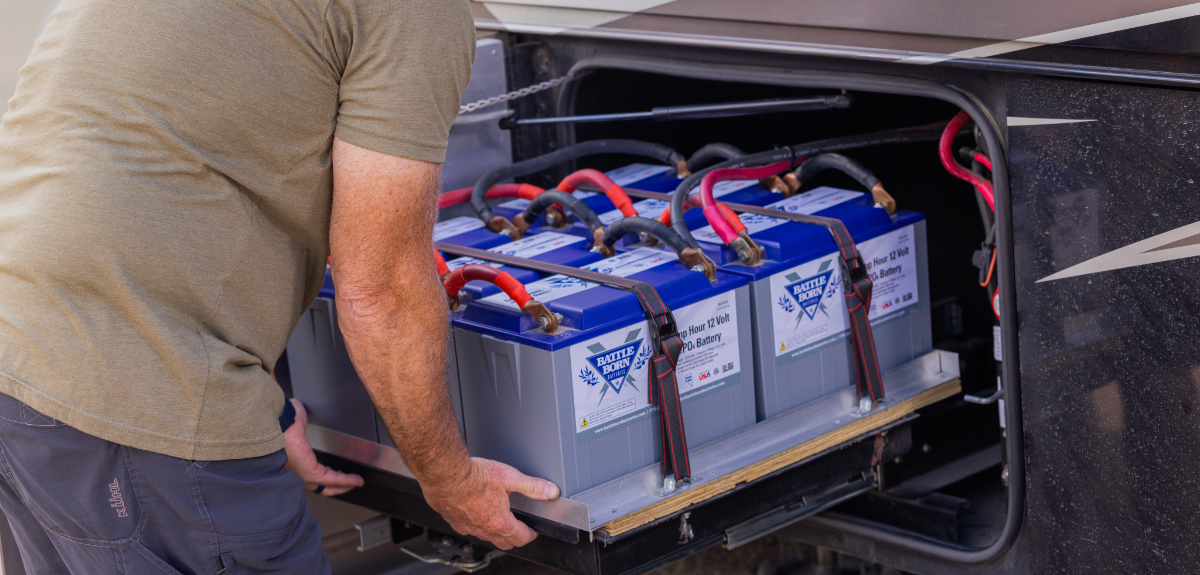
Image Caption: Image Courtesy of Rick A. Diaz
The venerable Ford F-53 motorhome-specific chassis has been in use for more than a decade by many different RV manufacturers. It can be found under motorhomes of varying lengths with up to seven different available wheelbases rated from 16,000–26,000 pounds and powered by V-8 and V-10 engines. Being a gas-only chassis, it uses a standard leaf-sprung/shock-absorber suspension and is most often found on shorter, lower, or mid-level RV models with maximum tow ratings of 5,000 pounds or less. Unlike diesel models that often have airbag or coil-spring suspensions and much higher tow capacities, the F-53 is as basic as a medium-duty RV chassis can get.
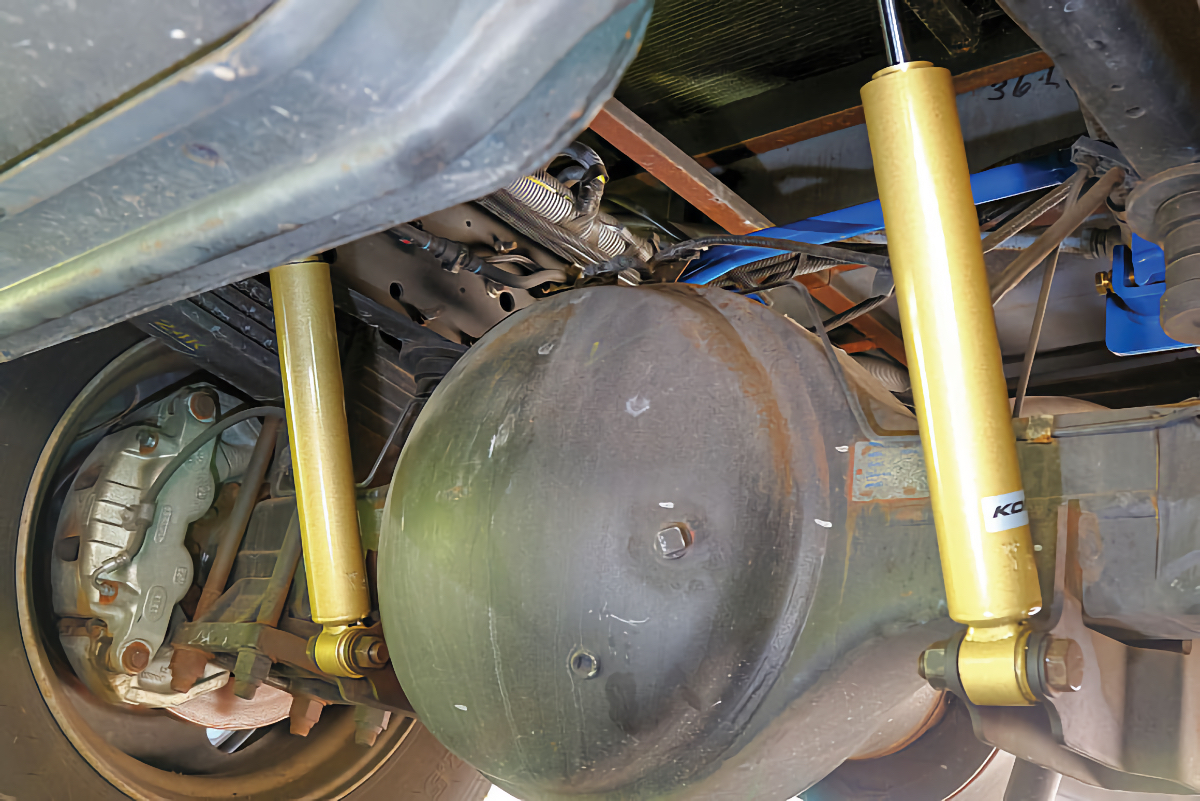
Image Courtesy of Rick A. Diaz
To tighten up the often-less-than-precise steering feel; the sometimes-top-heavy feeling of sway or wandering on the highway; and bounce when hitting a pothole, expansion joint, or that off-camber driveway entrance into a fuel station, three of the most popular mods for the F-53 chassis are relatively inexpensive and easy enough for almost any level of DIYer to install at home.
We decided to do just that on a 2019 Tiffin Allegro Open Road 36LA Class A built on the 24,000-pound, V-10 version of the Ford chassis. All the products used in this article are available for just about any configuration of the F-53 regardless of what brand of RV it sits under. These product recommendations came from Josh Walker, plant manager at Safe-T-Plus Steering Control in Tallapoosa, Georgia. We wanted to see how easy it is to install these products at home, plus we simply like working on our own motorhome.
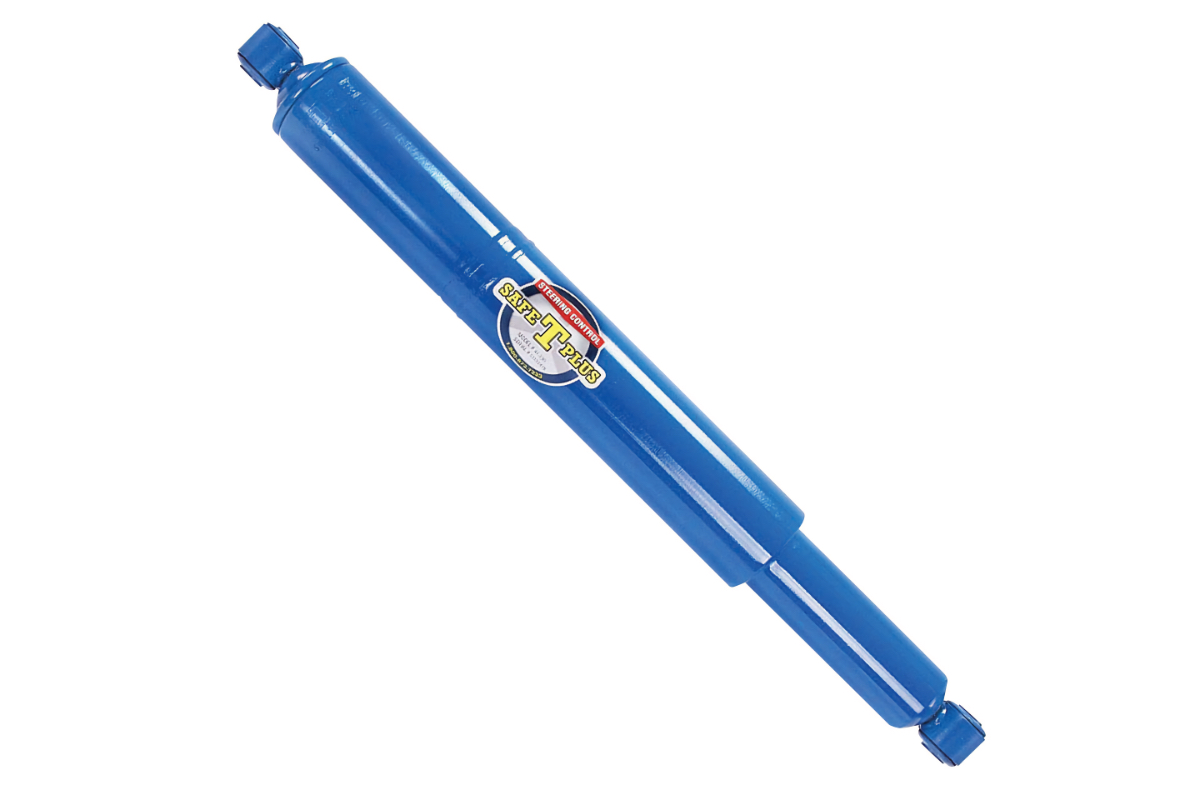
Image Courtesy of Safe T Plus
The Parts
The Safe-T-Plus Steering Stabilizer ($668, plus $81 for the mounting kit) is basically a return-to-center device that reduces the need for constant steering-wheel correction by the driver. It can also provide more control in the event of a steer-tire blowout, allowing you to safely reach the road shoulder. The KONI shocks ($217 each) improve overall ride quality and improve control on bumpy and unlevel pavement transitions while helping resist the effects from wind or buffeting from passing semi-trucks on the highway. The SuperSteer Rear Trac Bar ($549.99) provides a solid connection point between the rear axle and the frame that eliminates that “tail wagging the dog” feeling sometimes exhibited by lateral movement of the axle within the frame.
According to Josh, the combination of these three products targets the main complaints RV owners have with the F-53 chassis and are the most popular modifications done to Tiffin, Newmar, and other Class A coaches built on this Ford chassis platform.
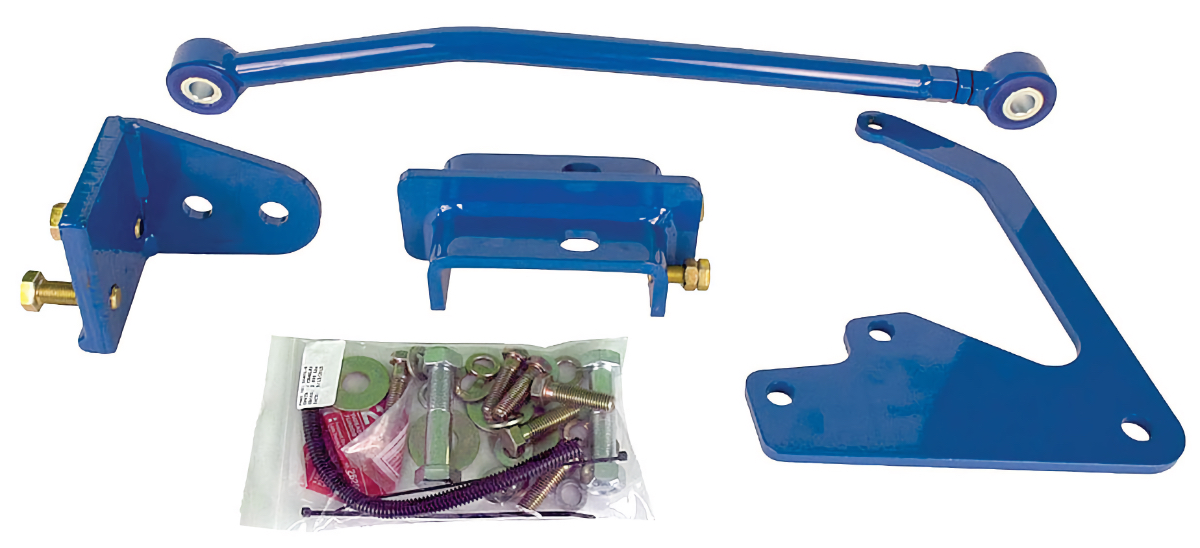
Image Courtesy of Safe T Plus
The installation of these upgrades does not require any special tools and we were able to install everything without the need to raise the coach off the ground to work underneath it or the need to remove any wheels. If you don’t want to spend half a day under your rig on your back, you’re looking at about 21/2–31/2 hours of labor for a shop to do the installs. All the included instructions were clear and concise enough that we didn’t need to make a single phone call to a manufacturer for assistance, although each offer telephone and web tech support if needed. There are videos on the Safe-T-Plus and SuperSteer websites detailing the proper installation of their products.

Image Courtesy of Rick A. Diaz
Prep Work
A week before we started working on our coach we sprayed all the bolts and nuts involved with WD-40 and let it soak in. This made removal a lot easier. In the case of the Safe-T-Plus Steering Stabilizer installation, stopping the coach with the front wheels and steering wheel in as straight a line as possible beforehand will make for less adjustment of the Tie Rod Bracket after installation.
With all the products installed, the last step before taking our Allegro Open Road out on the open road was a final adjustment of the Safe-T-Plus Steering Stabilizer Tie Rod Bracket. This is important to make sure the vehicle tracks straight and that very little driver steering input is needed to do so. You begin the process by using a soapstone or painter’s tape to mark the current position of the bracket edge on the tie-rod. You then drive the vehicle in a straight line, preferably on a road with no traffic, and feel for any pull to the left or right. If any pull is present, simply loosen the 9/16-inch nuts on the U-bolts, move the bracket slightly in the opposite direction of the pull, and re-torque the nuts to 20 ft-lbs.
If necessary, repeat this process until your coach tracks straight. This adjustment needs to be done on as flat a road surface as you can find. If the road is even moderately crowned, the coach will have a tendency to drive or pull toward the low side of the road, which could throw off the adjustment. Testing and readjustment will help achieve the best results.
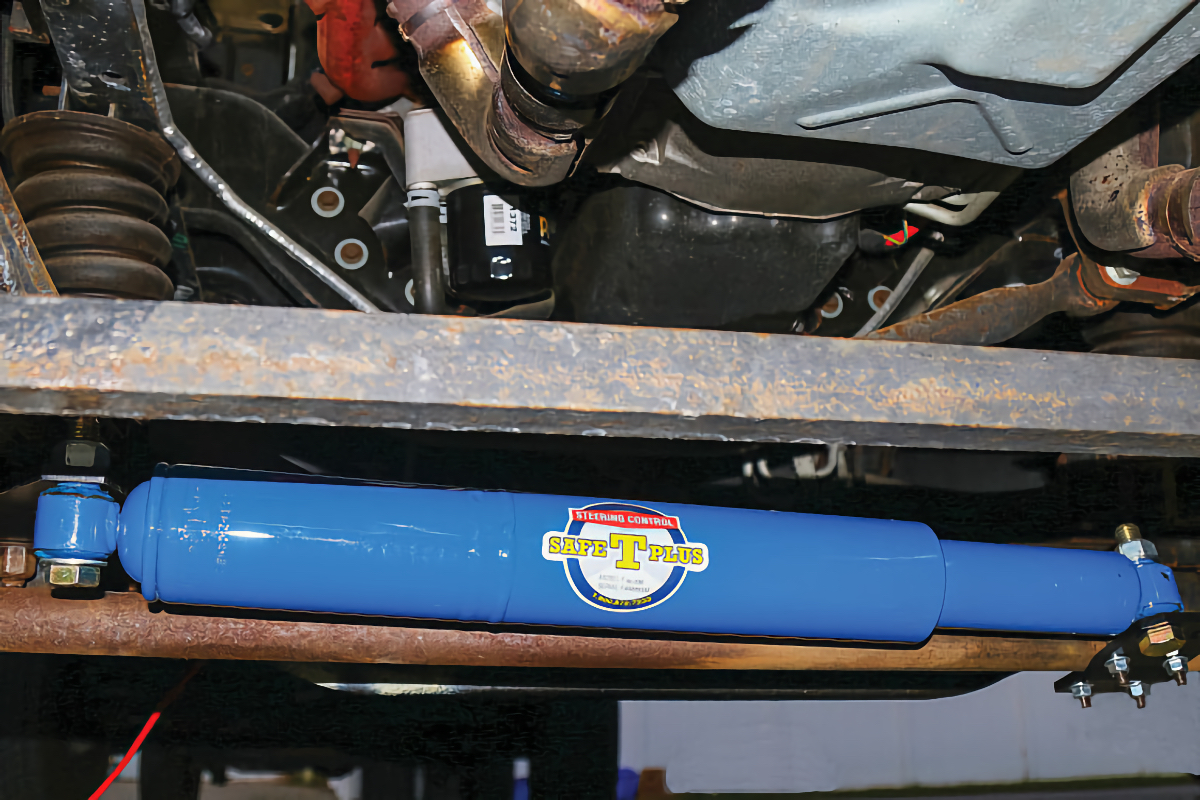
Image Courtesy of Rick A. Diaz
DIY Installation Tips
Prior to installation, clean the area with a Scotch-Brite pad or wire brush on the tie-rod where the Safe-T-Plus Tie Rod Bracket will attach. Dirt or rust buildup will interfere with proper contact of the plate. Final connection of the Super-Steer Rod Assembly should be made with levelers up, slides in, and the full weight of the coach and approximate load on the suspension. Some shock absorber mountings may be too close to things like differential housings or leafspring perches to allow the use of air or electric impact drivers.
If this is the case, it may be necessary to use hand tools to remove and reinstall the mounting bolts, thereby requiring significant physical effort to do so. Breaker bars or oversized wrenches can assist greatly, if necessary. The bolts used at the top of a shock absorber mounting may be longer or shorter than those used at the bottom. Be sure to reinstall them in the same positions from where they were removed.
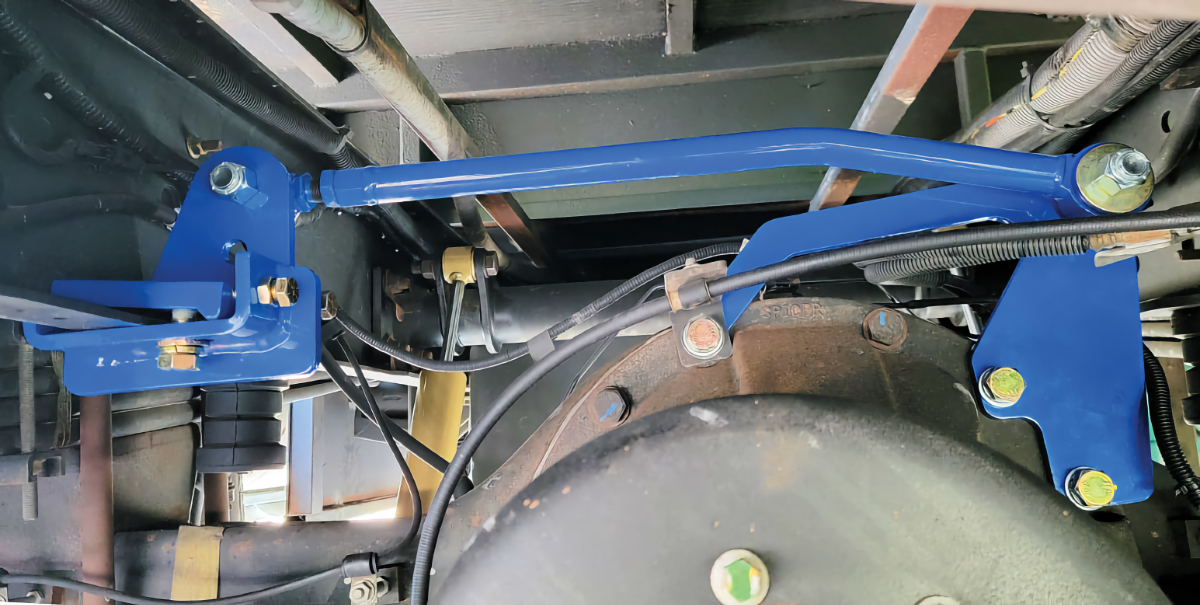
Image Courtesy of Rick A. Diaz
The Verdict is In
Our coach had just over 10,000 miles on it and the factory components were not even close to requiring replacement, so the suspension was as good as it ever was prior to the installation of these upgrades. After installation, right off the bat we were pleasantly surprised to see an improvement when we left our campsite and hit an off-camber driveway to the main road, complete with drainage channel. The normal side-toside dip and dance we would experience was much less intense and jarring than before, as was the porpoising effect on even small dips and speed bumps.
Heading for the highway we encountered a series of railroad crossings, a drawbridge, some road construction, and stop-and-go traffic. Surprisingly, the Safe-T-Plus Steering Stabilizer added no discernable effort to the steering, something we expected given the return-to-center nature of this device. There was no resistance felt in either direction when turning, but going straight the steering wheel definitely felt less sloppy. Front-tire deflection (felt in the steering wheel) when hitting potholes or speed bumps at an angle was noticeably reduced as well.
Once out of traffic and onto the interstate, we positioned ourselves in the right lane and started the second leg of our evaluation. On this particular day it was sunny with a cross-breeze of 10–15 mph with occasional gusts of about 20 mph. Normally, we would be very aware of the effect of even these light wind conditions on our coach, but on this day the only thing we were aware of was the sunshine.
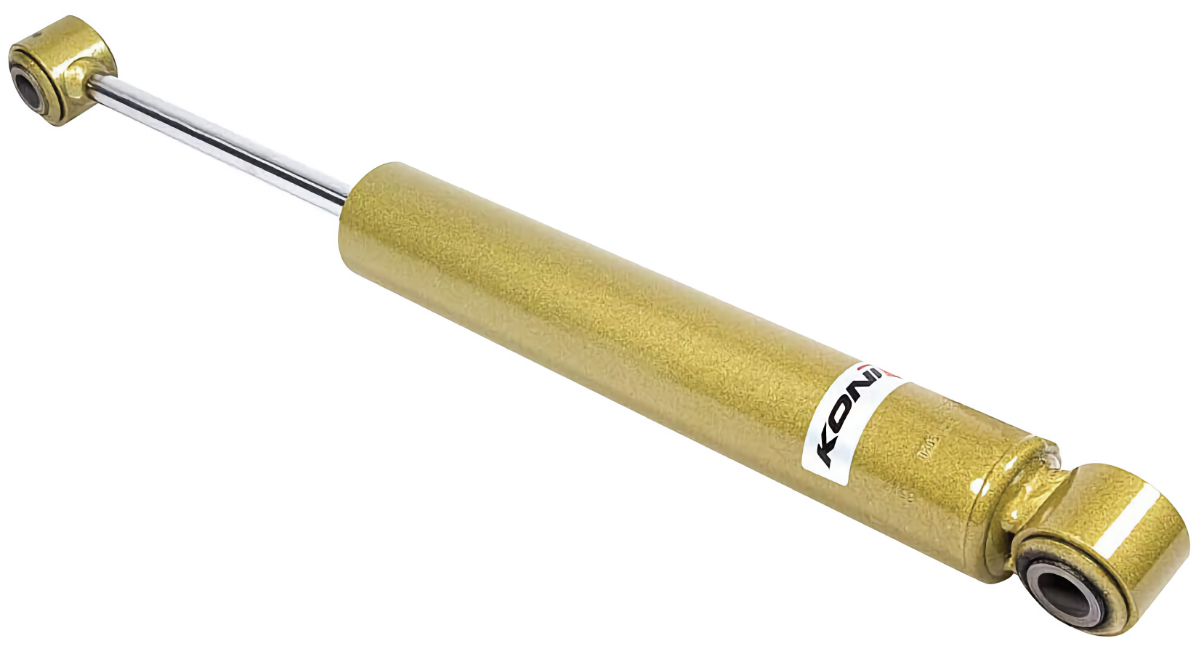
Image Courtesy of Koni
The ability to “stay in your lane, bro,” felt improved as well. We sat back, set the cruise control to 65 mph (the speed limit was 70), and waited for the semi-trucks to attack. Within minutes, the first big rig crept up on our coach and we expected the rear to react, as it always had. Before we knew it, we were seeing the lettering of the trailer as it went by and realized we had not felt much of anything as it passed us. No white-knuckle grabbing of the steering wheel to fight the vacuum. No counter-steering as it passed or struggling against the push of the big rig’s headwind as experienced before.
Continuing on down the highway this lack of influence on our coach by semi-trucks repeated itself with a dozen more passings. After the install, we now feel more confident, comfortable, and relaxed driving our coach, and are looking forward to putting more miles on the odometer and farther trips on our itineraries.
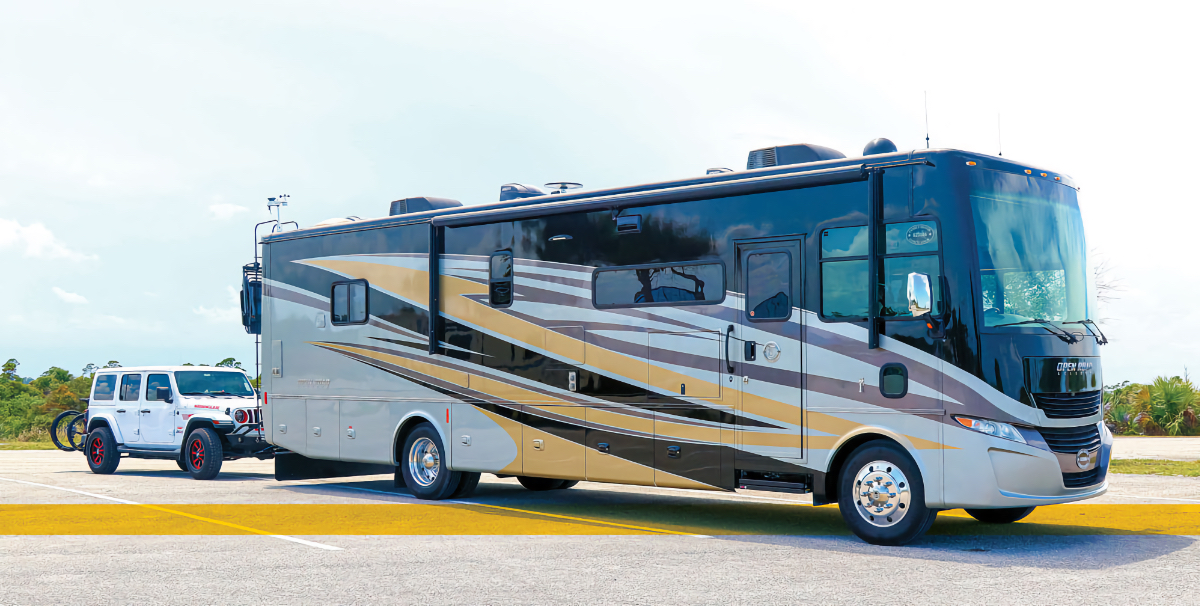
Image Courtesy of Rick A. Diaz
Tools Required
- 1/2″ drive electric or air impact driver
- 3/8″ drive ratchet
- 3/8″ drive 9⁄16″ deep socket
- 3/8″ drive torque wrench
- 1/2″ drive ratchet or breaker bar
- 1/2″ drive impact sockets in 15/16″, 11/16″, and 11/8″
- 11/8″ box or open-end wrench
- 1/2″ drive torque wrench (max setting of 200 ft-lbs.)