Rigs + Gear: Mobile Gear Box
Simple Items Every RVer Should Have in the Fix-It Kit for Those Unexpected Emergency Repairs
Image Caption: Photo Credit: Getty
One thing is certain if you own an RV: It will need repairs. Maybe not today. Maybe not tomorrow. But at some time down the road, usually, when you least expect it to happen, something will break, leak, fail, come loose, get dented, punctured, or torn. It could be the result of normal wear and tear, an act of Mother Nature, or operator error.
When something goes awry, you fix it or make a temporary fix until you can get your RV into a repair center. Having the right combination of simple products and tools handy can save the day. Experienced RVers know this and have a special tote or other container with an array of fix-it “must-haves” when they hit the road.
Basic RV Repair Must-Haves
What needs to be in a “fix-it kit” varies widely from one RVer to the next. Those with an aptitude for being handy with tools and a knack for doing their own RV repairs carry a pretty extensive array of tools and products to handle most things that go awry—even a spare freshwater pump.
On the other hand, those new to RVing may not have a clue what tools and products they need to facilitate making the typical RV repairs that pop up while on a camping trip.
We talked to numerous experts who have decades of RVing experience under their belts to get their take on items that supplement the typical combination ratchet/socket set, flashlight, pliers, and screwdrivers that should be onboard an RV.
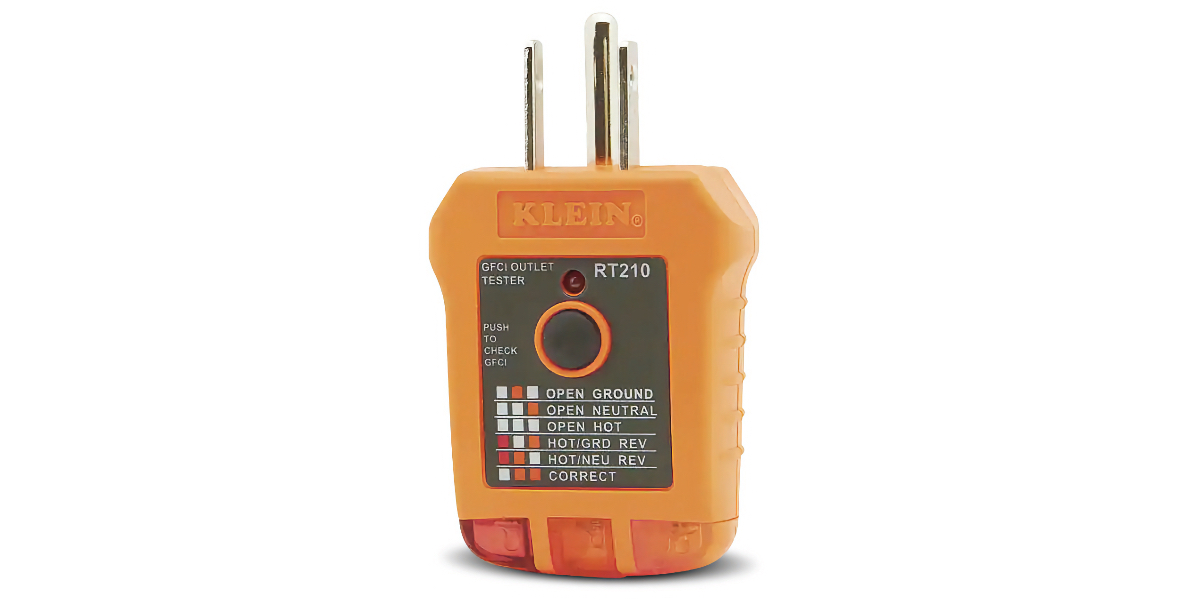
Photo Credit: Klein Tools
Fixing Basic RV Electrical Issues
Electrical receptacles that suddenly quit working are a common problem that arises in RVs, according to Teresa Carrier at Carrier RV Services in Eugene, Oregon. That’s where an inexpensive GFCI outlet tester comes in handy to check if there’s power to that outlet.
“An ohmmeter is good if you know how to use one. For those who don’t, a simple $15 GFCI tester, like the one from Klein Tools, helps isolate the issue. Sometimes there’s one whole side of an RV that has ‘dead’ outlets,” says Carrier, “and one tripped GFCI causes the problem, which could be solved by pressing the reset button on the o ending outlet. Or, a wire may have vibrated loose from that one receptacle.”
Don’t Forget Fuses
When running lights quit working, the power steps on the coach don’t deploy or retract, or interior lights or other electrical items quit working, the problem can usually be traced to a blown fuse in the RV’s distribution panel for that particular circuit. (Tip: Always read the owner’s manual and take a walk-around of your RV so you know where all the fuses are located.)
A basic ATC fuse kit, with an assortment of 7.5-amp to 30-amp fuses, saves the day. One such kit that can be easily found at auto parts stores, hardware stores, Walmart, and online is the Bussmann EasyID assortment of fuses that light up when blown.
“This basic automotive fuse kit will cover most fuse-related RV and tow vehicle issues,” says Tony Salazar, an RV technician who spends a lot of time camping with his family. “In an emergency, a 30-amp fuse can hold temporarily in place of a 50-amp. But never use a higher-amp fuse to replace a lower-amp one.”
A small assortment of wire nuts is also a handy item because, once in a while, they come loose and fall off. Several sizes for wires ranging from 22-gauge up to about 10-gauge would be good.
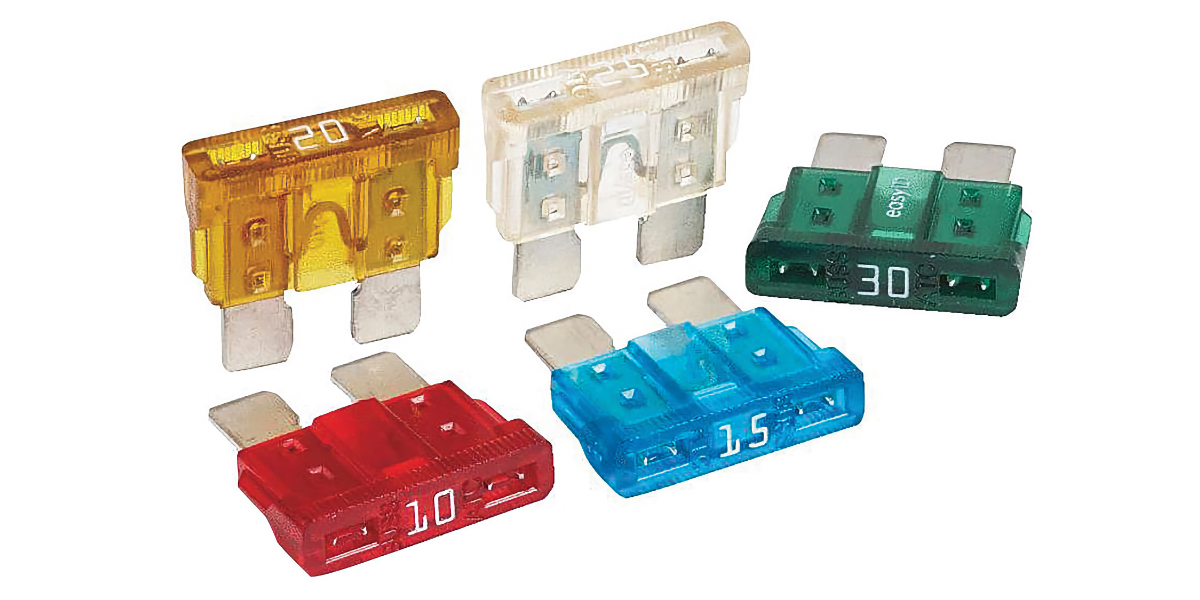
Photo Credit: Bussmann
Screws, Skewers, & Glue
Another very common RV repair is replacing screws that have vibrated loose, been accidentally pulled out, or stripped by overtightening. A small assortment of wood screws in #8, #10, and #12 sizes, in lengths from 1/2 to 1 1/4-inch, will cover you. It’s also good to have a box of 1 1/4-inch #8 premium exterior wood screws for roof and floor repairs.
Salazar, who repairs RVs every day, says to avoid using lag bolts, drywall screws, or those plastic screw anchor-insert kits you would use around a house. That’s because these fasteners are not designed to handle the up/down, side-to-side “shear loads” the walls of an RV are subjected to as it moves down the road.
Another item to have in the fix-it kit is good wood glue, such as Elmer’s Carpenter’s Wood Glue, and a little bag of bamboo skewer sticks or toothpicks. Skewer sticks are great for the barbecue grill—and for inserting a 3/4-inch-long piece in the hole where a screw has pulled loose. Coat the stick with wood glue so it bonds to the wall panel. After the repair dries, use a tiny drill bit and put a #8 wood screw back in place. You can also place the end of the toothpick or skewer in the hole with the glue added, then carefully drive the screw in. The wood chunk takes up some space in the stripped-out hole, so the screw is tighter, and the glue helps secure everything in place.
Roof Sealant Tape
RV roof membranes are very susceptible to damage from tree limbs, flying debris, and anything else that can puncture or tear the fabric. Even the smallest tear or puncture will allow water to penetrate and cause expensive damage to the wood underlayment. That’s where RV roof sealant tape comes into play.
A roll of 4- or 6-inch-wide EternaBond, 4EvaSeal, Quick Roof Extreme, or Dicor DiSeal is a necessity if you do much boondocking or dry camping. Roof repair tape is also excellent for sealing out water on damaged skylights, cracked roof vents, and damage to side walls, in addition to sealing the edges along the front/rear caps and the side wall-to-roof seams.
Before you apply any roof sealant tape, clean the surface with isopropyl rubbing alcohol (which is probably already in your RV’s medicine cabinet) to make sure the area is free of dirt, dust, and grime that invariably accumulates on an RV’s exterior. Rubbing alcohol is inexpensive and doesn’t damage roofing membrane materials. Once these tapes are laid down, they are very difficult to remove, so be sure you know where you want it before starting to attach it.
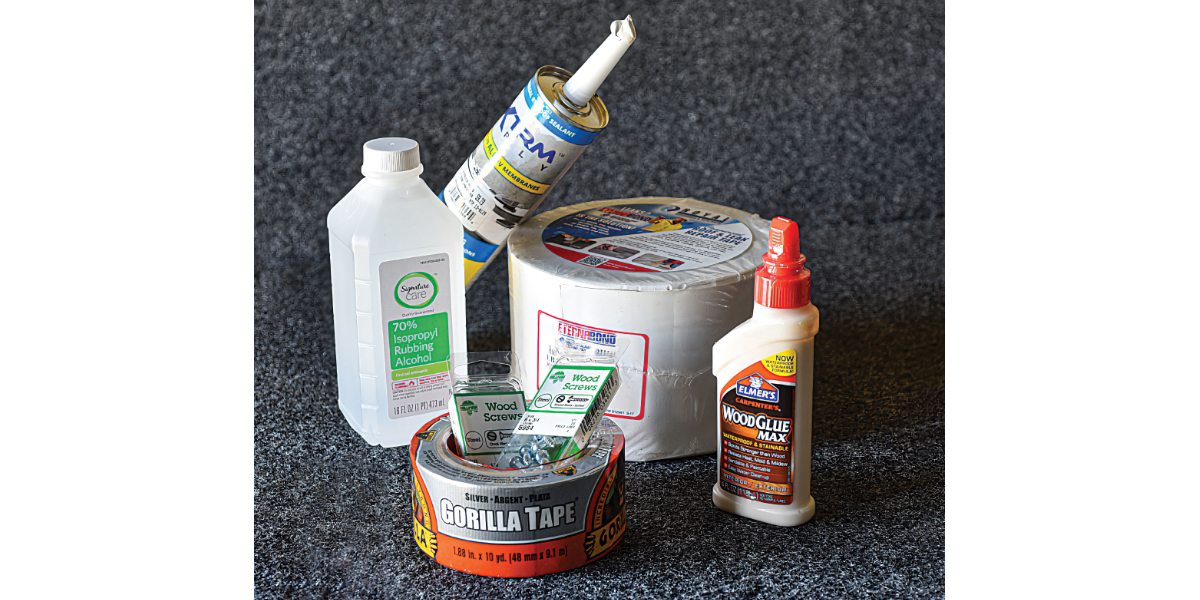
Photo Credit: Bruce W. Smith
Silicone Sealants & Duct Tape
The basic fix-it kit should also have a couple of tubes of both non-sag and self-leveling silicone sealants and a roll of heavy-duty duct tape. These sealants quickly fix those small leaks around roof-mounted components, window frames, and side punctures and work for a number of other repairs.
A good quality duct tape, such as Gorilla Tape, can be used to make temporary repairs of damaged bodywork, cracked PVC plumbing, broken glass, and so forth.
Robert Henderson and his wife, owners of Henderson’s Line-Up Brake & RV Repair in Grants Pass, Oregon, have driven more than 1 million miles back and forth across the country in RVs. In addition to the above items, they also carry a BedRug kneeling pad that makes accessing cargo compartments or working under the coach much easier on the body.
Fixing Pesky RV Plumbing Leaks
Plumbing leaks also pop up from time to time. “Forget using regular hose clamps for making repairs to RV waterlines. They will still leak,” says Salazar. “The best tool you can have to fix water leaks in an RV is an inexpensive PEX crimping kit like the ones you can find on Amazon or at most of the local home-improvement centers.”
Brands such as SHALL, KOTTO, and iCrimp sell PEX crimping kits, which include the special clamps, ratcheting crimping tool, and a PEX hose cutter and can be purchased for less than $35. A definite must-have for RVers.
“In your RV’s emergency repair kit I’d also include a .-inch PVC straight, 90-degree elbow, and a straight selector valve that fits the water hoses,” says Christopher Dougherty, president of Dougherty RV Consulting in Springfield, Massachusetts. “If a fitting cracks, which they can do, those AquaLock push-to-lock or Flair-It compression-style fittings can save the day.”
More Handy Items for an RVer
Having a few extra Flair-It Santoprene Swivel Seals around is also good. These tapered plastic seals crack and can be the cause of a water leak in an RV. At the very least, when a waterline fitting is removed, put a new seal back in.
Some RVers have a short piece of 3/4-inch galvanized, perforated metal strapping, commonly known as “plumber’s tape,” in their fix-it supplies. This comes in handy should something underneath the RV come loose from the belly and needs to be rehung or reattached.
Including a pair of ratchet-style cinch straps when you go camping is also handy. Not only do they work great for holding down cargo and gear, but in the rare event a tank underneath the RV comes loose, a couple of cinch straps can be used to hold it up in place until permanent repairs can be made.
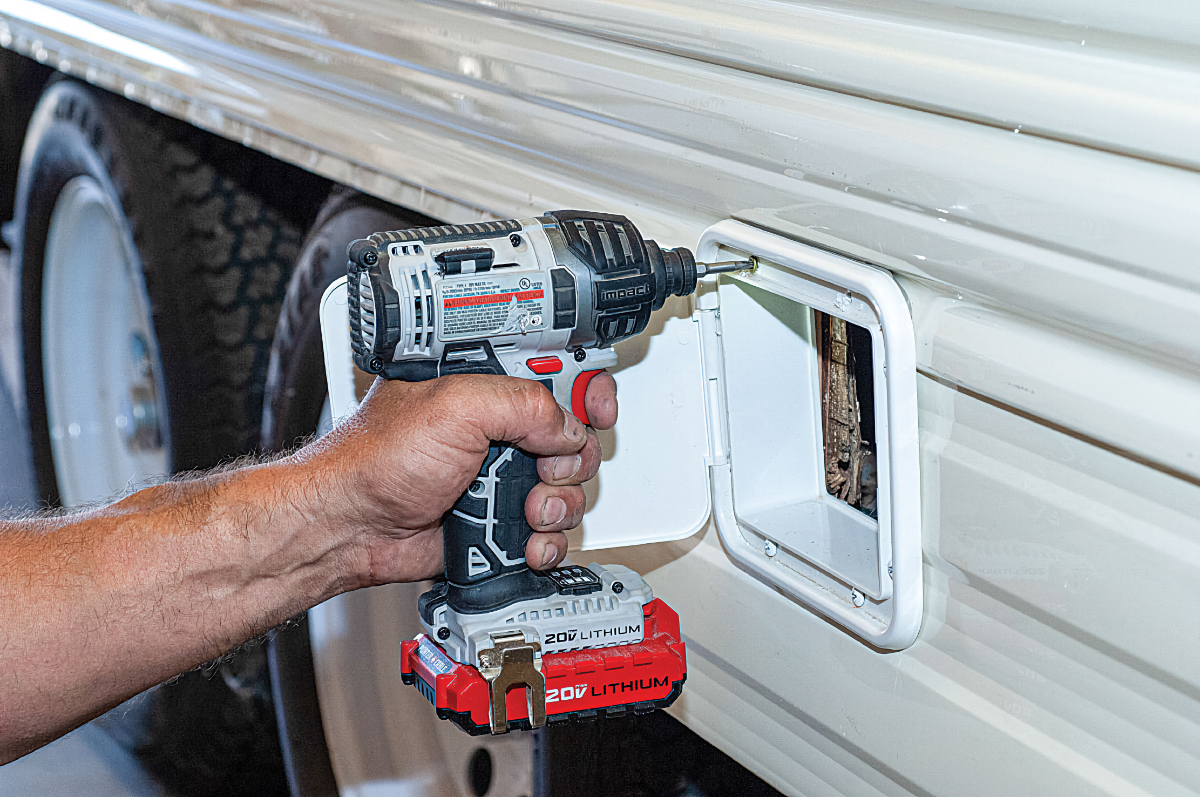
Photo Credit: Bruce W. Smith
A Drill-Driver Makes RV Repairs Easier
Lastly, many experienced RVers carry a cordless drill driver and attachments. The DeWalt 20V Max XR with matching impact driver bit and drill bit sets are popular, but any quality brand will do. Such a tool and attachments take care of most small repairs and installations related to the basic RVer’s needs.
For those tight places where a cordless drill driver doesn’t fit, like inside cabinets and drawers, a .-inch right-angle ratcheting multi-bit driver is just the ticket. These are available for less than $5 from places like Harbor Freight, or more expensive versions, like the Craftsman kit, can be purchased at any home-repair center or online.
Between the tools and products mentioned here, every RVer should be ready to tackle the basic repairs that can—and do—happen while on the road. That way, you can continue to enjoy the lifestyle … or at least safely get to a repair center to help get you back on the road.
RV Go Box List
Here’s a list of some other items that should be in the “Go Box” before heading out on a camping trip:
- Tool kit with hand tools and electrical tools (ratchets, wrenches, screwdrivers, hammer, set of pliers, wire strippers, and solderless crimping tool)
- Solderless wire-connector kit
- Torque wrench in foot-pounds
- Thin-wall socket for aluminum wheels
- SuperSteer Centering Lug Nuts for reinstalling aluminum wheels
- Tire ramp (Trailer-Aid)
- Tire-pressure gauge
- Utility knife and blades
- Water hose(s) & adaptors/fittings
- Extra sewage hose extensions/fittings
- Spare hitch pins/lock pins
- Propane regulator
- Fifth-wheel landing-gear pins
- Roadside safety flare kit
- Flashlight
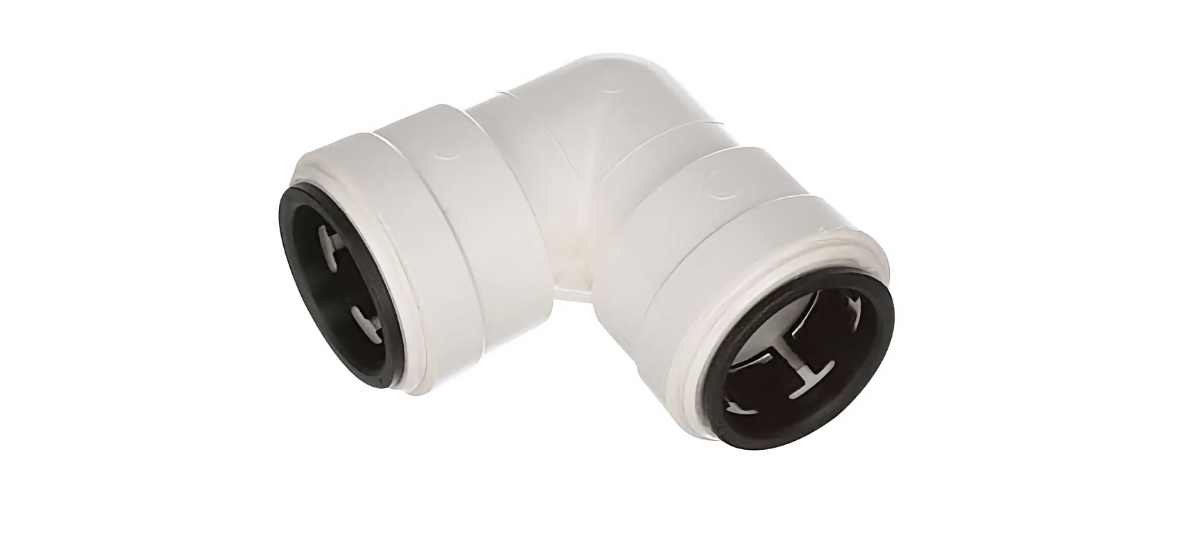
Photo Credit: Watts
Quick Leak Fix
Broken water hoses in an RV can be easily and quickly repaired using push-to-connect compression fittings like the Watts AquaLock pictured above. Carrying these in a ½-inch straight and a 90-degree fitting in your RV’s emergency repair kit should handle most situations