How to Maintain an RV Roof
Tip & Tricks for Preventing Leaks & Making Repairs
Image Caption:
A little TLC goes a long way in preventing leaks and expensive repairs on RV roofs. One of the great joys of RVing is having a roof over your head, no matter where your travels take you. Sometimes, though, it’s easy to take that RV roof for granted. Unfortunately, if you don’t give it some TLC on occasion, that snug little home on the road may not feel so cozy when it begins to look worn and dirty or even leak!
Keep it Clean
The best thing you can do for an RV roof is to wash it at least twice a year. If you park or store your rig under trees that drop leaves or sap, or if you travel in areas that are warm and moist with higher chances of producing mold, a thorough roof cleaning four times a year is even better. Better yet, don’t park under trees that drop sap because it’s a pain to remove the sticky substance! Also, periodically climbing up and inspecting the roof for rips, tears, cracks and caulking separations can keep you one step ahead of preventing damaging leaks and expensive repairs. Be sure that the roof is designed to walk on; if not, you’ll need to do cleaning, inspection and repairs from a ladder. Since an RV roof — especially a wet one — can be very slippery, rather than climbing onto the roof, it’s advised that you set up a stable ladder and wash the roof from the side.
RV Roof Types
There are several types of roofs on RVs. The most common are rubber membrane roofs (EPDM/TPO) and fiberglass roofs. Rubber roofs are made of a thin weatherproof membrane that is stretched across a wooden substrate. Fiberglass roofs are molded and it’s best to keep them waxed so anything that lands on the surface will slide right off. Most travel trailers and fifth-wheels have rubber roofs. Some of the higher-end fifth-wheels, small clamshell trailers and a number of motorhomes have fiberglass roofs.
Cleaning the Roof
Rubber roofs are durable but can be damaged by certain chemicals. Abrasive cleaners, citric cleansers and any product that uses a petroleum distillate can damage the roof material.
The first step in cleaning the roof is to sweep off all the debris, paying special attention to the areas around the roof fixtures. This is also a great time to inspect all the caulking for cracks. Then rinse the roof with a hose. To prevent streaks down the RV, it helps to hose off the sides and front of the RV before heading up to the roof, and continue to do so throughout the washing process.
Next, put a healthy splash of Murphy Oil Soap in a bucket, fill it with water and scrub the roof with a long-handled sponge mop or medium-bristled brush. Tackle a small section at a time (3 feet by 3 feet) and use a circular motion. As you move across the roof, look for rips and tears in the roofing material. Rinse as you go, but be careful of slipping and falling on the wet roof! Plus, watch behind you so you don’t trip over a vent or air conditioner. As mentioned earlier, it’s safer to stand on a ladder from the side and use a long handle brush to do the cleaning. Rubber roofs technically don’t need any further protection, but treating the surface with a quality protectant will make subsequent washing easier and provide another layer of protection against the elements.
Fiberglass roofs can be cleaned the same way as rubber roofs. For stubborn stains, FSR Fiberglass Stain Remover may do the trick. Simply wipe on the FSR, let it sit a few minutes (more for tougher stains) and then wipe it off. Repeat if necessary. Many RVers also rely on granular powder products like Bar Keepers Friend and Bon Ami. Also, companies like Protect All offer good cleaning products designed for RVs.
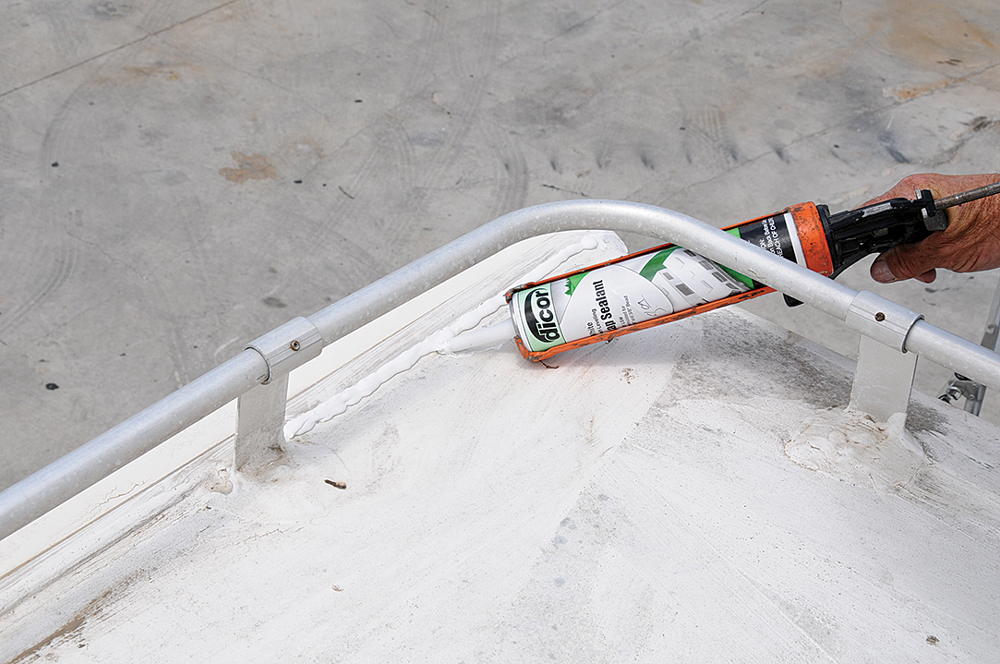
Check caulked seams for signs of cracking or lifting and reseal with Dicor Lap Sealant.
Fiberglass Roof Oxidation
After cleaning, fiberglass roofs also need a protectant so they don’t oxidize; that is, lose their shine, feel rough to the touch and eventually even slough off white powder. All surface oxidation must be removed before protectant can be applied to the roof.
If there is slight oxidation, an easy one-step process is to apply a cleaner/wax or restorer/wax. These waxes contain a mild to medium abrasive. Working in small 3-foot-by-3-foot areas, apply the product using a circular motion. Let it dry to a haze and then buff it out to a nice shine, and your RV’s roof is done. An orbital buffer makes the job easier.
For a more oxidized roof, use a polish containing a mild abrasive. If the polish can’t make the surface smooth, dab some rubbing compound on the buffer pad. Rubbing compound is very harsh, so go easy with the buffer, and add rubbing compound as needed. Unless you know what you are doing, it’s best to leave any cleaning using a polishing or rubbing compound to the pros.
While the roof may shine after initial cleaning or treatment of a protectant, in reality it’s only providing instant gratification. To prevent further oxidation, it’s best to paint the roof with a good quality epoxy-based paint, like Imron, to make sure the surface remains nice looking and is protected from the sun and other elements.
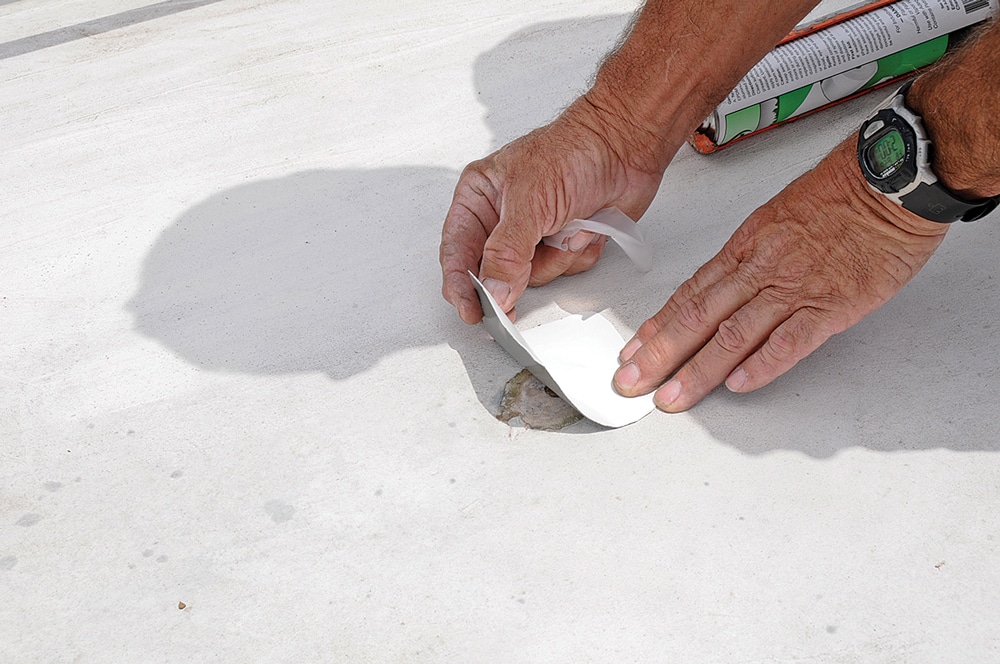
Small rips or tears in a rubber roof should be patched immediately to prevent water damage.
Fiberglass Roof Protection
After cleaning and/or removing the oxidation, the roof needs a protectant. Some RV manufacturers recommend using 303 Aerospace Protectant to protect the fiberglass from UV rays, to eliminate black streaks from forming on the walls and to give the roof a shiny luster. Use of a protectant is in lieu of waxing.
An alternative is to put a coat of paste wax on the roof, but beware of walking on a waxed roof, especially when wet, as it can be extremely slippery and dangerous.
Cleaner/waxes, restorer/waxes, polishes, rubbing compounds and paste waxes range from cheap to expensive brands. Meguiar’s and Griot’s Garage from the auto industry and 3M and Collinite from the boating industry are all excellent brands. Many RVers also have great success with liquid acrylic products such as Poli Glow and Zep Wet Look. Higher-quality products, although more expensive, will last longer.
There are several products on the market that go beyond just surface treating such as the MS GelCoat Restoration System (which replaced Vertglas). The kit includes a two-step process that removes oxidation and restores a high-gloss shine to fiberglass gelcoat. It’s generally available through marine stores.
Rubber and Fiberglass Roof Repair
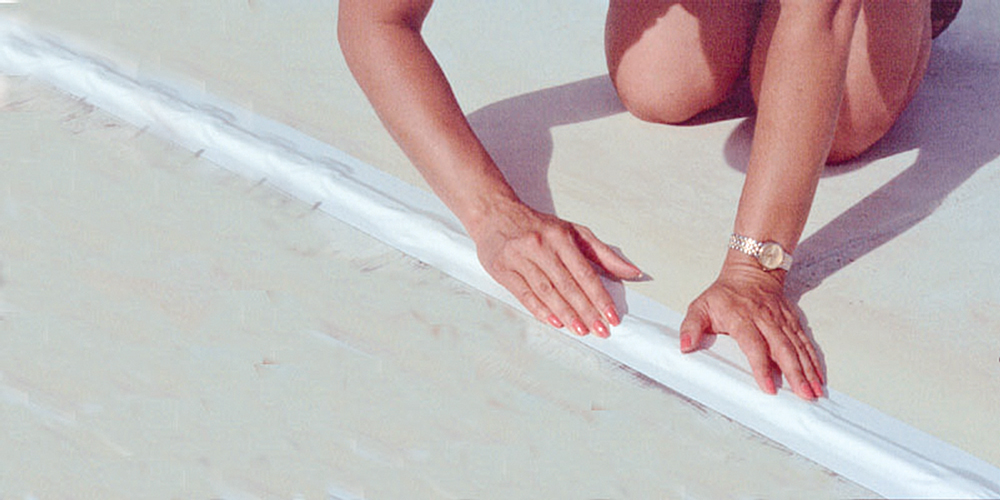 EternaBond tape can be purchased in 4- to 50-foot lengths, installs quickly and can be used on most surfaces for permanent repair.[/caption]
Although most rubber roofs are guaranteed for 10-12 years and can easily last for 20 when well cared for, a snagged tree branch can tear the roofing membrane. Likewise, fiberglass roofs sometimes develop hairline cracks. The roof-to-wall and roof-to-cap transition joints are also susceptible to separation, and problems can crop up around roof vents, TV antennas and other accessories mounted to the RV’s roof.
There are two products that make repairs to both rubber and fiberglass roofs a snap. EternaBond comes on a roll, like tape, and is easy to install. Clean the area thoroughly, roughing it up with a Scotch-Brite pad and clean the area with water. Then cut the tape to allow a 2-inch margin around the tear, press it into place, and use a small wallpaper-type roller to ensure the tape is affixed smoothly without any bubbles.
EternaBond tape (the company claims it will bond to any surface except silicone) can be purchased in many lengths, from 4 feet to 50 feet, for small tears to major roof/wall separations that run the full length of the RV. The tape shelf life, before application, is five years, so if you keep some on hand for emergencies, make a note of when you bought it.
Dicor, one of the manufacturers of EPDM roofing membranes, also makes a roof repair product called DiSeal Patch Sealing Tape. The company claims that this product has superior adhesion and stays flexible. The shelf life of the Dicor repair tape is one year. With the Patchit Roof Repair Kit, you’ll need to do an additional step of outlining the edge of the patch with Dicor Lap Sealant.
If you need to replace the caulking around the vents and other accessories, use Dicor EPDM Lap Sealant. Simply clean the area of all dirt, particles and grease. Let it dry and then run a bead along the damaged area using a caulking gun. The sealant will flow and spread out. If it is cold, warm up the sealant before applying it so it can flow well.
Since 2007, we have been traveling full-time in a 27-foot travel trailer and a 36-foot fifth-wheel throughout the United States, and on a 44-foot sailboat on Mexico’s Pacific Coast. We have diligently and successfully used these inspection and cleaning techniques on rubber roofs and on the sailboat’s gelcoat fiberglass hull and cabin top. Despite being exposed to intense UV rays and nature’s elements 24/7, our three homes have been very cozy and totally leak-free.
The products mentioned in this article can be found at auto parts stores, Walmart, Home Depot, Lowe’s, Camping World and other RV supply stores and/or boating supply stores.