Rigs + Gear: In Search of Level
How to Get Things Straight While in the Campground for an Improved RVing Experience
Image Caption: Photo Credit: James Adinaro
When it comes to a level rig, there are two ends to the spectrum of RVers. On one end, we have those who don’t care so long as things are sort of close. At the other end, we have those for whom being not level is an existential crisis. I could be the president of that latter group. And while there’s no right or wrong way to be here, I wouldn’t let anyone in that first group build a deck for me or install shelving.
Personal hang-ups aside (and I freely admit, my obsession with level qualifies as a hang-up), there are definite benefits to having a level rig, regardless of where you fall on the spectrum. In a level rig, for example, you won’t have to worry about the refrigerator door flying open or closed whenever you let go of it. It will just stay where you put it. The same can be said for objects you place on counters or tables, like eggs or splashed water—they won’t roll or drip off.
And besides items not falling off shelves, there are other practical and functional reasons to have a level rig. Absorption refrigerators work at their safest and best when they’re level. Your RV’s waste plumbing system was designed around a level rig, and staying close to level will ensure that everything continues to drain as it should. Your RV’s tank sensors will be more accurate. The list goes on. So, it’s a good idea to try to get your rig at least approximately level, even if you wouldn’t mind sleeping upside down.
I should also point out that “level” is different from stable, and that stabilizers are not the same thing as levelers. “Stabilizers” are designed to do just that, stabilize your rig. They’re not designed to support the entire weight of your RV, or potentially lift wheels off the ground.
We’ve covered stability in the magazine before (“Rock Solid,” January issue), and having a rig that doesn’t excessively bounce or sway as you walk around inside is still important. But here, we’re going to look at products and solutions for getting your rig level. (And for the record, you should get your rig level before you deploy any stabilizers.)
We’ll tackle this in two ways. First, how you FIND level, and second, how you GET level.
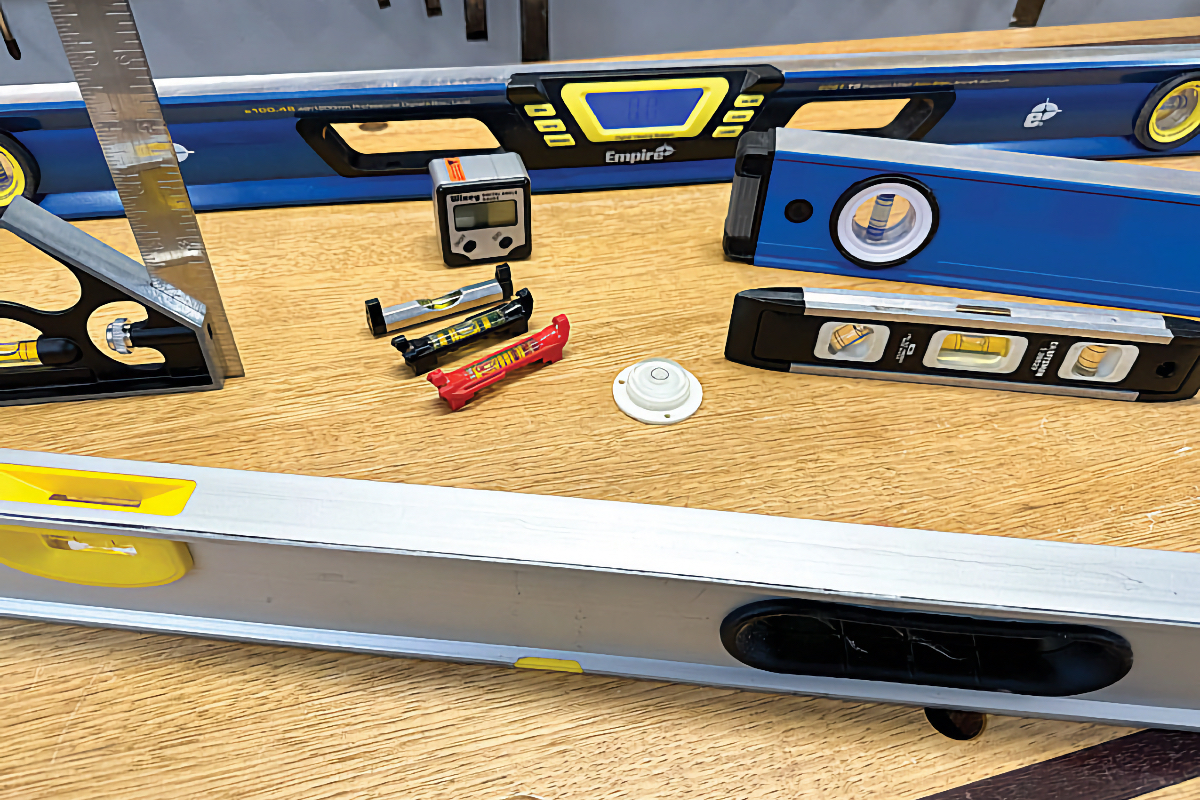
Photo Credit: James Adinaro
Finding Your Level
If you’ve ever seen my spouse and me hang a picture, you’d quickly realize that level can be a matter of (sometimes strong) opinion. So, it’s a good idea to have an objective source of level truth on the subject. The products for finding level range from simple and time-tested to wireless whizbang, and I’ve used most.
Bubble levels, if you believe Wikipedia, have been with us since the 1600s, and they work just fine for leveling your RV. I have nearly a dozen of them, in various lengths and degrees of precision. But for leveling an RV, day in and day out, I’d use one of the RV-specific bubble levels that are designed to be mounted to your rig.
Usually, they’re used in pairs—one for leveling side to side and another for front to back. For a motorhome, you might put them where you can see them from the driver’s seat to help you to find a level spot while pulling into camp. For a towable, you might try mounting them where you can see them in your mirrors for the same effect.
Another kind of bubble level that will measure all directions at once is the small circular device that simply is placed where you’d like to achieve level. They’re easy enough to use, but to read them properly, you need to be more or less looking straight down on top of them, so they’re less convenient to use from the driver’s seat.
Your smartphone also has level capabilities through a variety of apps. I’ve used basic level apps that mimic the functions of a carpenter’s level or surface level, and the digital apps seem to work as well as their analog cousins. But for RVers, there are better apps than general purpose levels.
Studio shot of smartphone isolated on background with blank screen for Infographic Global Business web site design app ios – Clipping Path
One of my favorites is from Truma, the same company that makes RV heaters and water heaters. They provide a leveling feature in their app that represents level as a beach ball bouncing around inside a virtual rig: When the ball is centered, you’re level.
But the real magic with the Truma app is that you can enter a little information about your rig (wheelbase and track for motorhomes, hitch-to-hub distance, and track for towables), and then the app will tell you exactly how much to raise or lower each point of contact with the ground.
There are a couple of caveats to this app, though. First, it relies on your phone being at on a horizontal surface in your rig. My newest phone has a camera bulge on the back that prevents it from laying flat, so that’s a problem. When I tested the app with an older (flat) phone, I was able to get extremely accurate and repeatable results, but I had to ensure that my phone was aligned precisely with the vehicle axis. I got the best results by setting a tape outline of my phone on the floor and putting my phone within it to keep it aligned. It worked great, but not everyone appreciated what it added to the decor.

Smartphone with blank screen.
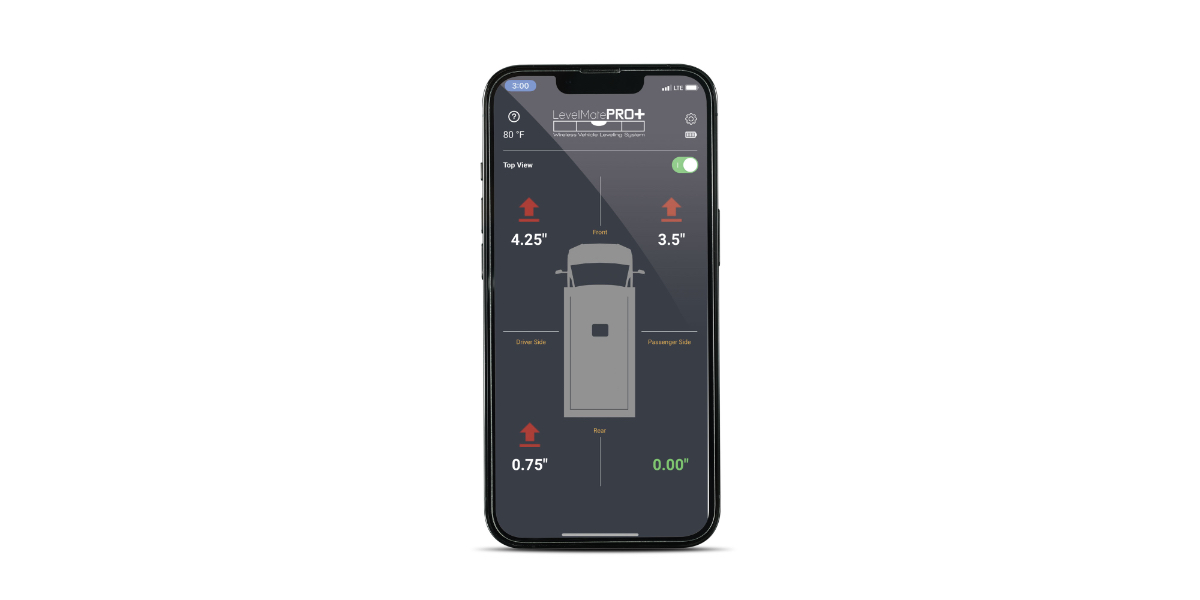
Next up is what I personally use to level our RV. It’s the most accurate solution I’ve found, but also the most expensive. I use the Level- MatePro+ from LogicBlue Technology. It consists of a small, battery-powered box of circuitry that’s mounted solidly and permanently inside the RV and a corresponding app on your smartphone. The beauty of this solution is that once you’ve taken the time to set it up properly, subsequent levelings are extremely fast and accurate.
Setting up the LevelMatePro+ involves getting your rig completely level. Once your RV is level, you provide your rig’s dimensions in a similar way to the Truma app and complete a calibration procedure to “set” level in the app.
With setup completed, turning on the LevelMatePro+ box and opening the app will quickly tell you exactly how much height to add and where to get your rig level. Any guesswork is eliminated. And you get it right the first time.
Getting Level
Measuring level is great, but how do you get your RV there? Solutions range from extremely simple and inexpensive to fancy push-button automation. The exact procedure you’ll use to level your own RV will vary based on your RV type and the equipment you have installed, but we’ll run down the most common leveling aids here.
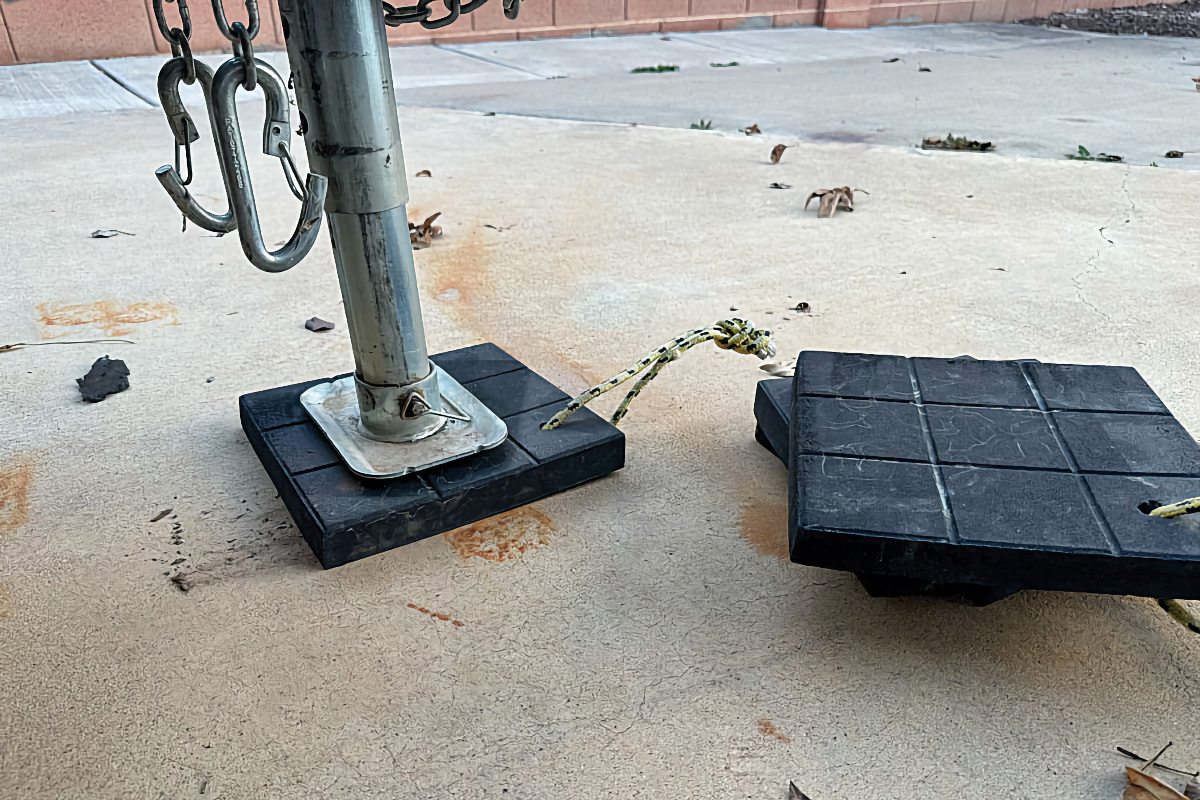
Photo Credit: James Adinaro
Blocks
Up first, we have the simplest: wooden blocks. RVers have been using wood blocks for leveling ever since RVs were invented. I know RVers who travel with a variety of thicknesses of wood planks, blocks, and chunks. Once they know which direction they need to raise the RV, they’ll get out appropriate collections of wood, stack them up in front of the tires, and drive onto them. If you have a motorhome, you might do this at all of the tire locations. For a towable, you’d usually drive onto blocks on one side to level side to side first and then level front to back using the landing gear or A-frame jack.
I’ve never been a big fan of wood blocks because they always seem to scoot about when I try to drive onto them. I know I could drive a nail or a screw into the stack to hold it together, but that gets old after a while. I find it easier to use something like Hosspads to achieve the same result. Hosspads are heavy rubber (think: recycled tires) pads that are nearly indestructible. Since they’re made of grippy rubber, I’ve never had trouble with them sliding about.
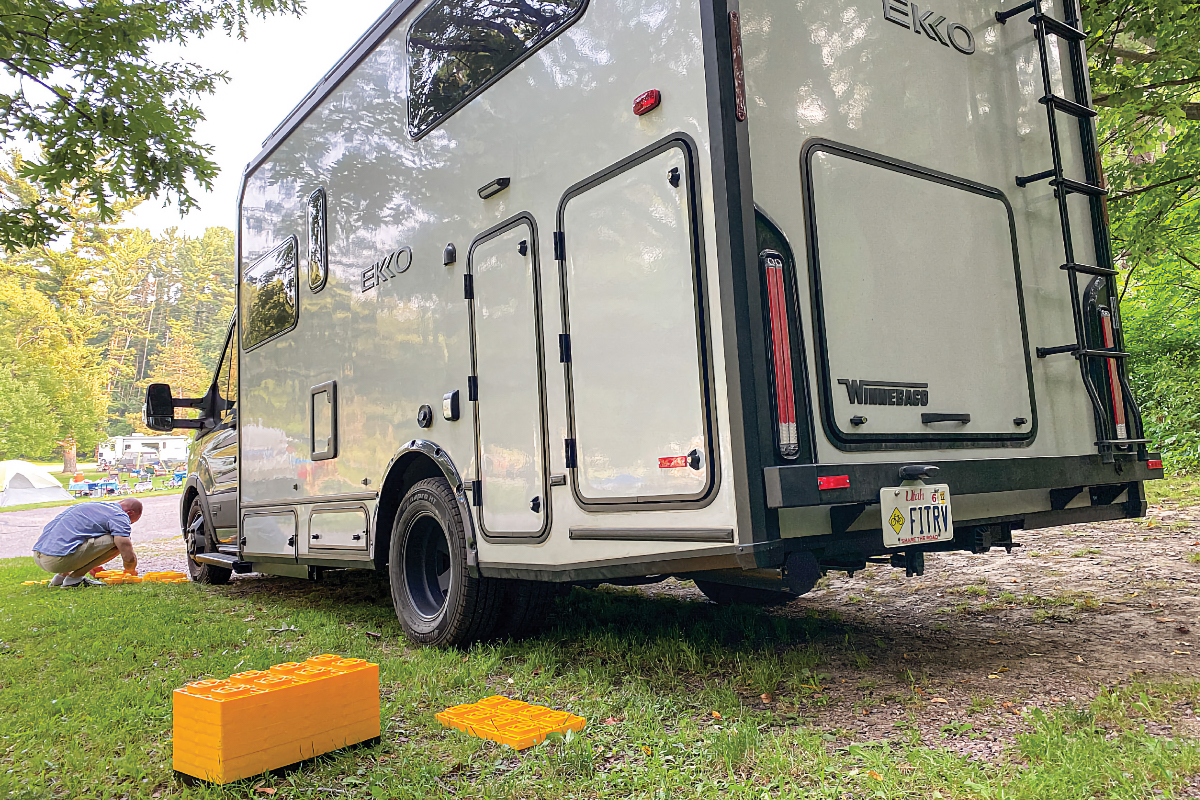
Photo Credit: James Adinaro
Pads
The next step up are the RV leveling pads that look like large Lego blocks. You can find them in sets by Camco, Lynx, and others. These have a few advantages over plain old wood. Because they interlock, you won’t have trouble with them sliding out when you drive onto them. They’re all made to a consistent thickness (usually 1 inch) and consistent size. And they stack up for storage, so they won’t scatter all over your RV’s storage compartments.
My one minor gripe with the stacking block products is that the bottoms tend to get chewed up if you use them on gravel campsites. When that happens, they don’t stack up as nicely anymore, so you may have to replace them occasionally—or put a protective pad underneath them.
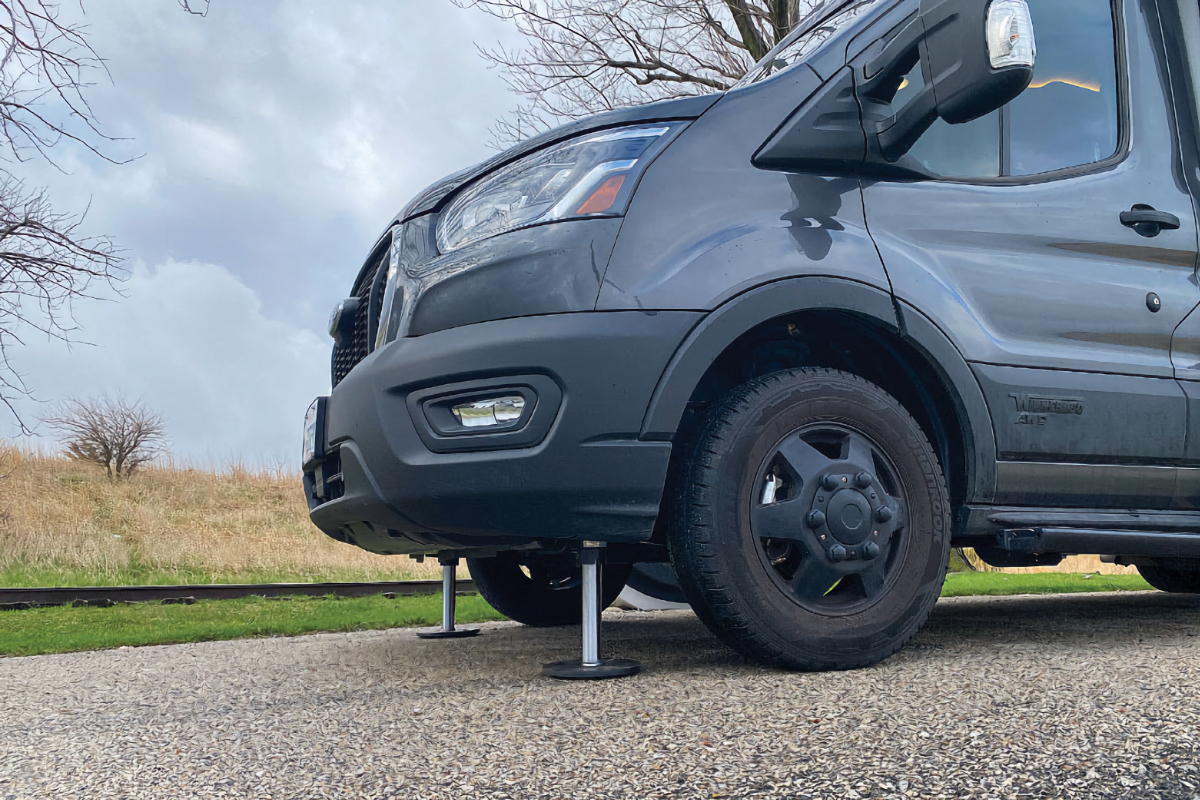
Photo Credit: James Adinaro
Jacks
Finally, we have arrived at leveling jacks. There are manually operated leveling jacks available, but when it came to our motorhome, I went straight for the “nuclear option” of leveling products: automatic leveling jacks.
These systems are made by companies like HWH, Lippert, Bigfoot, Bullseye, and others. These are often of the hydraulic variety, but electric systems are available. Larger RVs may come from the factory with these installed, but there are a number of aftermarket options available.
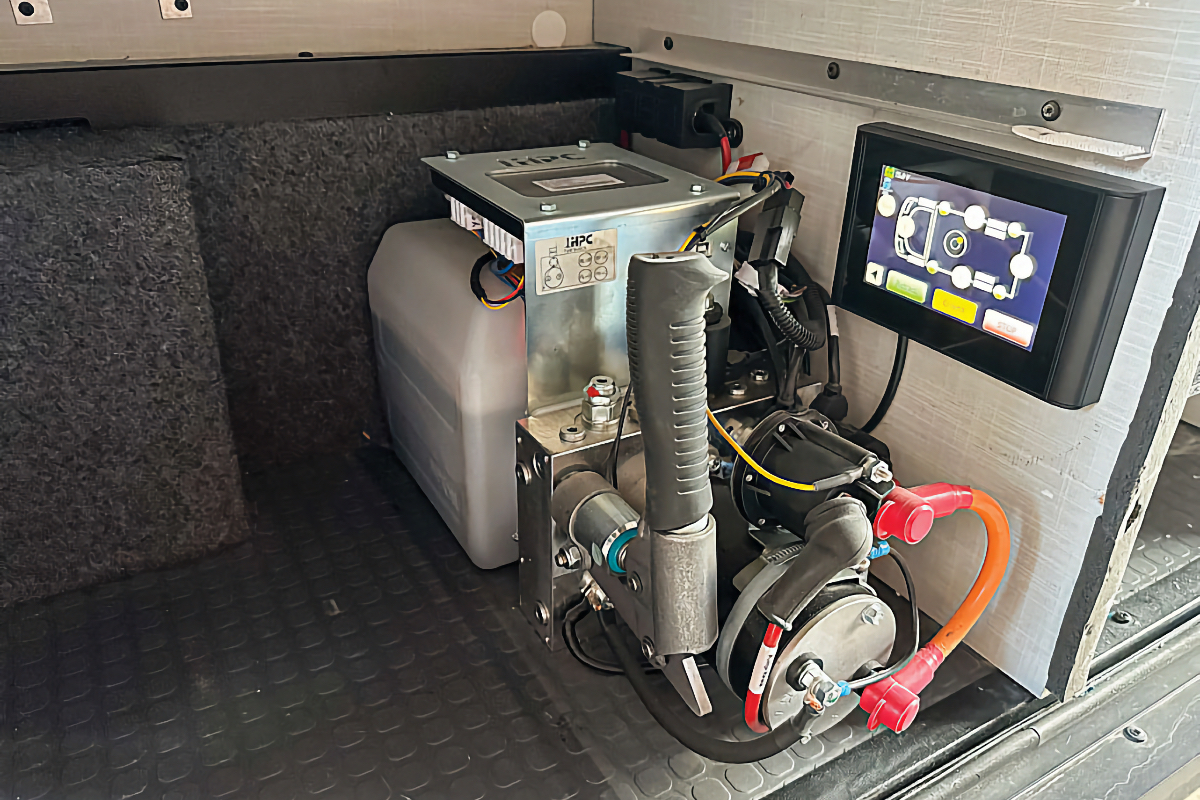
Photo Credit: James Adinaro
Granted, installation of these automatic systems is best left to a professional, but once they’re installed, the fun begins. Most of them work in a similar way: You push a button and watch the magic! These systems will have level-sensing capabilities built in, and they’ll automatically deploy and raise the jacks and stop when the rig is level.
Most of them will provide a manual mode so you can adjust things to your liking and one-touch retracting of the jacks for when it’s time to go. These systems can be somewhat expensive, but when it’s dark and you’re wiped out at the end of a long driving day, leveling with a button push feels like winning.
Get Ahead of the Curve
Here’s a practical idea for the initial side-to-side leveling of a towable RV.
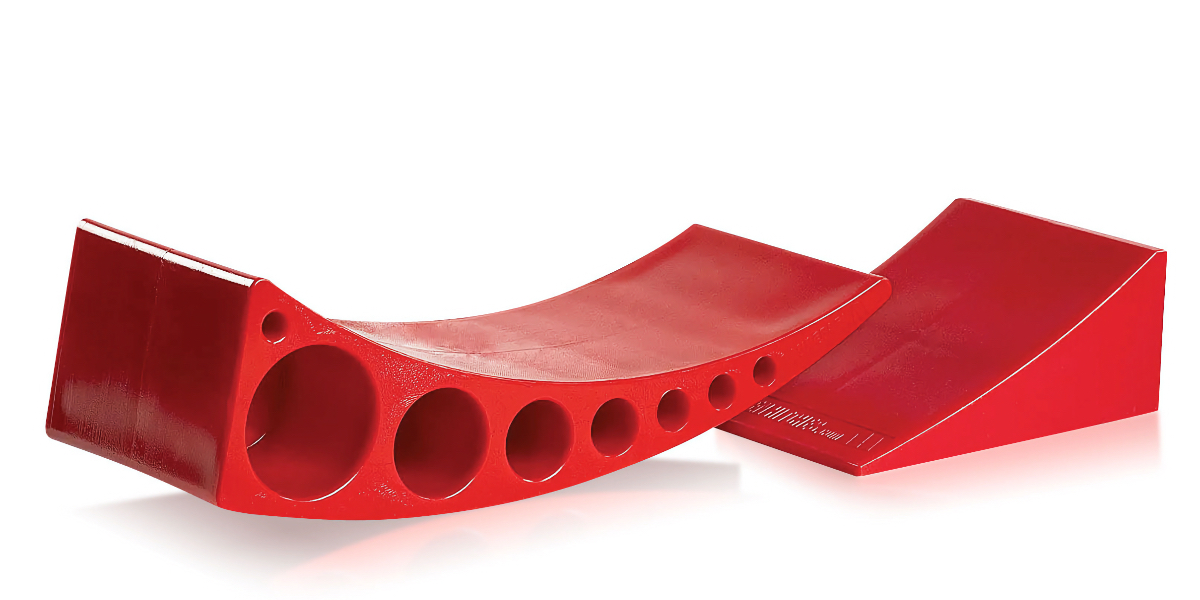
Another interesting leveling product is the curved camper levelers made by Andersen Hitches and Camco.
Whereas with the stacking blocks, you’re limited to leveling in 1-inch increments, with the curved levelers, you drive the wheels up a curved ramp. Depending on where you stop, you’ll get a different amount of lift. It’s a neat idea, particularly if you want to raise a wheel precisely 1-13⁄32 inches. They even come with chocks to keep the wheels from rolling back once level.
These work best for the initial side-to-side leveling of a towable RV. I loved the idea, though, and once bought a set to try four-corner leveling a small motorhome. They didn’t work as well in that application, but they’re a great idea for the towable crowd.