Replacing a galley fixture is easy, and is a quick way to improve the look of your motorhome’s kitchen
When it comes to plumbing, your motorhome has many of the same fixtures as those in a residential home. At some point, you may want to change out a galley faucet for cosmetic reasons, or you may have to replace it due to failure. Whatever the reason, the installation steps are simple enough that the average person can tackle this job using a few hand tools, and doing so can really save you a lot of money.
Plumbing fixtures installed in a motorhome are exposed to a different set of conditions from those installed in a traditional house because they often sit unused during the off-season (unless you are a full-timer). During the winter, these fixtures may be subjected to freezing temperatures, which is why it is critical to winterize the motorhome if you store it for the winter. Otherwise these waterlines, valves and faucets are prone to freezing with water inside them, which usually results in cracking. And, as you will see during the installation of this new kitchen faucet, many of the parts are plastic, so if they are not completely winterized you can almost be assured they will fail during the first hard freeze.
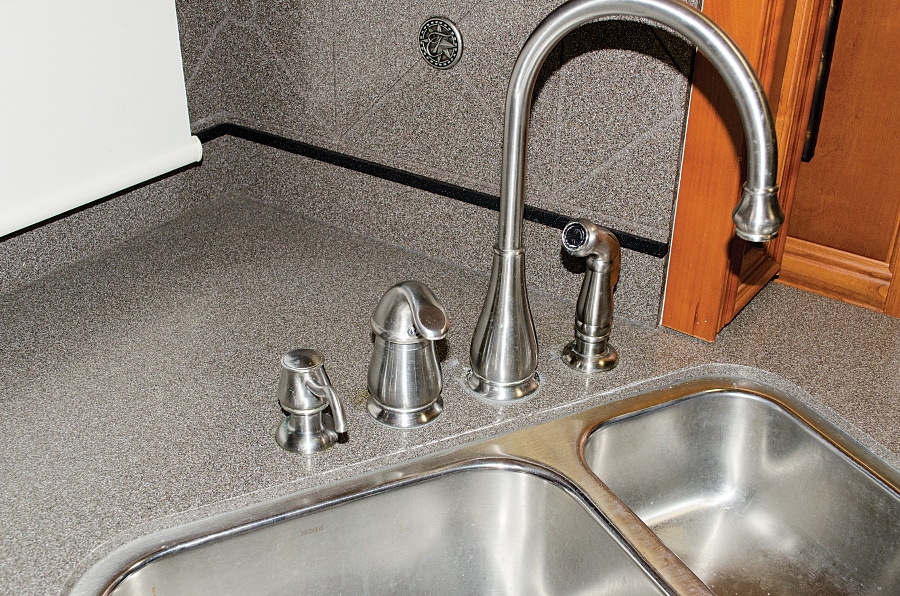
As you can see, our old faucet included a soap dispenser and a separate sprayer for a total of four holes, so we selected a new faucet that has the same configuration for the easiest install. Before you remove each of these components, make a note of which goes into each hole. Remember that the spout has to access both sides of the sink, so it is usually positioned in the hole that is in the centerline of the two sinks (if your setup has dual sinks).
The old kitchen faucet in our Tiffin motorhome not only had an annoying drip, but the finish of the 9-year-old metal had started looking rough, so we decided it was time to replace the faucet with a completely new unit.
If you make the decision to replace the entire faucet, there are a few things you need to make note of before purchasing a new unit. First, look at the current setup and determine how many holes are occupied by the faucet, valve, sprayer and/or soap dispenser. In our case it was easy to determine because there were four distinct fixtures all occupying their own hole. However, sometimes the fixture uses an escutcheon plate on top of the counter, which makes the number of holes needed more difficult to determine. It may be necessary to look under the sink, or completely remove the faucet, before buying a replacement model.
Once that’s settled, another important aspect of a successful changeover is determining the diameter of the holes in the countertop. Each faucet manufacturer has a different requirement for the diameter of each of the holes. This measurement also dictates where each part of the faucet can be mounted, so if you want to change the position of the handle or the spout it may or may not be possible depending on the configuration of the new faucet and the diameter of the holes in your countertop.
[satellite gallery=12 thumbs=on]
Another important consideration is the diameter and type of the water-supply lines in the motorhome that will be connected to the new faucet. There are two common types of supply-line fittings currently in use: a female 3â„8-inch compression fitting, or, as in our case, a ½-inch female pipe-thread fitting. When we went shopping for a four-hole faucet, we found that most of them used a 3â„8-inch compression fitting, so we also had to purchase an adapter to mate the two types of fittings.
This project is actually quite easy and requires just a few hand tools, so if you are flexible enough to crawl under your motorhome’s kitchen sink there is no reason you can’t perform this DIY project in your driveway, or even while parked at a campground.
The only safety precaution here is to make sure you first disconnect the water-supply line to your motorhome and completely drain the pressure off the water system by turning on several faucets until there is no water flow on either the hot or cold lines.
This easy project only takes about an hour and you’ll save money by doing the work yourself.