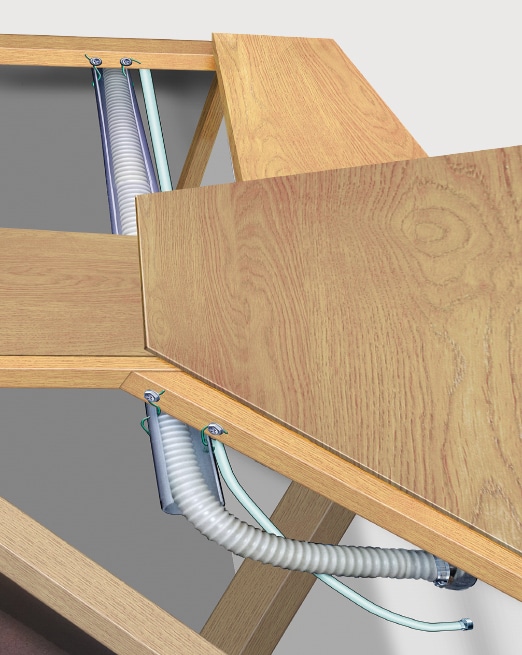
We had a problem in our Class C motorhome with the gravity-fill freshwater tank taking a long time to accept water. The freshwater tank is under the bed and the fill is on the same side of the motorhome. A plastic hose, 4 or 5 feet long, channels water from the outside fill port to the freshwater tank and a smaller plastic tube vents air from the freshwater tank to the freshwater fill port.
When I lifted the mattress and removed the panels to see the hoses, I found two problems. The water fill inlet on the freshwater tank was only a bit lower, maybe an inch or two, than the outside fill port. The weight of the water in the plastic fill pipe caused the pipe to drop and collect water, which meant water coming into the fill pipe had to push the water that had pooled in the fill pipe out of the pipe into the tank. The second problem was that the vent tube also drooped and collected water, blocking the release of air from the freshwater tank.
 |
 |
I used a section of lightweight, 2-inch electrical conduit to make a trough (or guide) for the freshwater fill tube to rest in so that it would maintain a constant slope to improve water flow through the fill pipe. I had a scrap piece of lightweight (schedule 20), 2-inch electrical conduit. You can use standard weight (schedule 40) if you can’t find the thinner walled conduit or water pipe. At the home improvement center, a 10-foot standard length of either 2-inch PVC water pipe or 2-inch electrical conduit is $10 or so. Often, you can buy shorter lengths.
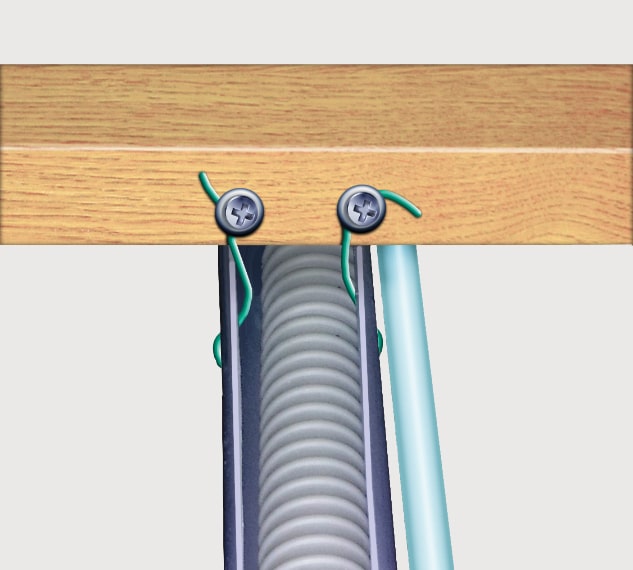
I set the table saw blade depth at about a half-inch and cut the PVC conduit/pipe along its length to make an opening wide enough to allow the freshwater fill pipe to fit inside. I then used scrap electrical wire and screws to mount the conduit/pipe to the supports under the bed. I also replaced the vent tube with new clear tubing and tied the vent tube to the freshwater fill guide so any water that got into the vent tube would either drain back into the freshwater tank or out of the vent opening at the freshwater fill port. The tubing connects at both ends (the water fill port and the freshwater tank) with a simple clamp. I removed the tubing and took it to the local home improvement center and bought a 10-foot roll of tubing for less than $10. I needed less than half of that, so I left the remainder rolled up next to the freshwater tank in the RV for the next replacement.
Dennis Jauch | Tampa, Florida