Whether you’re planning on traveling in your motorhome or storing it during cold weather, there are a few things you need to do before the freeze sets in
Before you know it, old Jack Frost will be getting his grip around the Northern Hemisphere, and for the next six months, motorhome owners will either become snowbirds or prepare their rigs for winter. Now winter doesn’t necessarily mean that the motorhome must go away until spring, but regardless of whether you’re going to use your RV or not, there are some things you need to do to protect it.
Winter Storage
The majority of RVers who stay in the northern climes from November to April put their motorhomes in storage for at least part of the winter, which means it must be protected from freezing, leaking, excessive snow loads, and pests. No matter what kind of motorhome you own, it’s still a significant investment that requires care and protection, not to mention the fact that you want it available and usable when you’re ready to hit the road.
The first and most obvious thing to do is to protect the plumbing system. This includes the entire freshwater and sanitation systems. Failure to protect these systems, even for a brief period of freezing temperatures, can lead to very extensive damage.
Most, if not all, RVs manufactured today have PEX piping, which can put up with some exposure to freezing without damage. All the connections, terminations, valves, and plumbing appliances (faucets, etc.) can’t put up with it at all and will suffer some damage if the water is allowed to freeze. Older motorhomes may have gray polybutylene piping, which will easily fracture if frozen.
The best way to winterize the plumbing system is to blow it out using compressed air, followed by running RV antifreeze through the system. This way, you can be certain that everything is protected.
Winterizing Plumbing
Winterizing a motorhome is a pretty straightforward process, made easier with the right equipment, including a water-heater bypass kit and a water-pump winterizing kit. Many RVs built today come with these already installed, but if yours doesn’t, don’t worry; the kits are available in the aftermarket from companies like Camco, and are easy to install.
The water-heater bypass kit is a valve or set of valves, tubing, and a backflow preventer that is installed on the back of the water heater creating a loop in the plumbing system from the cold side to the hot side. Since most water heaters have a capacity of 6 to 12 gallons of water, filling the tank with antifreeze is not only expensive but also unnecessary. All RV water heaters have a drain plug that should be removed and left out for drainage and spring flushing. Also, filling the water heater – as well as the fresh water tank – with antifreeze always leaves a residue of antifreeze, which can be smelled and tasted for some time afterward.
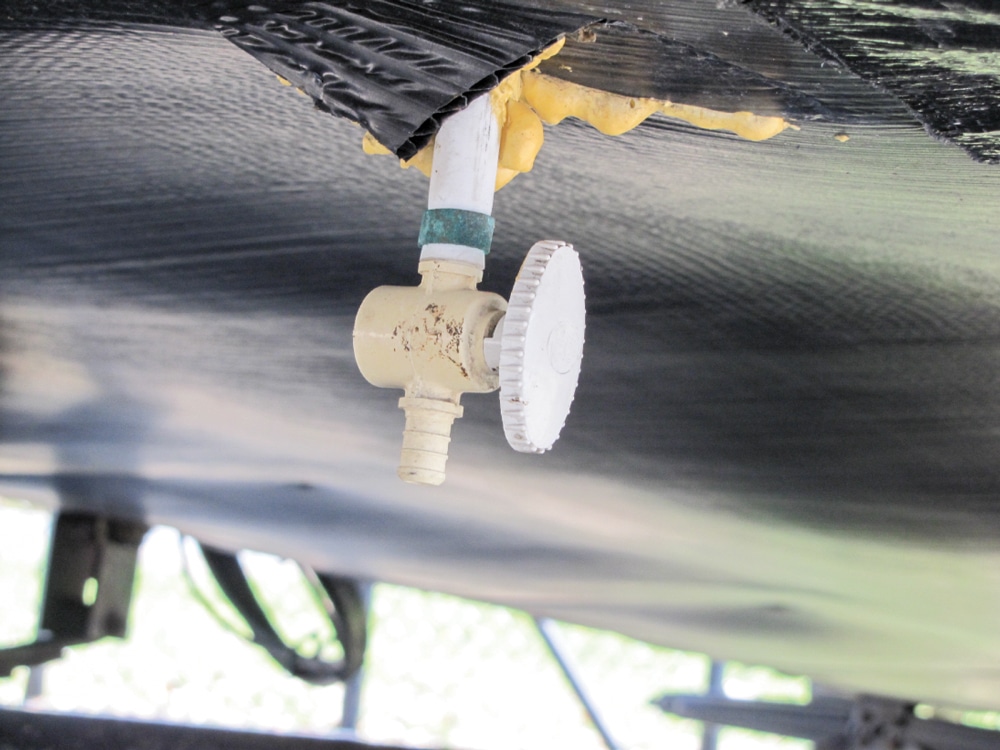
The pump winterizing kit installs inline at the inlet side of the pump and consists of a valve with a hose to draw from gallon bottles of antifreeze. This makes it possible to switch the valve so the pump either draws from the water tank or the antifreeze hose, ensuring that the pump is protected without pouring excess antifreeze in the tank, as well as eliminating the resultant leftover odor and taste from the tank.
For winterizing, you will need:
– An air compressor set to 40 psi, with a male garden-hose /Schrader valve adapter to connect to the city water inlet.
– At least 3 gallons of RV/marine antifreeze. Do not use automotive antifreeze! Note that the antifreeze comes in two levels of protection, minus 50 degrees Fahrenheit and minus 100 F.
– A drain wrench or a socket with an extension to remove the water heater drain plug or anode rod.
– A screw gun with a square-tip bit or a square-tip screwdriver to access the back of the water heater if it is behind a panel.
The first step in winterizing a motorhome is to make sure the water source is disconnected and the demand pump is off, and to release any pressure in the system by opening a faucet, then closing it.
Next, bypass the water heater and drain the water heater and the freshwater tank. Draining the water heater can be aided by opening the pressure/temperature relief valve on the front of the water heater. Leave the plug out for the winter, and leave the fresh water tank drain open. If there is a little water left in the bottom of each of these, that’s OK. We’re concerned here with burst protection, not freeze protection.
Next, screw on the Schrader air valve to the city-water inlet and connect a compressed air hose to it, again with no more than 40 psi of air pressure. While you can technically winterize without blowing out the system, I prefer doing this first. An alternative would be to also pump antifreeze through the city-water inlet to make sure that section of piping is protected, or to insert a small tool into the city-water inlet valve to allow antifreeze to backflow out of the inlet, expunging any water that might be trapped.
Once the air is connected, start your rounds. Go to each faucet in the system and open it until air comes out. Don’t forget the toilet, exterior showers, low-point drains and water-using appliances like washers, icemakers, and so on.
Next, disconnect the air and recap the city-water inlet. Go to the water pump and switch the winterizing kit to the antifreeze pickup tube, open a gallon of antifreeze and insert the tube to the bottom. Turn on the pump and repeat the rounds, and leave each outlet open until you see pink at each one. If you don’t have a winterizing kit, a flexible clear hose and ½-inch female PEX fitting will work fine, screwed onto the inlet side of the pump.
Next, turn to any special appliances you have, including the icemaker, washer or dishwasher. Once that is done, and you may have to open a new bottle of antifreeze during this process, shut the pump off and pour the remaining (at least 1 pint) down each sink and tub/shower trap.
The last step is to dump the holding tanks. When dumping tanks for winterizing, the tanks should have been rinsed thoroughly at the end of your last camping trip; dump the remaining water after you finish the winterizing procedure. As long as the tanks are thoroughly drained, it is not necessary to put antifreeze in these tanks.
Protecting the Rest of the Coach
When storing your motorhome there are some things you should do to make sure it’s ready to go the next time you want to use it.
First, remove all food items. When you’re not using the motorhome, pests like mice and bugs may want to use it for a free vacation, and nothing attracts them like food. This includes the refrigerator, cabinets and any remaining messes or spills on the floor and inside the cabinets. Remember, the base cabinets just sit on top of the flooring, so anything spilled on the floor can run into the cabinets, which is where mice prefer to play. Be sure to clean the appliances – paying special attention to the range top – and around the burners if the top opens. Leave the refrigerator open using the storage lock position or the little storage locks that were included with it, depending on the make or model.
Remove any items that may be used for pest nesting, or secure them in totes that are difficult for pests to get into. These include sheets, pillows, blankets, towels, etc. It’s usually harder for pests to get into wall cabinets, so if you have to store these items, this may be a better option.
Thoroughly clean the entire inside of the motorhome, and vacuum the carpets if you have them. Check in and around seating to make sure there’s no food left around them. Pest deterrents can be put in the motorhome if you want to be extra-cautious or you think you’re more likely to have a problem.
Clean the entire exterior, including the roof. It is imperative to check the sealants on the roof, which should be done three to four times a year, and reseal as necessary. Also do a visual check around the rest of the hardware and seals on the sides of the motorhome for damage, and repair as needed. Storage compartments should also be cleaned, and if you have a barbecue grill, take it out for the winter. Mice love the smell of a grill just like we do, and they’ll make a mess if they get into a barbecue. Check underneath the motorhome, if you can, for any large holes or openings and reseal them. Spray-foam insulation from your local home center works well for this.
Batteries are best removed and stored in a cool (but not freezing) location unless you plan on keeping them connected to a charger. Fully charged batteries are less likely to freeze in a more moderate climate such as in the United States, as temperatures need to dip down to a frigid minus 76 F to do so.
Covering the motorhome is strongly recommended for long-term storage. Environmental exposure is very hard on any motorhome; spending a few hundred bucks to save the exterior is a good investment. Using tarps is not recommended, as the coarse texture of the tarp can cause wear on the surfaces of the motorhome. There are a number of commercially available RV covers that do a better job, and those with Tyvek tops allow moisture to escape, which prevents mold and mildew from forming underneath. Tires should be cleaned and covered while in storage, properly inflated, and parked on a surface other than the ground, like wood or plastic leveling blocks.
Winter Travel Can be Exhilarating
It’s not uncommon for owners to automatically store their motorhomes during winter out of habit, thinking there’s no practical option for traveling in cold weather, where temperatures and road conditions can change at a moment’s notice. But, with proper planning, winter RVing can be a great adventure, even when the snow is flying.
One of the most important considerations is the water system. Some motorhomes are built to withstand the rigors of frigid weather and there are those that can be modified to protect the water system and be comfortable inside. Many new motorhomes are even marketed as four-season ready, which means the factory took additional steps to improve insulation and route heated air to areas where freeze-ups are likely when the temperatures plummet. Other considerations include a good-size battery bank for those off-the-grid adventures and dual-pane windows. Icy roads can be difficult to navigate, so remember to pack some type of legal traction device for the tires.
When you return from any winter trip, be sure to rewinterize the motorhome before putting it back into storage. The process becomes easier after doing it a number of times.
By following the above steps, you can rest assured that you won’t have any repair bills as a result of freezing or improper storage, and your motorhome will be ready to go for another travel season.
About RV Antifreeze
Not all antifreeze is the same, and this is very important for RVers to understand. Most automotive antifreezes are made from ethylene glycol, which is toxic to people, animals and the environment. This should never be used in a potable water system, or in the holding tanks of an RV.
RV/marine antifreeze is made from propylene glycol, and is considered safe. In fact, propylene glycol is even used as a food additive.
An important point is that RV antifreeze will freeze, and in fact the minus 50 F version will freeze at 10 F. The difference is it will not expand the way frozen water does, so it in essence provides burst protection, rather than freeze protection. It will not expand until it reaches about minus 50 F. If temperatures where the motorhome will be stored will drop below that, the more concentrated minus 100 F-rated antifreeze should be used. Camco offers a concentrated antifreeze that comes in a partially filled jug and is mixed with water prior to use.
Winterizing Special Appliances
Many late-model RVs, especially motorhomes, are equipped with icemakers, clothes washers, dishwashers and instantaneous water heaters that require special handling when winterizing.
The most common special appliance is the icemaker. In the 1970s and ’80s, many higher-end coaches came with built-in U-line stand-alone icemakers. Today, many RV refrigerators come with icemakers in the freezer, whether installed in an RV or residential-style appliance. In the case of RV-style units, it is possible to apply 120-volt AC power to the icemaker valve to make it open out of sequence to winterize it, but this requires making a special cord set and is not recommended for those who aren’t very familiar with the appliance and/or electricity. Most motorhomes with residential refrigerators will require the waiting-and-running method. Basically this means winterizing the entire motorhome and then running the refrigerator-freezer until it makes ice and the antifreeze is passed through the system into the ice tray. If the winterizing process is started when the refrigerator has been off, it can take 24 hours or more to complete this cycle with the motorhome plugged in and the refrigerator running. This same process will work with an RV-style refrigerator as well; just remember that the motorhome still needs 120-volt AC power for the icemaker to operate.
In all cases, be sure to refer to your appliances’ owner’s manuals, or check with the component/appliance manufacturers for more specific instructions on winterizing.