Reduce the mess – and the slippery slopes – with near-waterless fiberglass roof cleaning
Cleaning the roof of a motorhome is never a particularly easy task, but some ways of keeping it clean are easier than others. In the May 2010 issue (“Winning the Battle With Rooftop Mold and Mildew”) we covered some products and tips for cleaning a one-piece fiberglass roof that required the use of a water hose and various cleaners. Since then we have continued to search for better, easier ways of conquering this task and we found a new method that is waterless. We should point out that waterless cleaning doesn’t mean dry; rather, this method no longer requires access to running water. In fact, no water is required at all.
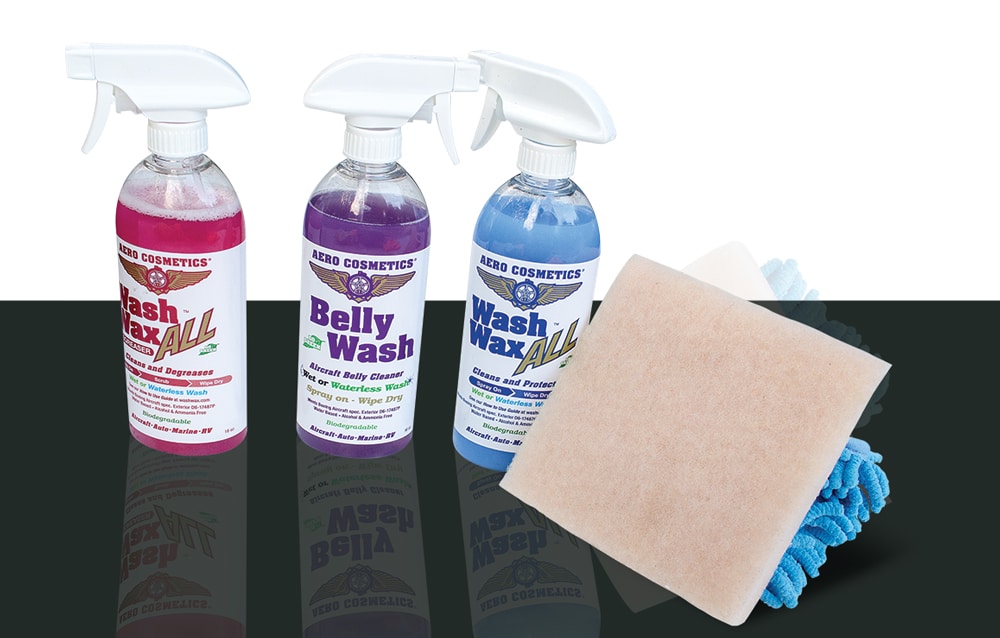
The Wash Wax All products we used include the red Wash Wax All Degreaser (left), the purple Belly Wash (center left), the blue Wash Wax All Cleaner, an Aero Scrubber Pad and a Waterless Mop Head (right).
The disadvantages of the traditional way of cleaning a fiberglass motorhome roof are many. First, you need access to running water, and also to be in a place that allows you to use running water for washing your coach. Since many RV parks don’t allow rig washing onsite, that alone relegates the procedure to your driveway or other areas where washing is allowed. The next problem is that while you are on the roof cleaning off all that mold and mildew, it invariably gets rinsed away with the water hose and down the side of your motorhome – which usually means streaks and residue are left on the paint and extra care is required. Another disadvantage is that with the traditional hose-down method you are forced to do the entire job at once or else be faced with lugging the water hose and other products up and down the ladder multiple times. Then of course there is the issue of safety. Walking around on a wet, slippery roof is tricky at best and requires extreme caution.
When using the waterless method, all of those disadvantages are alleviated. We recently tried a number of cleaners from a company that produces a waterless cleaning product called Wash Wax All (www.washwax.com) that we tested in the May 2011 issue (“Getting the Dirt Off”). Many of the company’s products are used in the aviation industry, where cutting heavy dirt and crud from large aircraft is the norm. After reading about its line of aircraft cleaners, we contacted the company and asked if its product would work on a fiberglass roof – without hesitation, we were met with a resounding “Yes!”
We ordered a few bottles of each of the heavy-duty cleaners, Wash Wax All Degreaser and Belly Wash. The Belly Wash is aimed at the dirtiest areas when nothing else seems to work and is safe for aluminum and fiberglass, which makes it perfect for a typical fiberglass roof. We also ordered the Aero Scrubber pad and handle, which is manufactured to work with these cleaners as well as removing bugs from the front of a motorhome (with the Wash Wax All product) and other really dirty or hard-to-clean areas. Each cleaner has specific uses, so make sure you follow the directions to prevent any issues with using the wrong one on paint or sensitive plastics.
| [1] After a year of sitting outside, the roof on this coach was in need of some serious cleaning. Notice the black dirt as well as the green mold toward the front. If your coach is covered with leaves and other debris you will first need to remove the offending parties by sweeping or blowing them off with a leaf blower before you begin. | 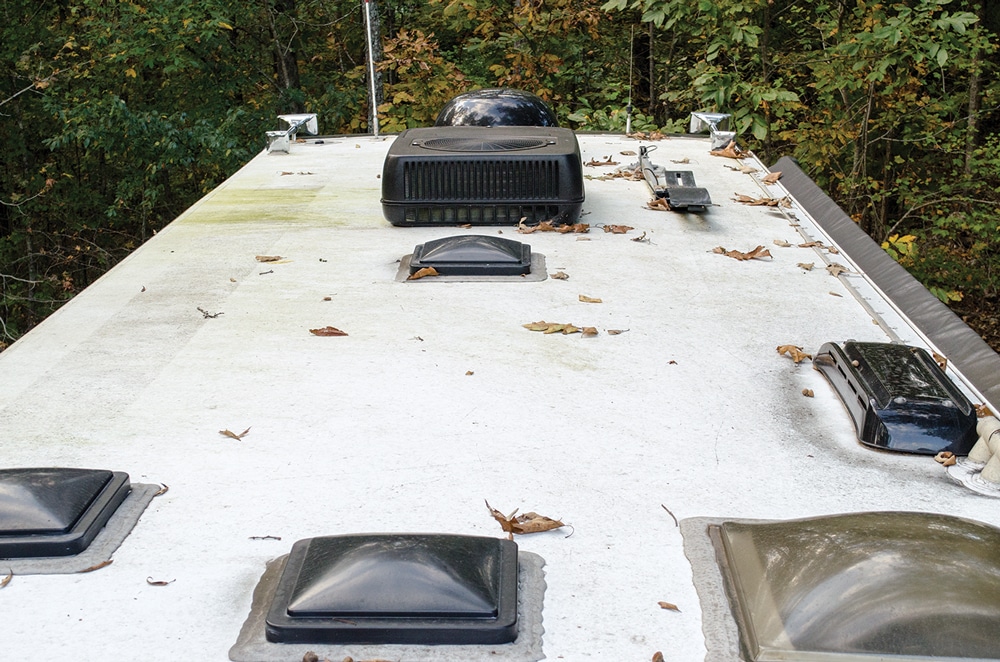 |
| [2] To get started, spray a small 2-by-2-foot area with the Belly Wash, making sure the area is completely covered before you begin scrubbing. The red-colored Wash Wax All Degreaser is safe for plastics and clear-coat paint, but the purple Belly Wash shown here is not. Make sure you use each product as directed. | 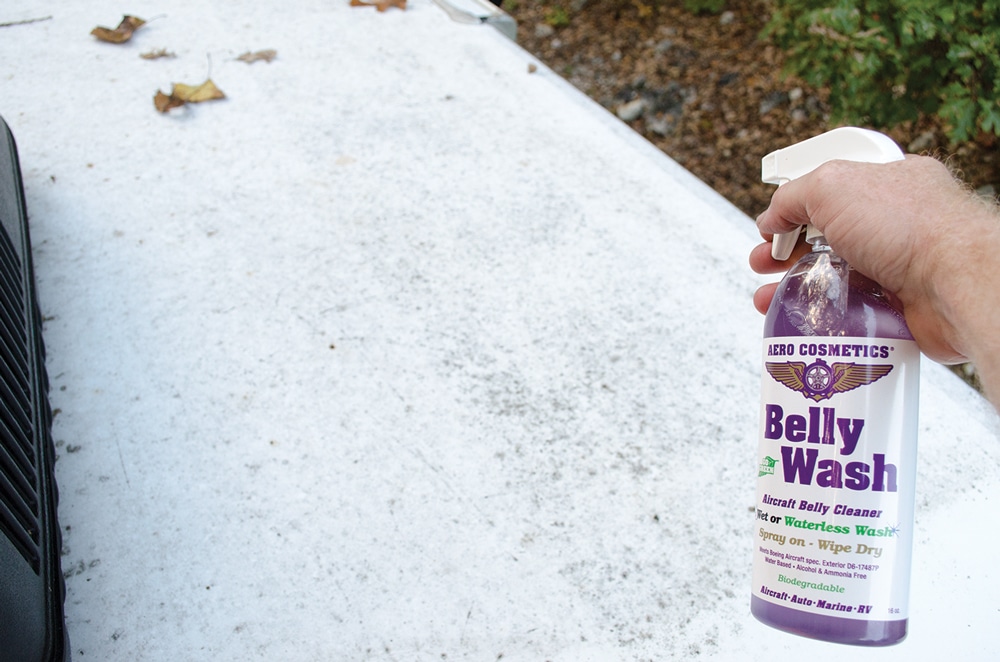 |
| [3] After spraying the area with Belly Wash, use the Aero Scrubber and start scrubbing. You will see the dirt and grime start to dissolve quickly. Usually it takes two or three minutes of scrubbing per area to get it clean. | 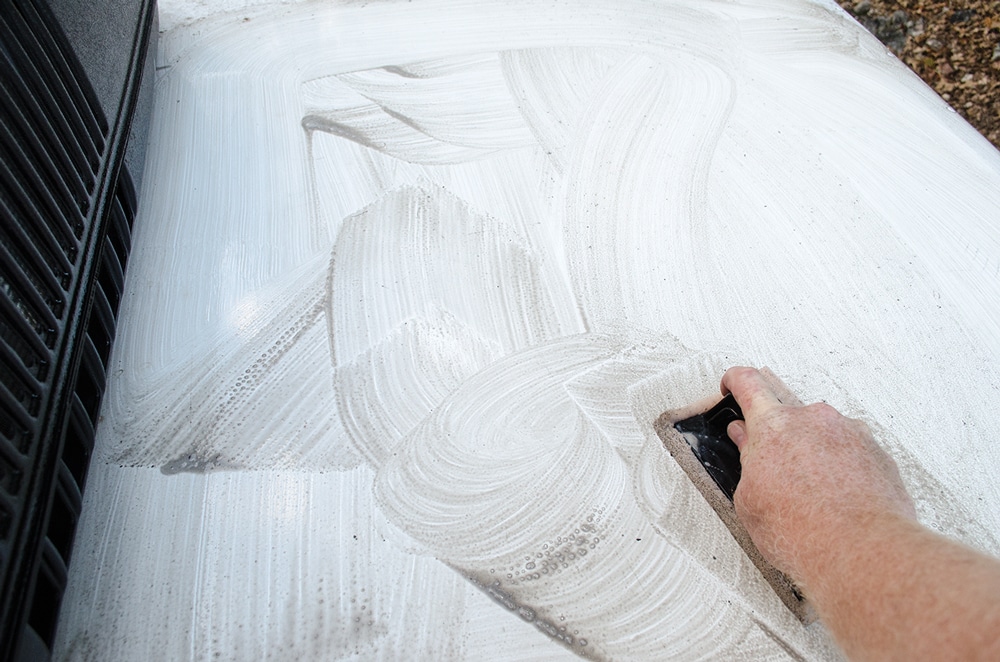 |
After trying countless products in an attempt to clean a motorhome roof using a waterless method, we had all but given up until these arrived. Nothing we tried would cut through the months of mold, mildew and road grime that had accumulated and, frankly, we didn’t think these would either.
![[4] Use a microfiber towel to wipe up the dirty remains from the surface. If an area dries out while cleaning, simply spray it again and wipe it up. Some really stubborn stains may require two applications. Turn the towel frequently, and swap out with clean ones after both sides get dirty.](https://www.rv.com/wp-content/uploads/2020/12/6824.jpg)
[4] Use a microfiber towel to wipe up the dirty remains from the surface. If an area dries out while cleaning, simply spray it again and wipe it up. Some really stubborn stains may require two applications. Turn the towel frequently, and swap out with clean ones after both sides get dirty.
![[5] While on the roof we also used the red Wash Wax All Degreaser product to clean the HVAC covers, the plastic skylights and the TV antenna, as well as the roof vents and satellite antenna dome. Since it is safe for plastics, you only want to use the degreaser on these more sensitive areas. As you can see it worked great and removed all signs of mold and mildew. We used the same method of spray, scrub and wipe clean.](https://www.rv.com/wp-content/uploads/2020/12/6825.jpg)
[5] While on the roof we also used the red Wash Wax All Degreaser product to clean the HVAC covers, the plastic skylights and the TV antenna, as well as the roof vents and satellite antenna dome. Since it is safe for plastics, you only want to use the degreaser on these more sensitive areas. As you can see it worked great and removed all signs of mold and mildew. We used the same method of spray, scrub and wipe clean.
The very dirty roof shown in these photos is on a 36-foot Tiffin Phaeton motorhome. To completely clean the roof as well as the HVAC covers, skylights and satellite dish cover (we used the red Degreaser on them), it took almost 32 ounces of each of the products shown. The Degreaser sells for $14.95 for 32 ounces (less expensive per ounce if you buy a gallon) and the Belly Wash is $13.95 for 16 ounces (we used two), or $39.95 for a half gallon. Our total chemical cost was a very reasonable $42.85.
![[6] Instead of cleaning the entire roof in one fell swoop, we split up the work and did it over a period of three sessions, each one about 40-50 minutes long. The ability to divide the work while not worrying about the cleaning solution and dirt running down the sides of the motorhome are two of the biggest advantages of this method.](https://www.rv.com/wp-content/uploads/2020/12/6832.jpg)
[6] Instead of cleaning the entire roof in one fell swoop, we split up the work and did it over a period of three sessions, each one about 40-50 minutes long. The ability to divide the work while not worrying about the cleaning solution and dirt running down the sides of the motorhome are two of the biggest advantages of this method.
[ Micro Mania ]
We used a lot of microfiber towels, so we suggest you buy a large pack at a local warehouse club like Sam’s Club or Costco, or at Camping World. Since you are just mopping up the residue off the roof there is no need to buy a really expensive microfiber towel.
After each session we washed the dirty (and they were VERY dirty) microfiber towels in a (home) washing machine in hot water and they bounced back for subsequent days on the job with no signs of distress. If you are full-timing you may want to wash these towels somewhere other than your built-in washer. After wiping each area dry, the towels actually take the majority of the moldy, dirty mess, so make sure you have plenty. It’s also a good idea to have something to place them in on the roof, like a bag or a nonabrasive container; otherwise the dirty towels will contaminate the areas that were just cleaned.
| [7] The entire process took a total of 2½ hours and as you can see the results are amazing. Not only is this method easier, it is also safer as you are not walking on top of a wet and slippery roof. | 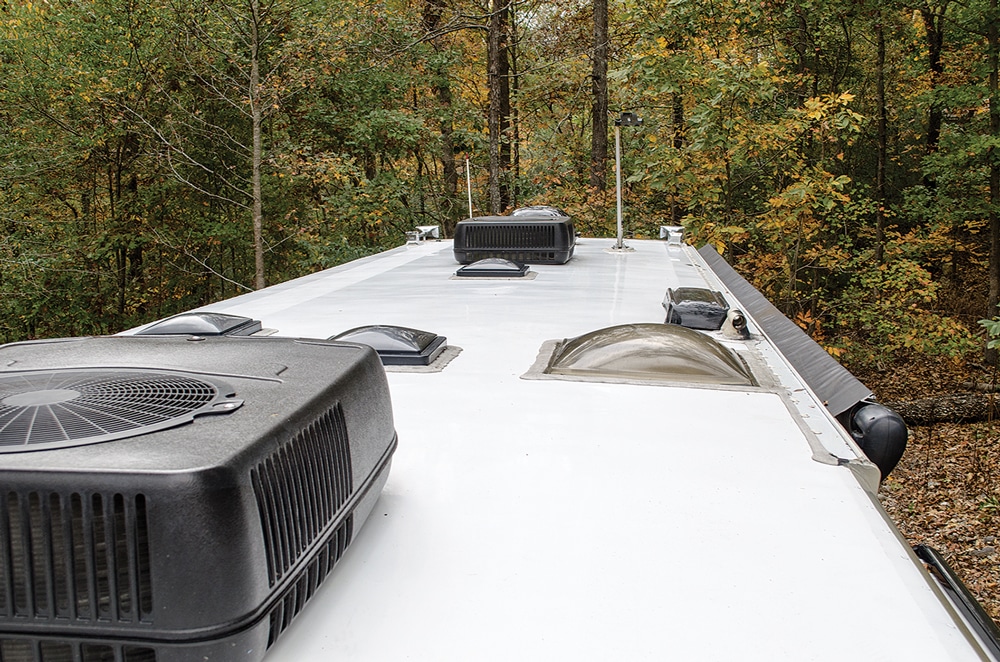 |
| [8] After the roof was shiny and clean, we applied the Wash Wax All product using the two-sided “mop.” Spray the product on one side, simply mop the (already cleaned) roof with it, and flip the mop over to dry it off. The Wash Wax All leaves a smooth, slick surface that will stay cleaner longer – just, as we found, it does on the painted surfaces of the coach. | 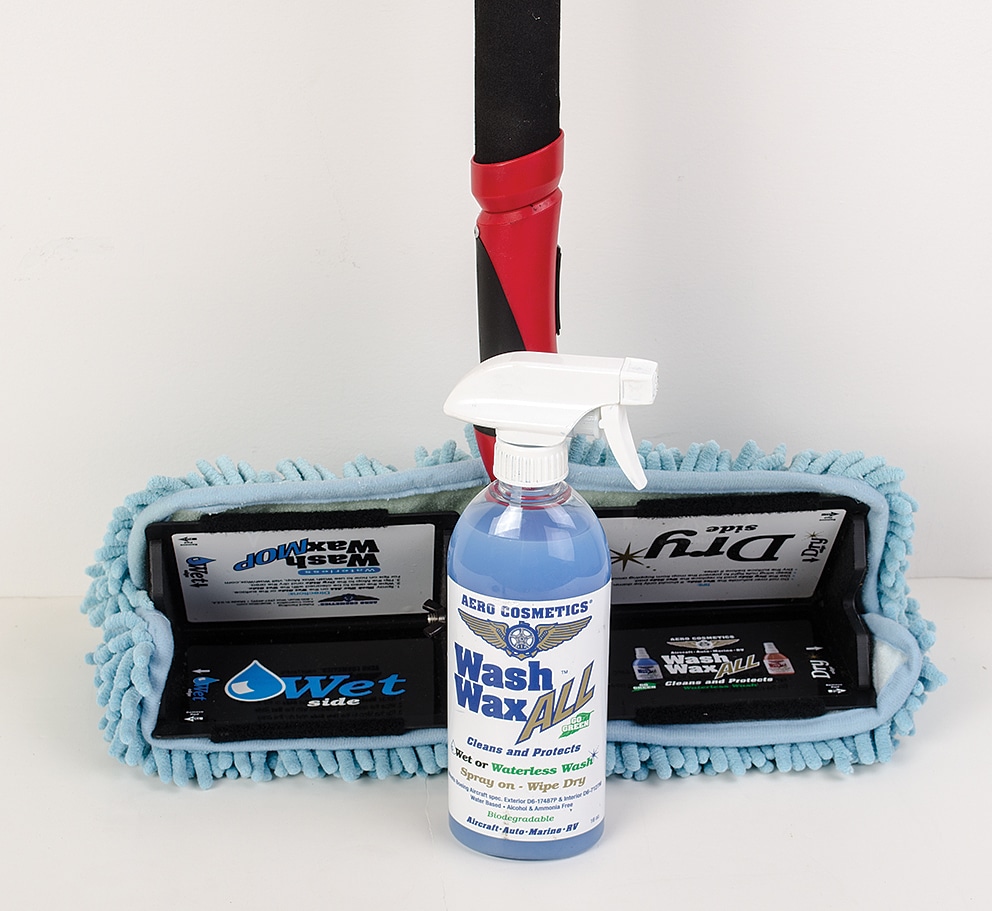 |
| [9] This job requires that you crawl around on your hands and knees, so a good pair of kneepads will ease the pain. | 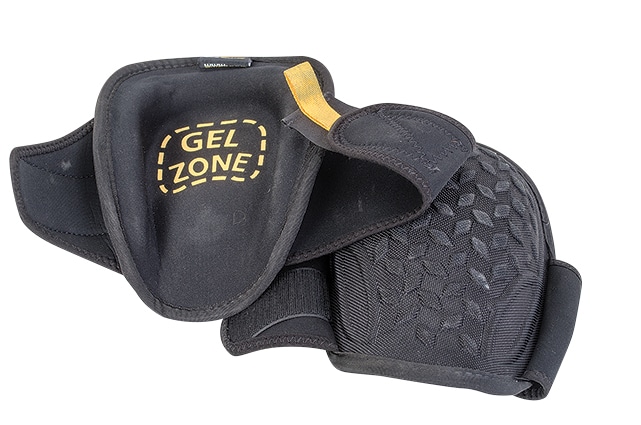 |
Source
Aero Cosmetics Products
800-927-4929 | http://washwax.com