Motorhome Water Heater Maintenance
A photo tutorial to taking care of your RVs residential water heater
Image Caption:
“Residential” is a word we see a lot when reading about motorhomes. That’s because it’s really the only descriptor that allows those of us living in stick-and-mortar homes to relate to the various attributes of a contemporary home-on-wheels, not the least of which are the appliances. After all, modern conveniences are a good indicator of how livable a motorhome will be; without them, extended trips or full-time living would be very inconvenient if not impossible.
Chief among a motorhome’s key appliances is the humble water heater, which provides us the freedom to take hot showers/baths, clean dishes after an evening’s meal and disinfect our hands after using the restroom or emptying the holding tanks. Without it, life would still go on, but no one could argue that it would be a lot less pleasant.
What is a residential water heater?
Though there have been recent advances in hot-water delivery, including hydronic systems and various tankless on-demand water heaters, the staple of the RV industry remains to be smaller versions of what we use in our permanent homes (most commonly 6- or 10-gallon capacity), manufactured by either Atwood (Dometic) or Suburban, a division of Airxcel Inc. They’re proven designs that provide a reliable hot-water source and can last for years if properly maintained. The main difference with regard to DIY service on these units has to do with the tank design; Atwood uses an aluminum-clad tank that does not require an anode rod, while Suburban models are porcelain-lined steel and use an anode rod.
Anode Rod or no Anode Rod?
What’s the difference? It’s mainly philosophical. Atwood claims that the aluminum tank lining acts as the anode and the metals in the water serve as the cathode so an anode rod isn’t required. Suburban uses an anode rod to draw the harmful electrolytic process away from the water-heater tank lining, focusing corrosion on the anode rod and sparing the tank walls. When servicing a Suburban water heater, it’s important to inspect the anode rod; corrosion eats it away over time, and once it has lost 75 percent of its material, it should be replaced. The anode rod should be inspected at least every six months and more often in areas with extremely hard water.
Simple Seasonal Water Heater Maintenance
Other than these design details, maintaining either brand is a similar process; the tanks should be drained and flushed at the end of every season, the burner tube inspected and igniter cleaned at the beginning of each season. We stopped by C&S RV Service Center in Oxnard, California, and observed as their technicians performed routine preseason maintenance on a 6-gallon Atwood and a 10-gallon Suburban. Performing this maintenance consistently will ensure that the water heater is always ready for use and will last as long as possible.

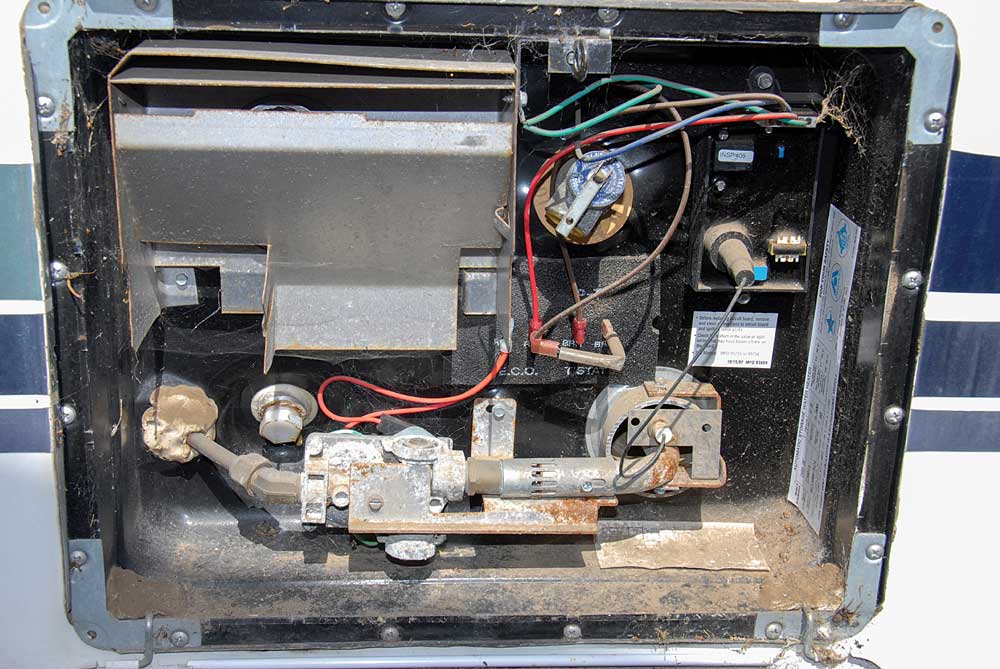
If your motorhome has been in storage for a season or more, this is likely what you’ll find when you remove the cover – dirt, dust and spider webs. In fact, there was still a spider present when we took this photo. Photos by Chris Hemer

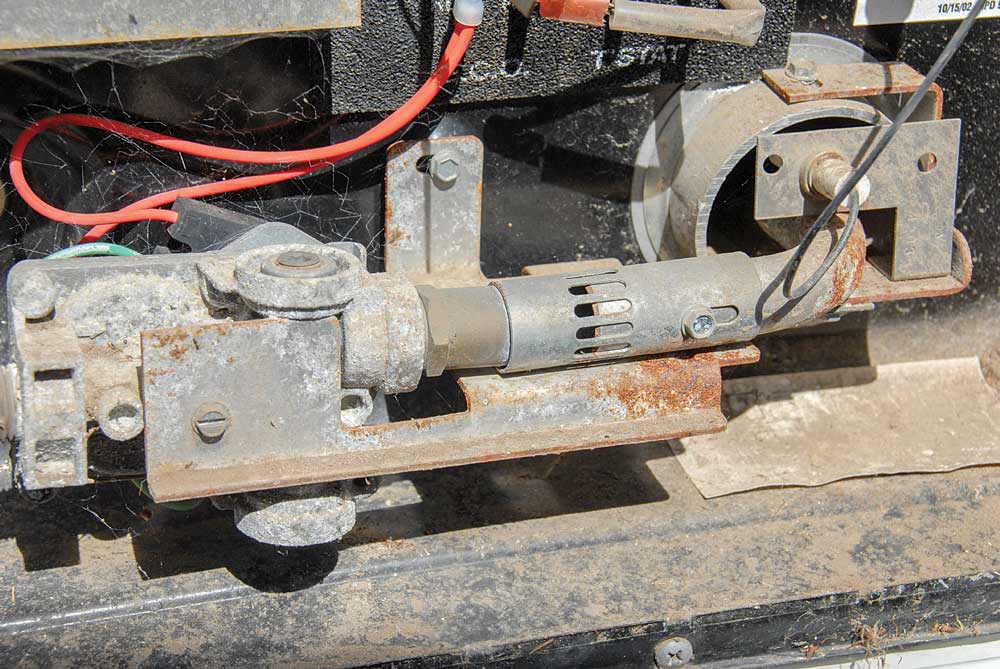
While dirt and other debris in the water heater enclosure aren’t attractive, they don’t do any harm. However, spiders and other critters love to build their homes in the burner tube, and that can reduce or obstruct the flow of LP-gas to the burner.
On this Atwood water heater, the first step is to remove the igniter assembly (the thing that makes that “tick, tick, tick” sound before the burner lights).
The unit is unplugged, then the single screw that holds the bracket in place is removed.
With the screw removed, the igniter bracket assembly can be lifted out of the way.
Use a piece of fine-grit sandpaper or emery cloth to clean the igniter electrode and ground wires. Make sure to hold the igniter assembly by the two wires as shown, not by the white porcelain, as it can crack if you’re not careful. If the porcelain is cracked, the igniter must be replaced.
The water-heater igniter is very similar to an engine’s spark plug – when it’s dirty, it doesn’t work very well. But also like a spark plug, its function can easily be restored by gently sanding off oxidation that can form on the metal wires over time. For the purpose of comparison, we cleaned just the bottom ground wire; compare it to the greenish-brown electrode.
If you have access to compressed air, blow out the burner tube as shown to clear any spider webs or other debris. If compressed air isn’t available, you can remove the slotted burner tube cover (held in place with one screw) and run a flexible brush through the burner tube. Some spiders and many insects are attracted to the smell of the odorant in LP-gas. Their fine, silk-like webs will impede the proper flow of LP-gas. Use a burner brush to clean out the burner. When reassembling an Atwood burner, after reinstalling the igniter (below), adjust the shutter, which is the sliding vent on the burner tube, one-quarter of the way open to start, so the flame is mostly blue with a very slight orange tint here and there. When you walk away a few feet, the sound of the water heater should quiet down. A “roaring” water heater is too lean (too much air going in) and a lazier orange flame is too rich and needs more air. Shooting from the exhaust is an indication of a rich air setting and/or a blocked tube by a spider web. A Suburban burner is not adjustable.
The igniter assembly can then be reinstalled and plugged back in.
Next, check the emergency relief valve by pulling up on the handle. Water from the tank should start to trickle out of the valve if it is working properly. If the valve is sticky or won’t move, it must be removed with a pipe wrench and replaced.
Here is a good example of a frozen emergency relief valve. Note the calcium deposits and rust that eventually prevented the valve from functioning.
The water heater should be drained at the end of every season. Atwood water heaters use a plastic plug that is easily accessed using a ratchet, extension and 5â„16-inch socket.
Here is a plastic drain plug from an Atwood unit that is several years old. Note the silt residue caused by water-tank corrosion and infrequent maintenance. Metal plugs should not be used.
Although it looks different, servicing a Suburban water heater is a similar process. First, unplug the electrode wire, as shown.
The electrode assembly is secured with one screw.
The Suburban electrode assembly is cleaned in the same manner as the Atwood. A few gentle passes with a piece of sandpaper and it will be good as new.
Checking the pressure relief valve is the same process as well. The biggest difference between the Atwood and the Suburban is that the Suburban comes with an anode-rod drain plug from the factory.
This Suburban anode rod did its job. Note that all of the magnesium has been eaten away by corrosion, leaving only the metal core. Obviously, you shouldn’t wait this long to replace the anode rod; it should be checked at least twice a year (more often when exceptionally hard water is used) for signs of corrosion and replaced when it has lost 75 percent of its material.
Sources
Airxcel Inc. – Suburban Division
423-775-2131 | www.airxcel.com/suburban
Atwood Mobile Products
800-546-8759 | www.atwoodmobile.com
C&S RV Service Center
805-983-1673 | www.candsrv.com
Western Leisure Products
800-654-2742 | www.westernleisureproducts.com


