Travel Photography Tips for Campers
Image Caption:
One of the most fulfilling aspects of traveling full time with our fifth-wheel trailer is taking photos of what we see, sharing them with friends and family, and reliving our wonderful memories. Almost everyone has a cell-phone camera in their pocket these days, but capturing truly beautiful and engaging photos is a skill that takes time to master. Luckily, it is not hard to learn, and practicing is really fun.
Each photo tells a story, and before grabbing your camera it helps to pause and think about why you suddenly feel the urge to take a photo and what it is you want to show in the image. Is it the beauty or drama of a landscape or a funny thing you’d never see at home, or is it a classic scene that makes you say, “This is the Wild West!” or “This is New England!” — or is it just to have a happy reminder that you were there, right in the middle of it all?
Compose the Shot
The essence of photography is to re-create the three-dimensional world in two dimensions, and that means viewing a scene, from near to far, as objects that relate to each other in terms of their relative size and position. This layout is called the composition of the image, and it is arguably the most important aspect of photography, whether you use a phone camera or top-of-the-line gear.
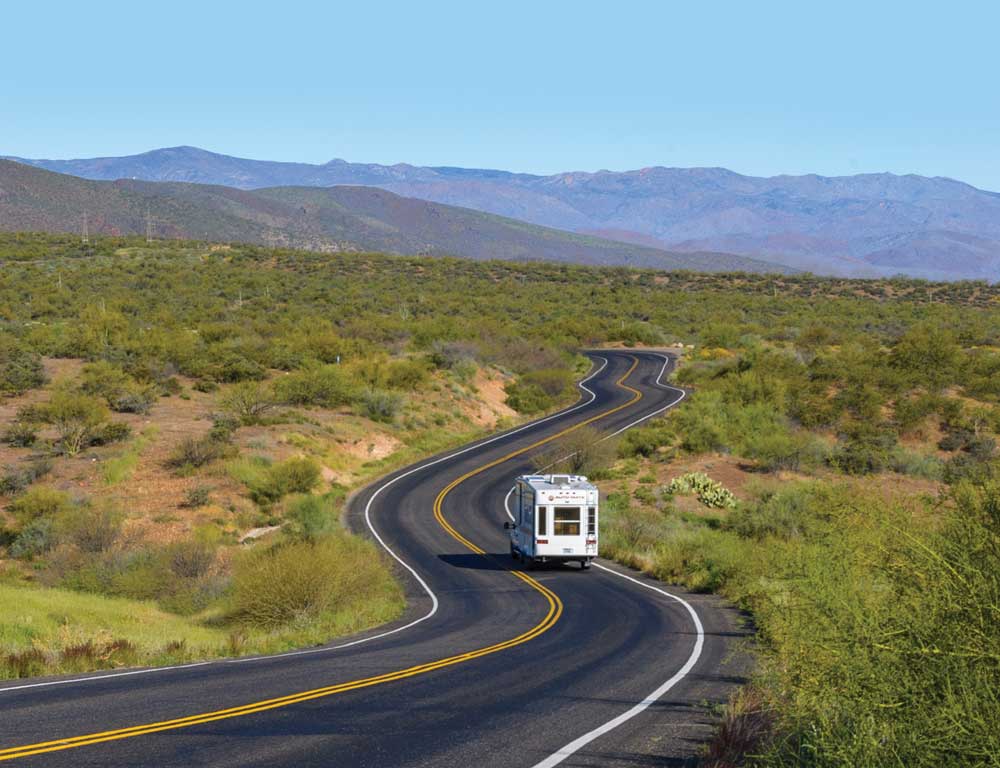
A curvy road or other diagonal lines draw the viewer into the image, especially going from left to right.
The more room a particular object takes up in a photo, the more dominant it will be as the image’s subject. If you are taking a photo of a stunning Arizona sunset, for instance, the image should be mostly colorful sky, with perhaps a small saguaro cactus to anchor the shot as being in Arizona. However, if you are taking photos of turquoise waves pounding Florida’s Emerald Coast, the image should be mostly jade-colored water and crashing surf with just a little sky and sand.
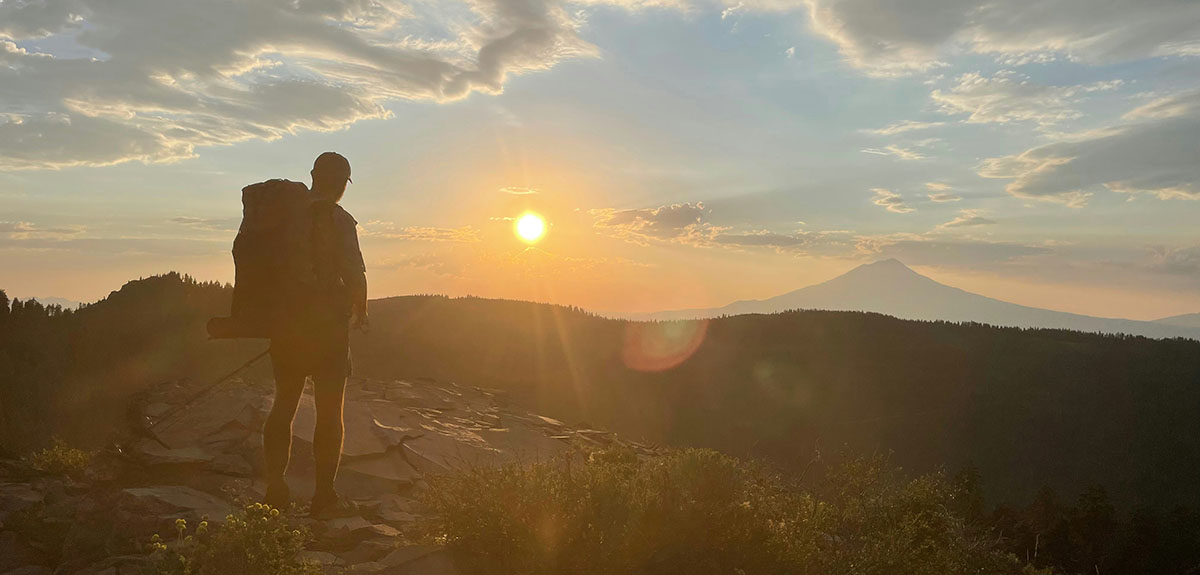
America’s most celebrated canyons are jaw-dropping in size and scale. It is a breathtaking experience to look out across the undulating sandstone and limestone ramparts of the Grand Canyon, stare down into the fairy-tale red-rock turrets of Bryce Canyon or gaze up at the sheer rock walls of Zion Canyon, but capturing the majesty and immensity of these landscapes can be a challenge. However, the size and scale are instantly comprehensible if there is a measurable object in the scene — a person, animal or tree, for instance — as it gives the viewer a way to quantify the size of the surrounding landscape. A lone person walking down a trail between massive rock formations or standing atop a towering precipice emphasizes how enormous the rocks are compared to the individual.
Posing People in your Photos
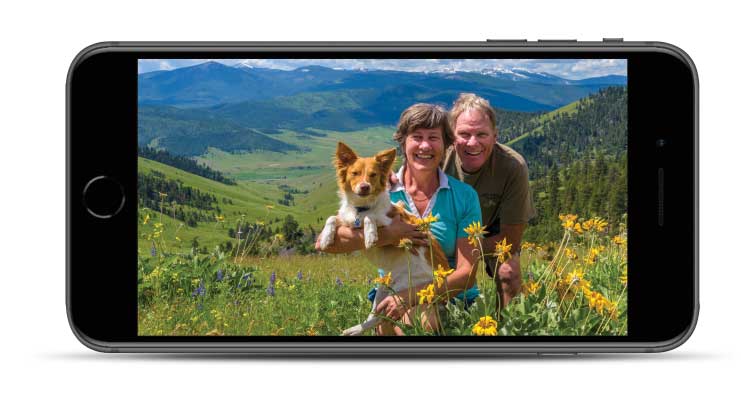
You can accentuate the people in a scene or the landscape around them by having them face toward or away from the camera. We are instinctively drawn to the eyes and facial expressions of people looking at us. So, if you want the people to be the main subject, have them face the camera and put on the facial expression you want, whether it’s a “Cheese!” smile or a serious or goofy face. If you want to draw the viewer into the landscape, have the person or people look away from the camera and out at the vista.
There is a popular Rule of Thirds in photography that recommends placing the major components of the image at positions either one-third or two-thirds of the way across the photo, vertically and/or horizontally. This is not a hard-and-fast principle, however, and I find that just shifting the subject slightly off center can make a huge difference.
Frame the Subject
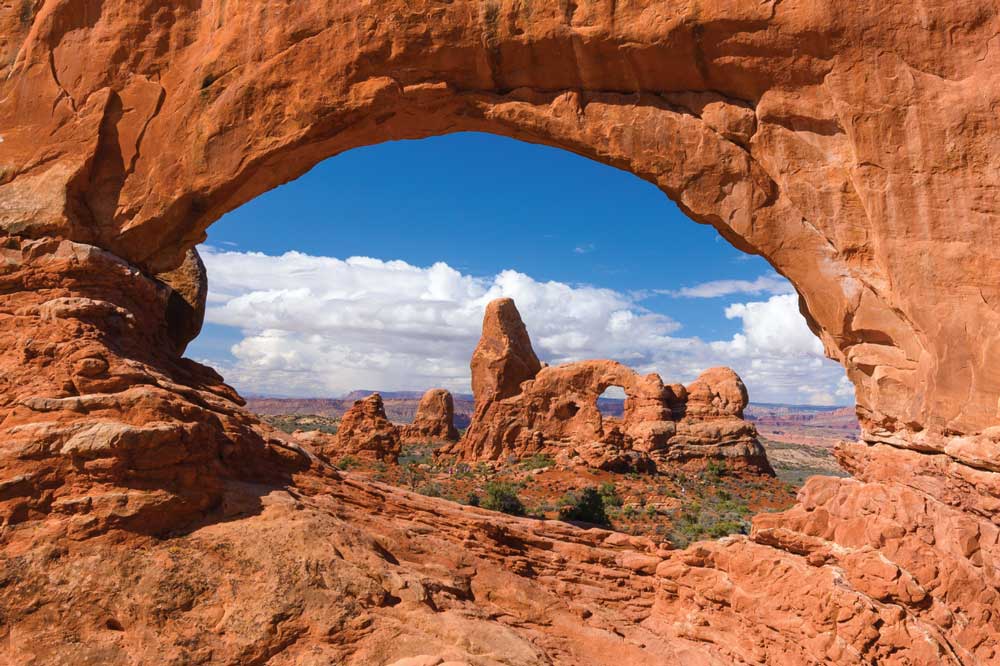
A fun way to draw the viewer into the photo is to frame the subject with another element in the scene, as shown in this window-in-a-window image of Turret Arch framed by North Window at Utah’s Arches National Park.
In addition to balancing the relative sizes of different objects in a photo, you can pull the viewer into a scene by taking advantage of diagonal lines and off-center positioning in the image. I love curvy roads, and there is nothing like a winding road or trail leading to or from somewhere alluring to fire up the wanderlust of a person looking at the photo. We read from left to right, so lines like roads and streams coming in from the lower-left corner catch our eyes, and we follow them into the center of the image.
Similarly, a subject can be framed in an image by shooting through a window or doorway, or shooting under the arch of a tree limb or between two trees or pillars. Framing one object between two others means there are three primary things in the image, and often the best balance, or “tension,” in an image is achieved by having three objects laid out in any kind of a triangular relationship at varying distances — for instance, a person in the foreground, a mountain peak in the background and trees in the midground.
One of the best ways to practice composing photos is to take them from the passenger’s seat of your tow vehicle as another person drives. We travel primarily on secondary roads, and as the scenery passes by, I watch the ever-changing relationships between the nearest and furthest things in view, snapping photos when they align best. If you are using a DSLR camera, a polarizing filter cuts the glare created by the dashboard reflecting on the windshield.
Photo-editing software or a cell-phone camera app that allows you to crop your images is an outstanding tool for learning composition. Cropping helps you learn to see where the most interesting part of an image really lies. Digital photo-editing software has replaced the old-fashioned darkroom work of the film days, and it is easy to enhance the colors, lighten the shadows and decrease the glaringly bright highlights of each photo.
Changing the colors creates fun effects, too. An image of a cowboy boot next to a saddle or of the front door of an Old West saloon can evoke another era by casting it in sepia tones rather than the full color spectrum. Similarly, some not-quite-perfect images can conjure up Ansel Adams once transformed to black and white.
Capture the Light
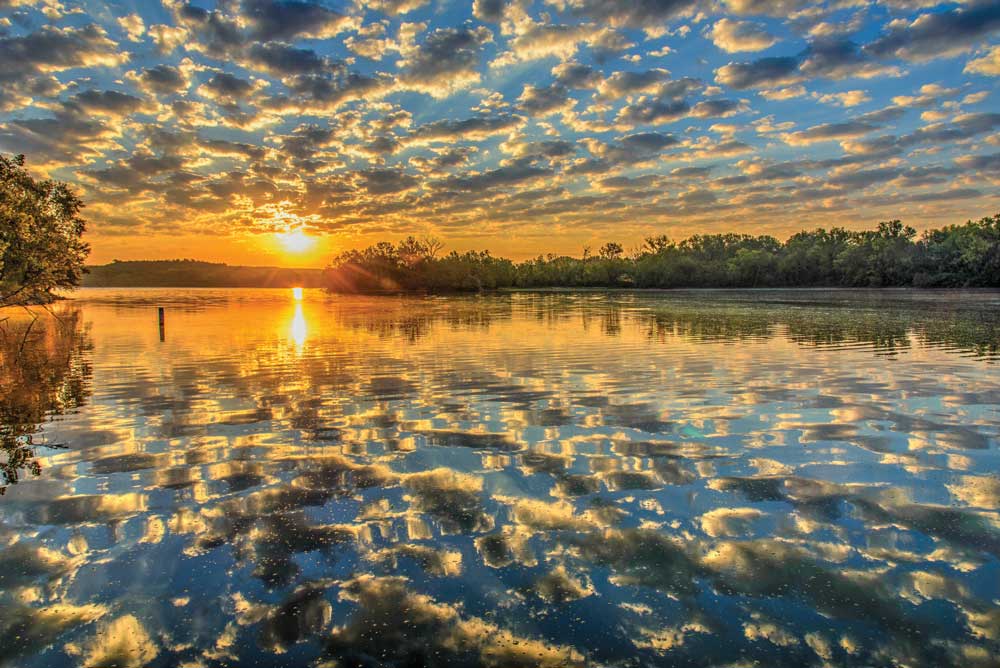
Sunrises and sunsets offer the most dramatic natural colors, and the hour after sunrise and the hour before sunset can bathe the landscape in a wonderful rich pink and orange glow accompanied by deep shadows. It’s hard to be out and about at dawn and miss the campfire happy hour in the evening, but these are great times for photography. An image taken at noon will be far more appealing when it’s shot during either of these “golden hours.”
The moments before and during sunrise can result in spectacular images, but shooting them requires leaving a warm bed.
Early morning is also a time when the air tends to be still, which allows for beautiful reflection photos at lakes and ponds where the water acts like a mirror for the surrounding trees, sky and mountains. Also, delicate wildflowers stop wiggling and can be captured in sharp images only when there’s no breeze blowing them around. Another huge reward for climbing out of bed before you really want to is that dawn is when the animals come out. Whether it’s bighorn sheep, elk, herons or bluebirds, the best time to see them is when they are foraging for breakfast.
Time the Exposure
When shooting wildlife with a DSLR camera, set the shutter speed quite high (around 1⁄2000 of a second) to catch the animals’ movements without blurring. Approach wildlife very slowly and avoid eye contact as you walk toward them to prevent scaring them away. Once set up, focus on the animal’s eye, if possible, as that is what people admiring your photo will be drawn to. For safety, use a long lens and shoot from a distance when taking photos of bears and bison.
Get in the Picture
Selfies are all the rage these days, and selfie sticks help gain a bit of distance between the camera and the people in the photo. Just make sure your enthusiasm for that awesome shot doesn’t send you over the edge as you back up into the scenery behind you.
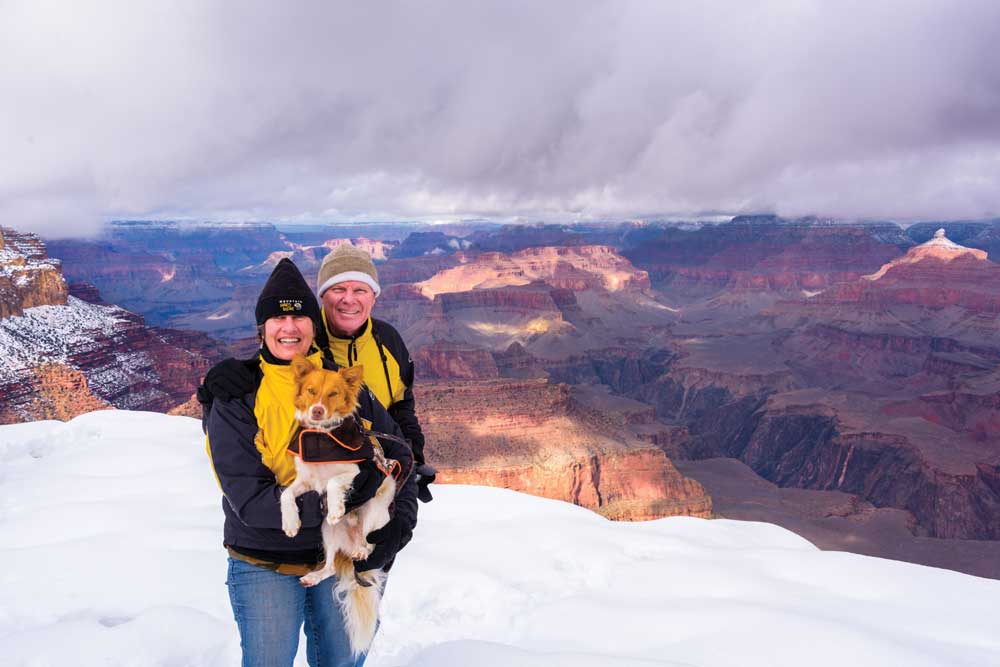
Beyond taking selfies, there’s a longstanding tradition at scenic over-looks of sharing cameras so everybody can go home with a photo of themselves against the stunning backdrop, as evidenced by this shot of Mark, our dog, Buddy, and me at the Grand Canyon.
Finding Subjects
At campsites, hang a suction-cup-mounted hummingbird feeder on your RV’s window and shoot through the window from inside to capture the antics of these captivating birds. Place a shallow dish of water on the ground under a nearby bush to attract other birds and small critters. Many campground chipmunks and squirrels are experienced beggars, and there are great photo ops when they stop by to see what you’re serving for lunch.
Out on the hiking trails, waterfalls and babbling brooks are great opportunities for DSLR shooters to use a very slow shutter speed (1⁄6 second or even slower — easiest with a tripod) to capture the flowing water as a silky stream.
A slow shutter speed can also emphasize movement in a photo. Show the speed of a cyclist or animal zipping past by setting a modest shutter speed (1⁄60) and panning the camera (moving it in sync with the moving object) to follow them as they pass. Most of the cyclist or animal (except their fast-moving limbs) will be in focus, but the landscape behind them will be blurred. Likewise, with the same shutter speed, you can keep the camera still and capture them as they fly by. The landscape will be in focus, but the fast movement of the cyclist or animal will be blurred.
Above all, have fun with your camera. Photography is a rewarding lifelong endeavor, and it’s an ideal hobby to take along on your RV travels.