Installing closed-cell polyurethane supplemental springs results in a smoother and quieter ride for the Ford F53 chassis
Manufacturers of gasoline-powered Class A motorhomes have a tough assignment: Build nice, comfortable living quarters on a chassis that, for cost reasons, shares suspension componentry found on commercial-truck platforms equipped with four stacks of steel leaf springs – and then make it ride and handle well.
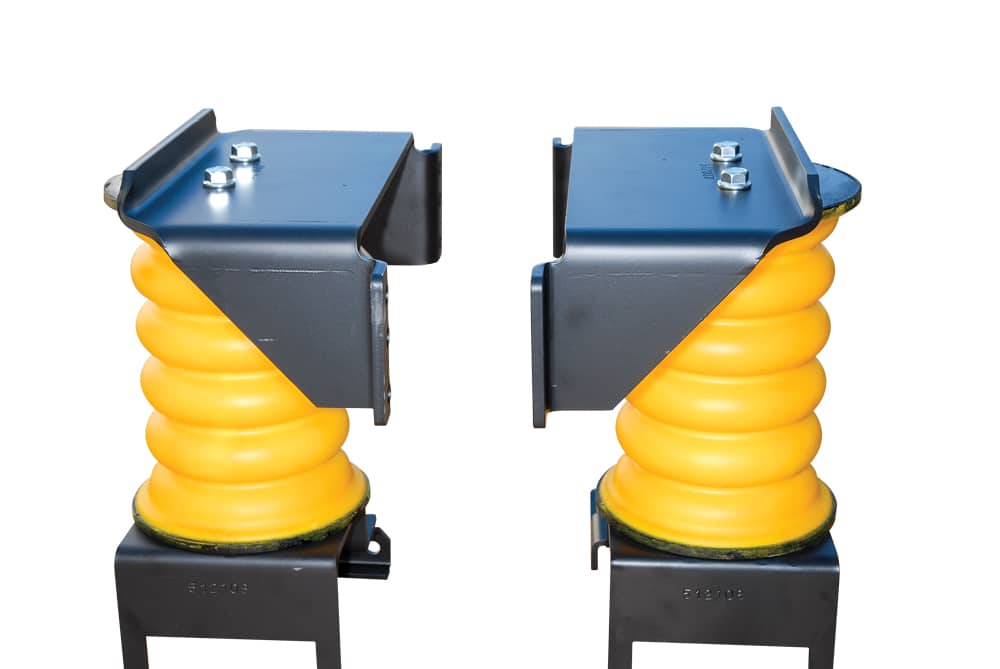
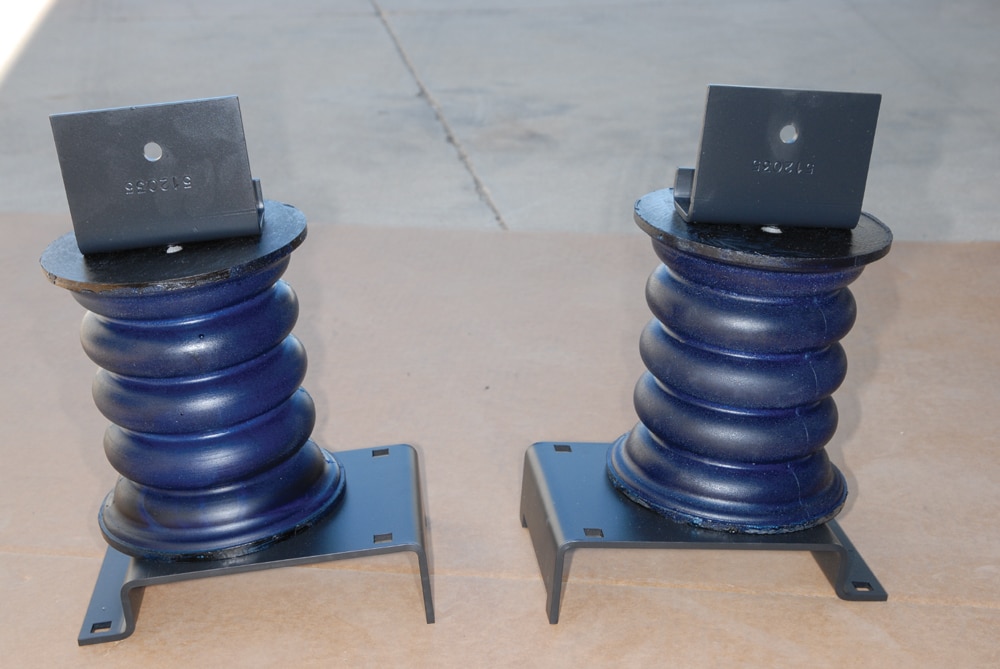
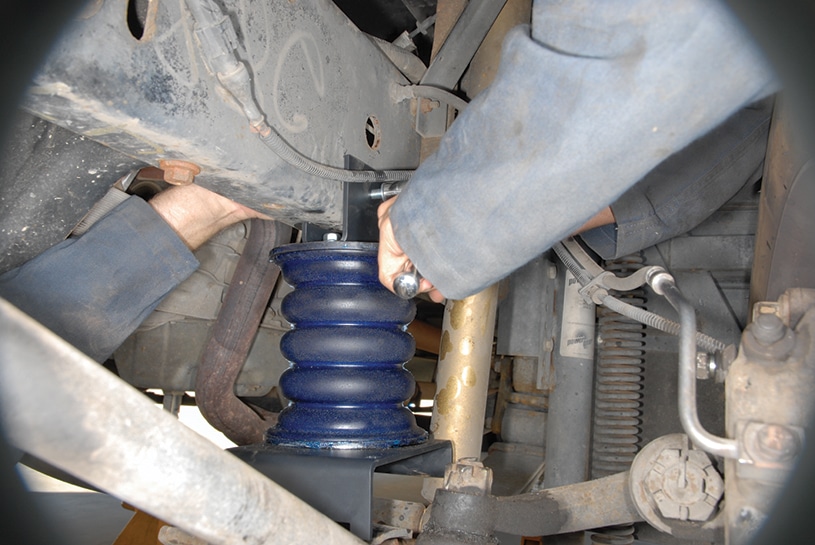
Maxim SumoSprings have the highest rating, which was necessary for the test F53 chassis with a 22,000-pound gvwr. Yellow is used in the rear; blue springs are installed up front.
It’s a tall order. Diesel-pusher coaches with full air-bag suspensions may approach luxury road manners, but motorhomes built on chassis equipped with steel leaf springs often need help.
While some owners of Ford F53-based motorhomes may be satisfied, others wish for a smoother ride on rough pavement, and more control of body roll (lean) on curves with the larger, taller profiles – especially if they are loaded to the gross vehicle weight rating (gvwr) or beyond. Front and rear stabilizer (sway) bars are helpful with the body-roll issue, but smoothing out the rough ride has been largely out of reach despite the use of excellent Bilstein shock absorbers.
SuperSprings International of Carpinteria, California, has brought supplemental springs made of closed-cell polyurethane to the RV aftermarket, and they’re relatively easy to install. Products made of open-cell and closed-cell polyurethane are everywhere – sealants, coatings, egg crates, insulation, car bumpers, seat cushions and thousands more, but using this material for cushioning the ride of Ford’s F53 chassis is a game changer.
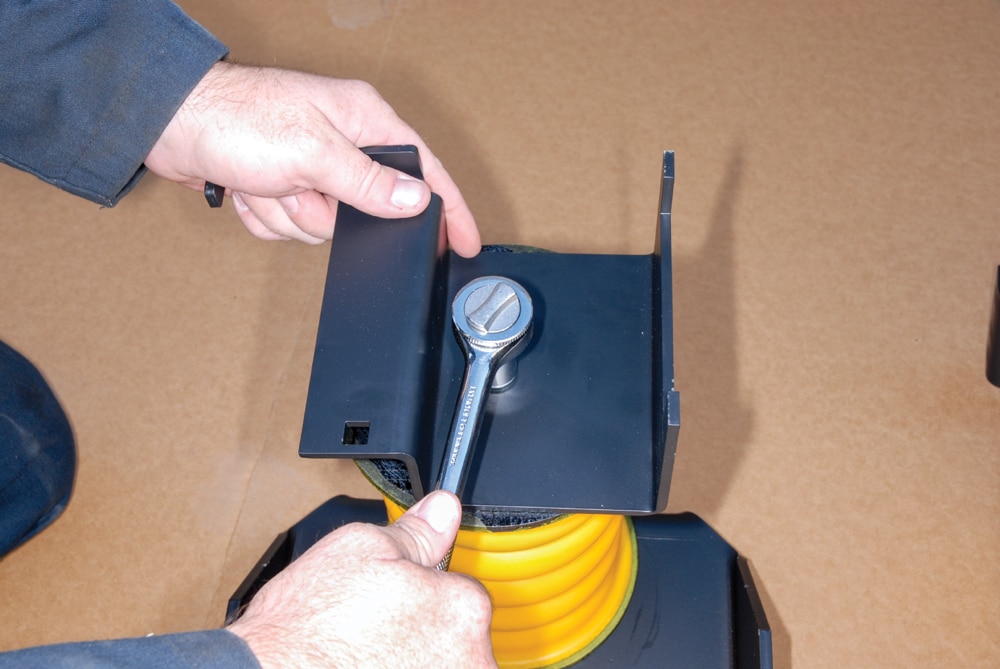
Brackets are bolted to the polyurethane springs before mounting on the motorhome’s frame and leaf springs.
In the SumoSprings application, varying amounts of nitrogen gas are combined with closed-cell polyurethane to create different compression rates. The outcome is progressive, supplementary springs with a parabolic rate; stiffness that begins moderately as load is added, then grows more rapidly when the springs are compressed by changes in the road surface.
Existing holes in the frame were used initially to bolt the rear springs into place tightly so the additional holes in the frame could be drilled.
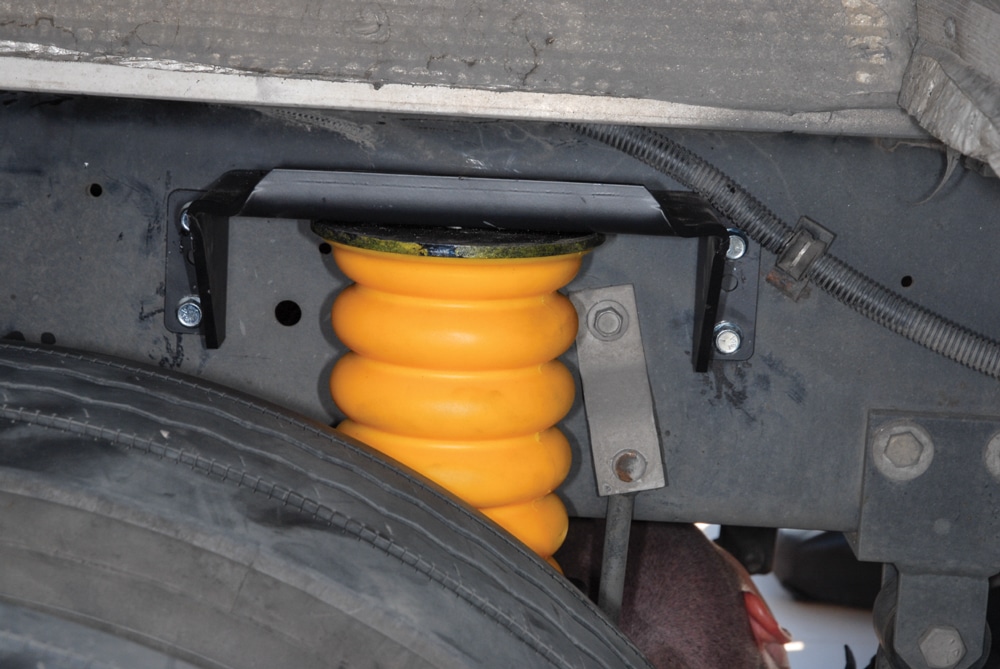
Our installation involved a 2008 Itasca Sunrise (2007 Ford F53 chassis with 22,000-pound gvwr) and the SumoSprings Maxim, the highest-rated spring in the line. The kit part numbers are SSF-180-40-1 front (blue) and SSR-180-54-1 rear (yellow). The springs are bolted onto the motorhome frame and axles, centered above the stock leaf springs.
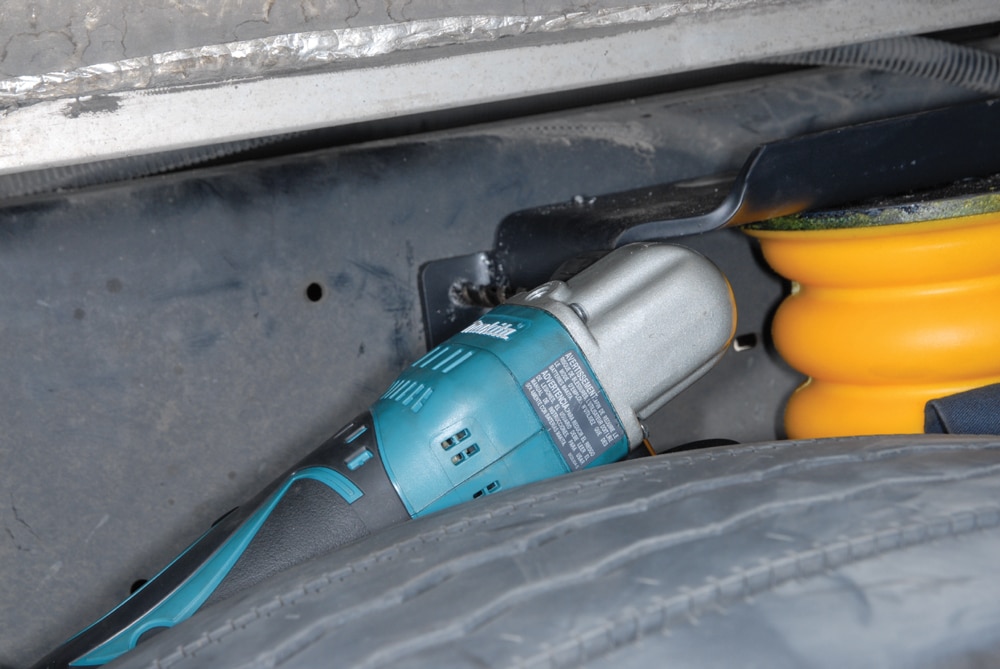
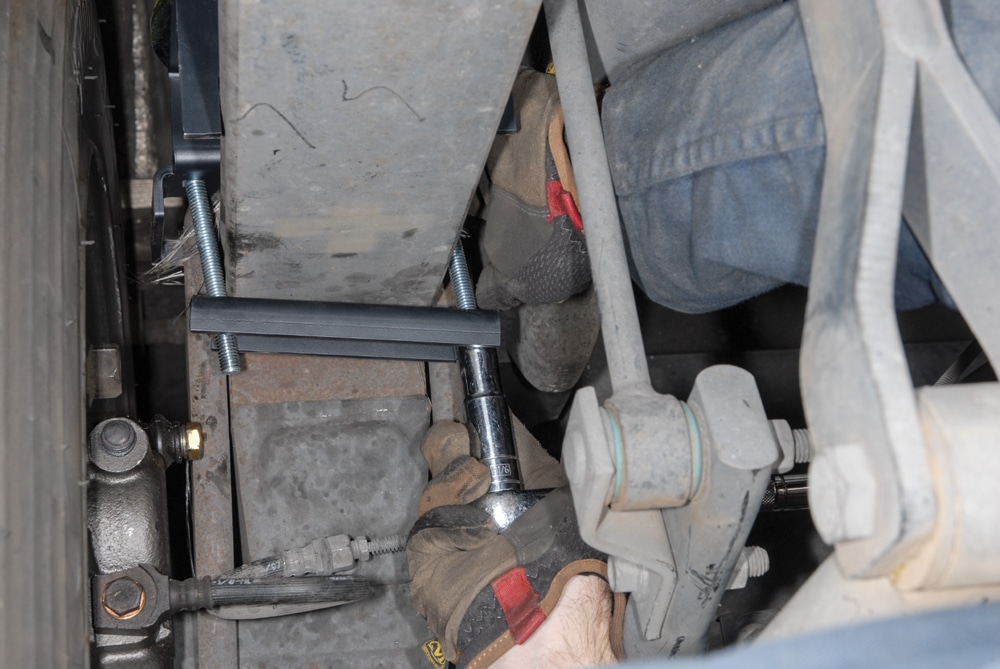
The rear springs can be installed without removing the wheels/tires, but working space is limited. An angle-head cordless tool is used to drill the necessary holes through the bracket, which is used as a template.
In preparation for the installation, road height was measured front and rear, chocks were placed fore and aft of the tires, and the motorhome was elevated one end at a time via its onboard hydraulic jacks to provide sufficient access to the frame and axle without having to remove the tires. Heavy-duty jack stands were placed under the frame for safety before the work was started.
It takes two people to bolt the SumoSprings in place. The job is not especially difficult, but working in close quarters makes it hard to reach both sides of the frame. Once installed, there’s plenty of clearance between the new springs and tires.
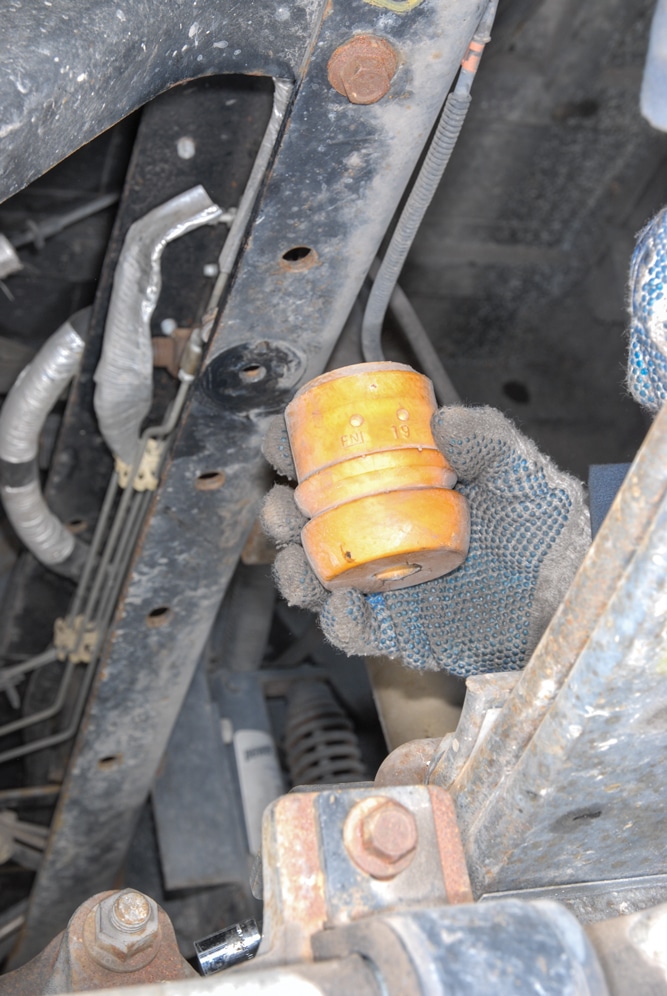
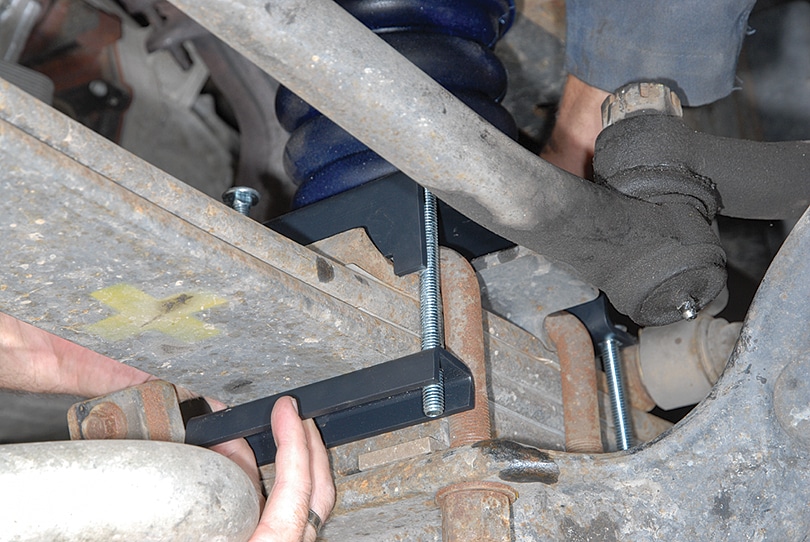
The SumoSprings kits include brackets for attachment to the chassis frame and to the axles. The installation required drilling 3/8-inch holes in the frame above the axles, then assembling the necessary brackets with bolts/nuts (supplied) to install the upper and lower brackets on each side, front and rear. The brackets are bolted to the top and bottom of the SumoSprings, and the bottom bracket is bolted to the stock steel spring stack just above and in front of the axle.
Long bolts are used to secure the bottom bracket to the top of the rear spring pack. A deep socket and impact driver will make this process easier, but it can be done with a ratchet wrench.
The installation involves working in close quarters between the frame and tires, as well as a sharp drill bit to get through the hardened-steel frame.
Once the brackets are in place, the blue springs are ready to be installed in the front.
After lowering the motorhome, road height was remeasured, showing that the SumoSprings had created an additional inch of road height front and rear due to partial compression under static load (motorhome parked).
Front stock spring bumpers are removed from the frame before starting the process of installing the SumoSprings.
Prior to the installation, the test motorhome was relatively level, not riding low on its suspension, and it didn’t need the additional road height created by the SumoSprings. However, partial compression of the springs without any dynamic loading allowed them to stabilize the ride and handling even on slightly rough pavement.
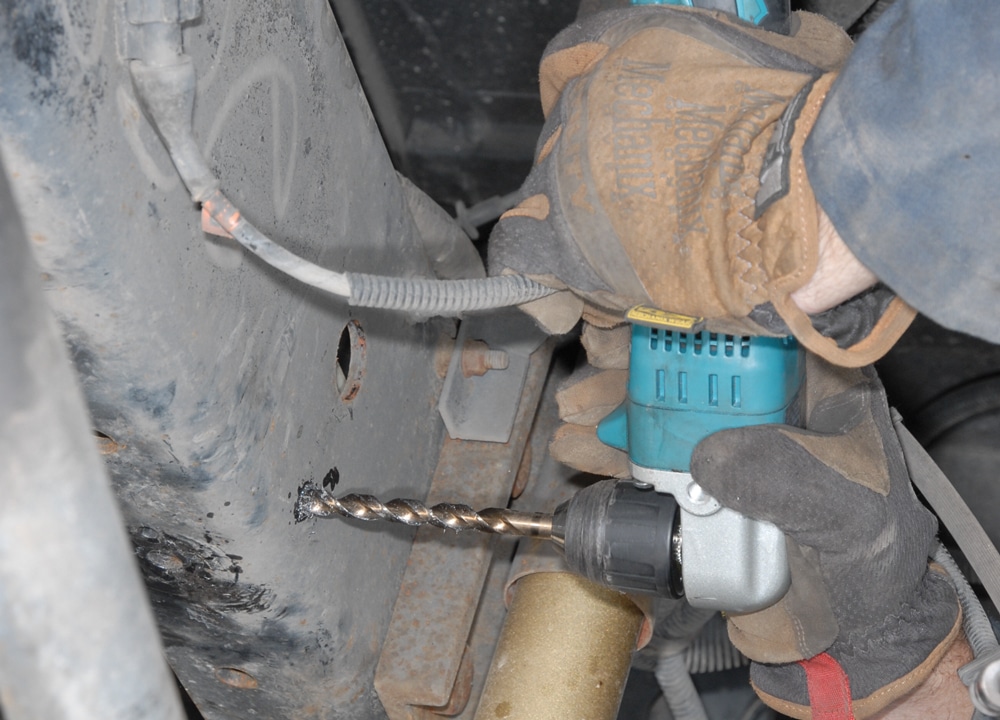
Holes are drilled in the frame to accommodate the top brackets of the SumoSprings. Location of the holes to be drilled must be carefully determined by using the top bracket as a template.
For a good before-and-after road test, we chose a couple of contrasting routes: the first, a two-lane asphalt road with moderate curves, undulations and patches in the pavement, along with strong crosswinds, and the second, a 150-mile highway that included periodic stretches of broken pavement and rough repairs from having been subjected to heavy commercial truck traffic – a road that we have driven on many times.
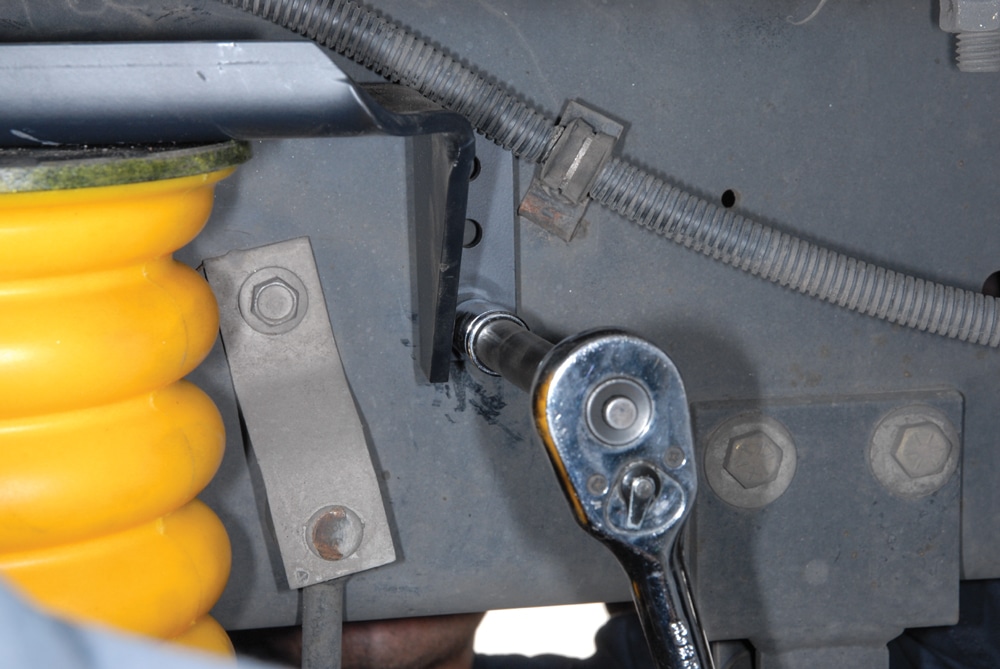
Top spring bracket is bolted to the frame, which can take some finesse, depending on the year of the chassis. Here, access was pretty good, but two people made the process easier.
While driving the first section with the SumoSprings in place, the effect of the springs was apparent right from the start. Ride quality was noticeably more quiet and controlled, both in terms of road shock felt by driver and passenger as well as the decibel level of squeaks and rattles. We felt less lean to one side or the other (body roll) on curves taken at highway speeds and in driveways, and more predictable handling in strong crosswinds.
Bottom bracket is bolted to the front spring pack using the same style long bolts and hardware. Once the bolts are tightened, the motorhome is ready to roll.
On the second test route, our “before” test run had produced a rough and noisy experience on the rougher stretches of this highway. With the SumoSprings in place, it was still rough and noisy, although less so. While the SumoSprings cannot transform the ride and handling of a Ford F53-based motorhome into that of an air-bag-equipped diesel-pusher coach, they were capable in this situation of creating a very noticeable – and welcome – improvement in ride quality and stability.
The springs are available for a variety of Class A, B and C motorhomes; Tiffin Motorhomes of Red Bay, Alabama, offers SumoSprings as an option on the company’s gasoline-powered motorhomes.
The spring kits for the F53 chassis are listed at $589.50 front and $625.50 rear; installation by a competent mechanic can be expected to take three to four hours. The product’s limited warranty covers 3 years.SOURCESuperSprings International Inc.
866-898-0720
www.supersprings.com