Preparing for the upcoming travel season will help ensure all systems are in tip-top condition and ready for service without hiccups
As the snow and ice melt in the northern climes, and the travel season officially arrives across the country, we all begin thinking of taking our motorhomes out on the road. But before we can go for that first trip, there are several things we need to take care of to be sure the motorhome is ready, and that it will give us trouble-free use throughout the season.
Uncovering and Checking the Major Systems
For those who have had their motorhomes protected by a cover, the first step is obviously to remove it. Be sure to take care while removing the cover, and to perform the task when everything is dry, if possible. If the cover remains wet or damp, set it out in the sun to dry before rolling it up and putting it back in the storage bag to prevent mildew from forming. Also, if any damage has occurred to the cover, this would be a good time to patch or replace it.

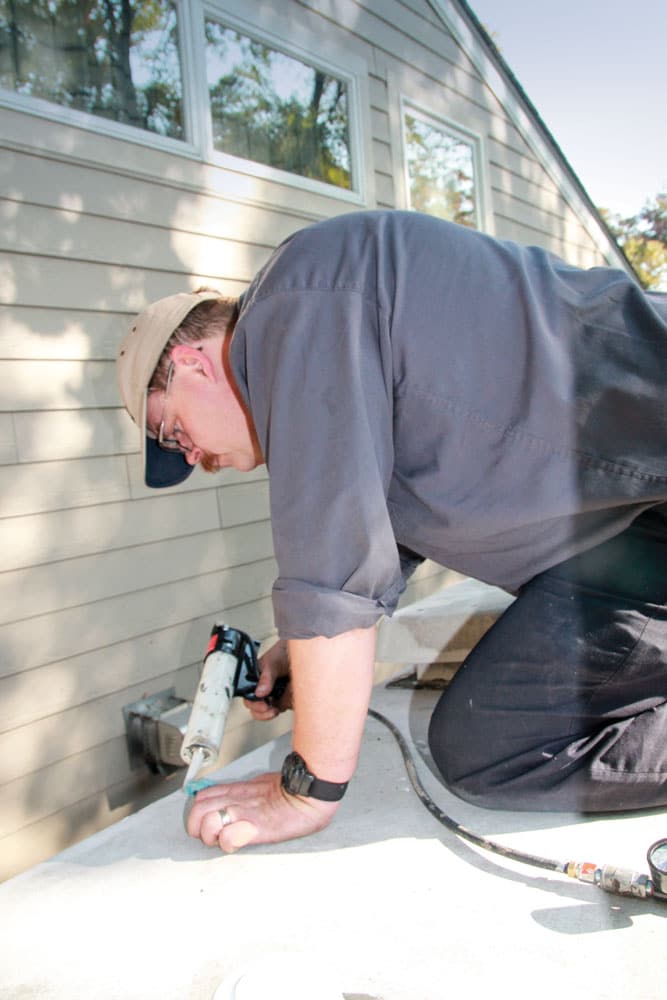
Spring is the optimal time to clean and reseal the roof of your motorhome. Be sure to use the proper sealant for the roof type.
Inspect the exterior of the motorhome for any damage that may have occurred during the winter. Check the roof carefully for puncture holes from things like fallen branches, icicles and so on. This is also a great time to reseal the roof seams using the proper products for your motorhome’s type of roof. While you’re at it, wash and treat the roof. Products like Protect-All rubber-roof cleaner and treatment, Thetford’s one-step cleaner and protectant, Dicor rubber-roof cleaner and treatment are all good choices, depending on the type of roof on your motorhome. If your motorhome is equipped with a fiberglass or aluminum roof, clean it as you would the sides of the motorhome.
Speaking of the side walls, do a thorough inspection, again, for damage. Wash and wax the outside of the motorhome. It’s a bit of work but is worth the effort in the long run. Open all the exterior compartments and check for signs of leaks, rodents, etc., and deal with any issues you find. Spring also is a great time to empty out the exterior compartments and rearrange and clean things for the season.
Many people remove their motorhome’s batteries for the winter season to protect them. Spring is a good time to clean and, if necessary, repaint the battery trays and then charge and reinstall the batteries. Be sure to check the water level and refill with distilled water, if necessary. If there is any concern as to the batteries’ states of charge, this would be a good time to get them checked. Many parts stores and RV dealers have advanced battery-diagnostic equipment that show battery condition.
Chassis and generator services should be completed in the fall just before storage, but now is the time to check everything over again, including the usual suspects like the fluids, belts and so on. Always look around the engine and generator before starting them to check for mouse nests, especially if you live in an area that’s prone to rodent infestations. In particular, check the air-cleaner housing and ducting, as rodents seem to enjoy using those spaces as storage warehouses. Visually inspect the tires, check air pressures and adjust accordingly. Turn on all the exterior lights to ensure they’re working.

Mice and rodents will often find winter refuge in engine and AC generator compartments. Check all openings as well as the tops of engines, air-cleaner housings and so on for signs of an infestation. Here, there was so much nesting and chewed wiring that the generator had to be removed for cleaning and repair.
Once the prechecks are completed, start the engine and generator and do a running check of all the mechanical systems, including the jacks, power awnings and slideouts. Before setting out for a long distance, test drive the motorhome. Follow a short route and ensure the steering, brakes, suspension and so on are performing as they should. Most such systems don’t just mysteriously break by themselves during winter storage, but it’s easy to check things out locally before hitting the road for a long trip.
LP-gas-Powered Appliances
All the exterior vented propane-burning appliances should be checked for cleanliness, and to be sure insects haven’t made nests in the burners. A visual inspection is usually adequate, and a small mechanic’s inspection mirror may help with this process. Some small spiders are attracted to the smell of ethyl mercaptan, the odorant used in LP-gas, and will sometimes build small, silky webs in the burn chambers and valves. If you see these, clean them out using a small flue brush. Don’t ever stick anything into the small gas orifice on a water heater, as it can alter the size of the opening, creating an uncontrolled increase in the amount of LP-gas released into the appliance. Watch the appliance carefully during the test run; if it misfires, shut it down and hire a certified RV technician to disassemble the system and thoroughly clean and test it. In order to inspect the burner in most furnaces, the appliance must be disassembled, which requires special training, and should be left to a professional. If the furnace malfunctions, again, contact a certified RV technician for assistance.
Dewinterizing a Standard LP-gas Water Heater
Motorhomes with a simple water system that includes a standard LP-gas water heater should follow these basic instructions to dewinterize. These procedures are assuming that antifreeze has been used to protect the system, so it is necessary to try to prevent antifreeze from getting into the water-heater tank. (Once antifreeze gets into the water heater, you’ll be smelling it, tasting it, and seeing foaming from it for a long time. It’s harmless, but annoying.)

The range is a frequent nesting and feeding spot for mice who have invaded the motorhome while in storage. Make sure this area is clean, and consider lining it with aluminum foil for easy cleanup, being careful not to cover any ventilation openings.
First, make sure the water-heater bypass is still in winterizing mode. There are different types of bypass kits installed in motorhomes, so check the owner’s manual or contact the manufacturer if you’re not sure which type is on your motorhome. Next, hook up the fresh-water supply to the motorhome and turn on the water to pressurize the freshwater system. Make sure to thoroughly flush the entire system, including all faucets, low-point drains, toilets, washing machines, icemakers, etc. Once clean water is flowing through all the faucets, and there are no leaks or other problems present, it’s time to move on to the water heater.
The outside drain plug was probably not reinstalled in the tank after last season’s draining and winterizing. In this case, reverse the bypass kit and let some fresh water flow out of the drain, then shut off the water and install the plug or anode rod back into the tank. This flushes any stale water and collected minerals out of the bottom of the water-heater tank. Once the plug is back in, turn the water on back at the hose, return to the water heater and open the relief valve using the spring-loaded lever. Once water comes out, release the valve so it closes. Check for flow-through of the hot-water system in the motorhome, then test-fire the water heater to be sure the flow is true. If your motorhome is equipped with a three-valve bypass kit, make certain the middle valve is closed. Dealerships get many calls about tepid water from the water heater only to find out the middle valve was accidentally left in the open position.

When dewinterizing, flush the entire water system, including the low-point drains, to remove any remaining antifreeze or contaminants.
Make certain water is flowing from every discharge point, including exterior showers and low-point drains and, if the motorhome is outfitted with a washer/dryer prep but no washer, hook a hose up to each of these valves and flow water into a sink, the washer drain or outside the motorhome. Stale water and antifreeze can remain in these lines and taint the freshwater.
Dewinterizing a Tankless Hot-Water System
Dewinterizing a motorhome with a tankless water system is simpler because there is no tank to flush. Systems like this include those from Aqua-Hot, Oasis and Truma. Just hook up the freshwater hose and proceed to flush the system, and follow the brand-specific instructions in the owner’s manual. Once everything is buttoned up and water is flowing throughout the system, you can test-fire the water-heater system.
Sanitizing the Freshwater System
I am a stickler about keeping the water as clean and usable as possible, so its quality is just like at my residential home. To do this, two things must happen. First, the incoming source of water must be filtered and clean, whether the water is going into the city-water connection or the freshwater holding tank. Second, the water system must be sanitized at the beginning of the season.
There are a couple of ways to sanitize the system. The old-school way is to make a bleach solution to run through the water system. The other is to use a water-freshener product on the market, sold through Camping World or other RV parts suppliers. In either case, follow the directions on the bottle.

Battery maintenance is essential. Once the batteries are reinstalled (if they’ve been removed), check the electrolyte level and fill with distilled water, if applicable. Seal the terminal with battery-terminal spray to prevent corrosion. If there’s rust on the battery trays or in the compartment, consider removing the batteries and repainting the compartment.
The bleach solution is quite simple and works like a champ, and is completely safe. Simply mix ¼ cup plain household bleach to 1 gallon of fresh water. If you have a known dirty-water system (rotten egg smell from hot water, etc.) you can increase this to a 100-ppm solution by increasing the solution to ½ cup per gallon of water. Add one gallon of solution to an empty, preferably flushed, freshwater tank, for every 15 gallons of tank capacity. So, if your motorhome is outfitted with a 30-gallon tank, you would add 2 gallons of solution, etc. Then fill the tank to the top, turn on the water pump and run the solution through the entire plumbing system until you can smell chlorine from each faucet. Allow the solution to sit in the system for at least four hours (one hour if using the 100-ppm mix), or overnight. Then drain the freshwater tank completely, and flush the entire system with fresh water. Draining the water-heater tank will speed things up a bit.
Flushing the system will remove most of the chlorine. Water-freshening solutions are available in liquid and tablet form and are designed for this purpose, but the leftover chlorine will actually dissipate quickly and is harmless after the system has been flushed. Baking soda can also be used to remove the chlorine taste and smell. Simply add a box of baking soda that’s been mixed with water in a bucket into the tank and fill the tank with water. Allow the baking soda to work overnight, drain the tank and flush with water. The plumbing system is now clean and sanitized.
Dewinterizing and Checking the Interior
First and foremost inside is checking for any rodent infestation and removing any nests and debris left behind. Now is a good time to see if you can find where the rodents came in and seal these areas from the outside. Do a thorough cleaning of the motorhome as necessary, including inside and under cabinets, windows and so on. Clean and check the operation of all the appliances. If the motorhome is equipped with an LP-gas range, be sure to lift the top to check for signs of intruders and clean thoroughly. Lining the area under the burners with aluminum foil is a good way to help with cleaning. Just cover the bottom, but do not cover any of the holes in the sides of the pan.

Flush the water system with fresh water before opening the bypass valves on the water heater to eliminate any residual antifreeze in the system. Consider flushing the water heater before reinstalling the drain plug on the outside of the motorhome.
Make sure the refrigerator is clean and mildew-free. Clorox or similar wipes are great for this. Power up the refrigerator and let it run for a day or two, switching power-source modes to make certain they function properly. If the motorhome is equipped with a residential refrigerator, simply clean and run it.
Test all the safety systems in the motorhome, and check the detectors for expiration dates. Install new batteries in all battery-powered safety monitors at the beginning of the season. Make sure all the emergency exits operate properly, and look at the fire extinguisher(s) to make sure there is no damage. Test the valve by pushing in the small plunger. Take the fire extinguisher off the wall, invert it for a few seconds, then return it to its bracket. Check all the interior lights, test all the gadgets for functionality and you’re ready to move in for the season!
As always, be sure to check the owner’s packet for any special instructions, especially if you own a higher-end or more technologically equipped coach. Always use caution when working on ladders or on the roof, and if you’re uncomfortable with the height, or any of the procedures outlined herein, have a certified RV technician do the work for you.
Spending a day working on the motorhome at the beginning of the spring will help ensure the most enjoyable RVing experiences possible all season long.