Roadmaster’s Sterling All-Terrain Tow Bar creates a strong, versatile link between motorhome and dinghy
Once in a while, those of us who tow dinghy vehicles get into “oops” situations in which we need to unhitch the car and back out. Unfortunately, it may happen that the car is at too much of an angle relative to the motorhome, creating so much tension that we can’t release the tow bar arms. What to do now?

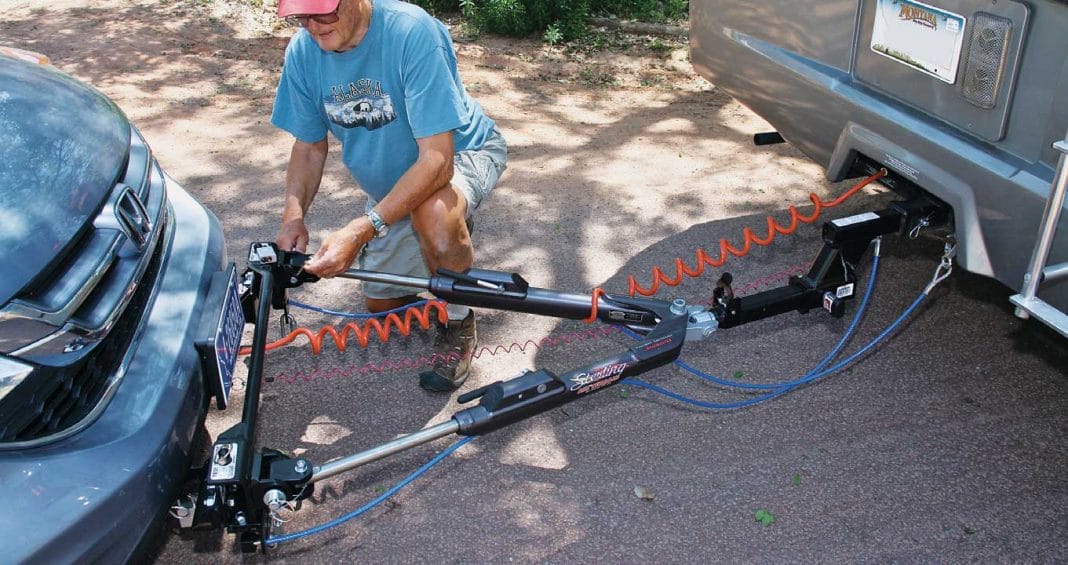
Made of aircraft-grade aluminum with stainless-steel arms, the Sterling has integral channels for cables and wiring.
The Roadmaster Sterling All-Terrain tow bar has the answer: a feature called the Freedom Latch that is designed to allow the owner to release the arms even when the motorhome and dinghy are in a bind. The latch is a patented cam design that multiplies force when the owner pulls one of the release levers.
The latch is but one of the features of the Sterling that make it a top contender with motorhomers who tow cars, SUVs and light trucks. Made of aircraft-grade aluminum with stainless steel telescoping inner arms, the bar weighs 35 pounds and is rated to tow up to 6,000 pounds.
Roadmaster mates this bar and several others in its towing products lineup with mounting brackets (also called baseplates) built for specific dinghy vehicles – in this case a 2011 Honda CR-V. We arranged for installation of the tow bar ($950 Camping World President’s Club price) along with Roadmaster’s mounting bracket ($460) and wiring/safety cable kit ($240) at the Camping World store in Henderson, Nevada.
The Installation
The Camping World technicians we enlisted for the project know tow bar jobs so well that their moves seemed almost choreographed – nice to find that level of experience. In terms of effort, they rate the CR-V at or near the top of the list for ease of installation.
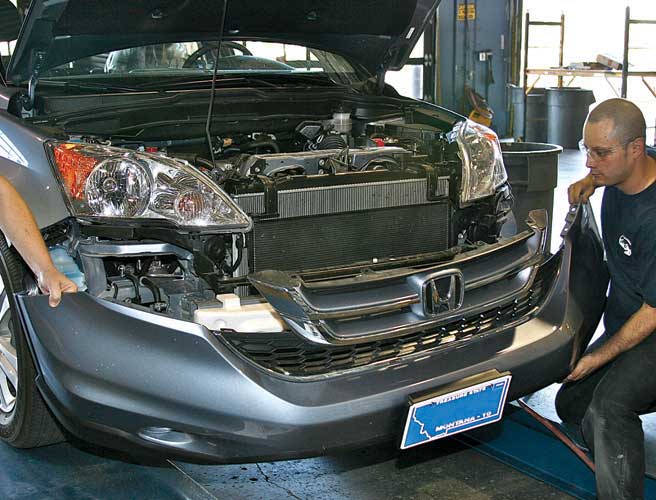
The Honda CR-V grille/bumper fascia was easily removed for installation of the mounting bracket for towing.
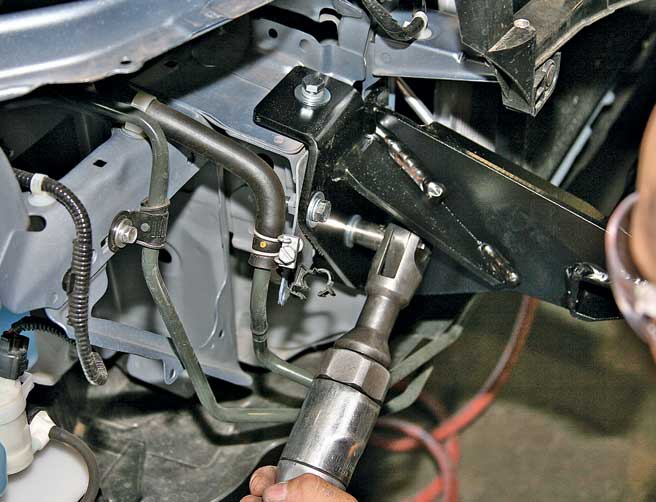
Installation of the Roadmaster mounting bracket involves removal of the Honda’s radiator cover and front plastic fascia, exposing the metal bumper core. Removal of the core exposes two square openings in the car’s frame rails, into which the mounting bracket is inserted. The bracket is well-made and a precise fit, bolted into place using the same 10 frame-attached nuts that Honda used for attachment of the bumper core.
The Roadmaster bracket is quite beefy, which is the company’s recipe for protecting the car in areas that receive towing force – force that Honda didn’t have in mind when it engineered the car.
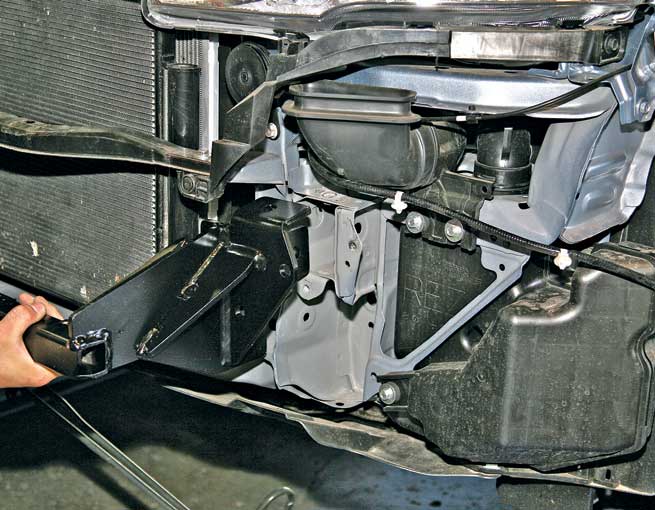
The mounting bracket was a precise fit for the CR-V, inserted into the car frame in place of the bumper core.
The Honda fascia was trimmed slightly to permit inserting two arms into the mounting bracket. The arms would be the connecting points to the Roadmaster quick-disconnect system, the front-of-car hardware to which the tow bar would be attached.
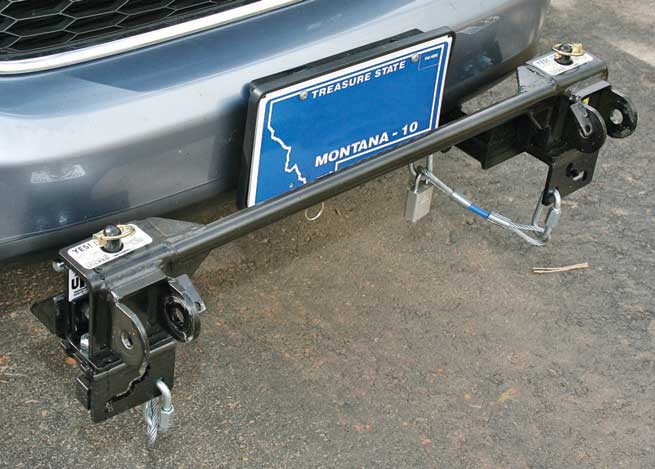
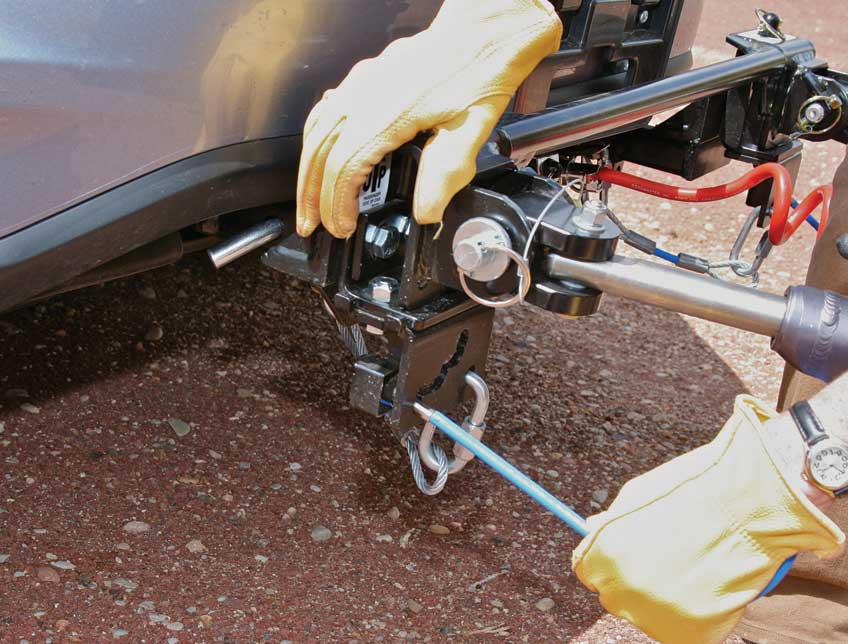
Quick-disconnect assembly adds rigidity for towing and offers easy disassembly, leaving two small receiver tubes visible on the car.
The quick-disconnect system is very substantial and is hardly a stylish addition to the CR-V, but a plastic cover ($80) can be set in place when not towing. Or the assembly can be removed in three pieces by removing clips, hitch pins and padlocks, leaving only two small, square receiver tubes protruding from the black Honda fascia.
Lights, Turn Signals and a Fuse
Onward to the Roadmaster wiring kit, which consists of a wiring harness complete with diodes (one-way electrical “valves”) that are spliced into the running light and brakelight wires to prevent feedback problems while connected to the motorhome’s lighting system.

A taillight lens for the CR-V is easily removed, exposing wiring into which diodes are spliced and connected to
the motorhome wiring harness.
When towing the CR-V for long periods, Honda recommends that a fuse be removed from an under-dash fuse block to keep the radio/navigation system from drawing down the battery, which could happen over a number of hours with the key in the accessory (acc) position (necessary to unlock the steering wheel).
Therein lies a problem: The fuse is very difficult to access even once – much less on a daily basis – and the solution is to wire a fused on/off switch into the Honda fuse receptacle and locate the switch within easy reach under the instrument panel.
After that procedure, the car was ready. We hitch-pinned the tow bar in place and connected the safety cables, which have hooks at one end and at the other, very easy-to-connect steel beads that are inserted into convenient anchor points on the car bracketry. The Roadmaster wiring harness as well as the cables are conveniently routed partially through channels in the tow bar arms.
Drop Receiver
It became apparent that the motorhome hitch receiver was too high. Roadmaster specifies that the tow bar should not be more than 3 inches out of level, and our motorhome was 5.5 inches higher than the attachment points on the car. We used a Roadmaster 6-inch drop receiver ($90) to lower the tow bar to a level position, although a 4-inch drop receiver would have been a better choice.
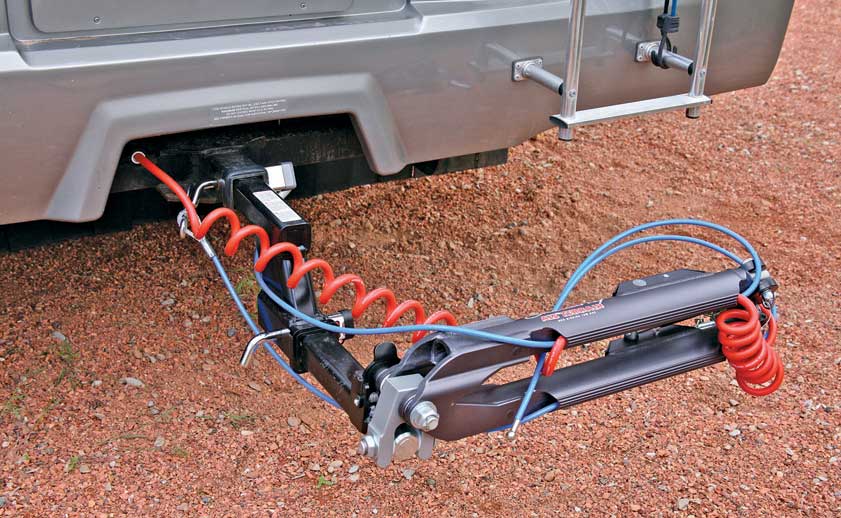
The Sterling tow bar is easy to handle and collapses for storage behind the motorhome. A drop receiver is used to lower the bar to a level position.
The drop receiver increased the length between the motorhome and car by 10.5 inches, which is convenient if the owner wants to mount a bicycle rack on the receiver. For owners who don’t, it would be convenient if Roadmaster would offer a shorter drop receiver because the tow bar instructions recommend against extending towing length. The longer drop receiver also requires a more expensive wiring harness, and safety cables.
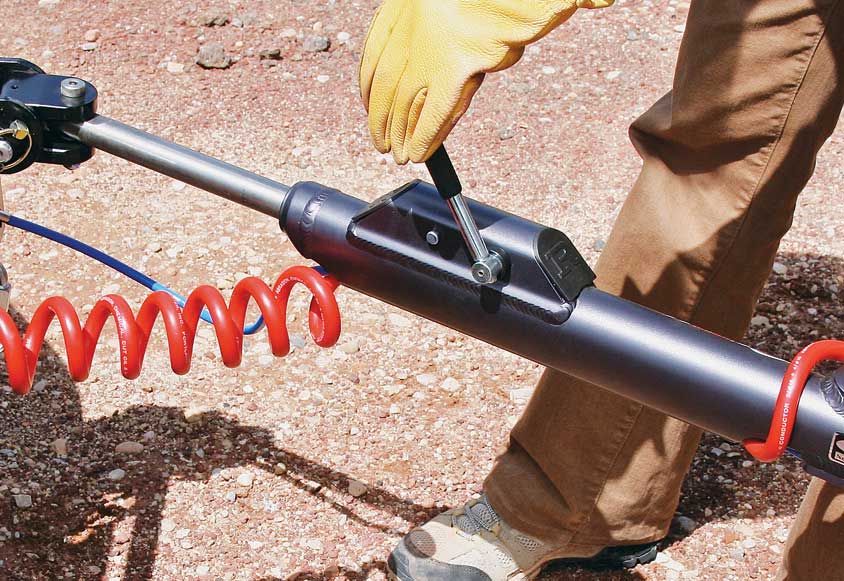
Roadmaster’s Freedom Latch eases the release of tow bar arms even when they’re under pressure in a bind.
The Roadmaster owner’s manual was thorough on how to use the equipment, and the Camping World staff took the time to explain everything in detail. The project took about 5.5 hours at $89 per hour which, when added to the cost of the component parts, brought the total to $1,840.
On the Road
The towing length added by the drop receiver caused the tow bar to swing in a larger vertical arc as the coach traveled undulating road surfaces, but the Roadmaster equipment nevertheless guided the Honda with precision, to the extent that we were only minimally aware that the car was back there. Motorhome tracking on curves was not altered; there was no jerky motion from the car on rough pavement, and no slack in the tow bar assembly that would have resulted in banging noises.
Hitching and unhitching the Sterling tow bar went very smoothly, even when the motorhome and car were in a bind. The quality of the bar was apparent to the eye, and obvious during everyday use.
Honda CR-V
The CR-V is approved by Honda for flat towing with a couple of pre-tow procedures: While idling the engine, press the brake pedal and move the shift lever through all its positions. Then shift the transmission to drive and hold for five seconds, then to neutral and idle for three minutes. (Warning: severe transmission damage will occur if the vehicle is shifted from reverse to neutral and then towed; it must be shifted from drive to neutral after idling for five seconds.) Next, turn the ignition key to the acc position, which shuts the engine off but leaves the steering wheel unlocked. The above procedure should be repeated after eight hours of continuous towing. Removing the aforementioned fuse also is recommended (only remove the fuse after you have performed the transmission shifting procedure and the key is in the acc position). Also make sure the radio and any items plugged into the accessory power sockets are turned off so they don’t drain the battery.
The CR-V is a popular choice as a dinghy vehicle on several counts. The car is relatively lightweight (3,554-pound curb weight for the 4WD EX-L model), gets 21 mpg in the city and 27 mpg on the highway, has a firm suspension and good road manners, comfortable seating and 4WD versatility (optional). The price for the fully loaded CR-V 4WD EX-L model is $29,895. The car’s few negatives include slightly elevated road noise and modest acceleration with its 180-hp 2.4-l 4-cylinder engine.
The Honda is a good choice for motorhomers who are shopping for a versatile midsize, midpriced SUV as a tag-along, and the Roadmaster Sterling is an effective way to tow it.

