Preventing leaks is of utmost importance for longevity
If there’s one constant concern in the motorhome world, it’s leaks and water damage. Over the years, owners have wrestled with taking care of their motorhome roofs and since they are tasked with the prevention of leaks and consequential repairs, it’s important to know how to prevent them in the first place.
Motorhomes are rolling homes that have to put up with, effectively, an earthquake and a hurricane every time they go down the road. Put your house on a trailer and run it down some of our bumpier roads and interstates for 50 miles and see what’s left. A motorhome has to do this, and withstand a constant bombardment from the elements, all while being light enough to go down the road legally, and also while remaining affordable and usable by the end consumer.
Leak prevention starts with the roof. Motorhomes have several different types of roofs, and the care and maintenance basics are the same on all of them, but the methods change depending on the roof type.
Keeping the roof clean is a priority, and making sure the seams and sealants are in good shape is an ongoing process. The sealants must be inspected for gaps, separations and cracks, and must be reapplied as necessary to prevent leaks. Some motorhome manufacturers even require that this work be completed every 90 days to keep the warranty in effect.
Roof Types
Cleaning the roof requires use of an approved cleaner for your motorhome’s particular roofing product. Motorhome roofs are made of aluminum, fiberglass, thermoplastic polyolefin (TPO), polyvinyl chloride (PVC) or ethylene propylene diene monomer (EPDM). The most common one today is TPO, which is a type of plastic, followed by EPDM, which is a synthetic rubber compound.
Fiberglass and aluminum roofs can be cleaned using any product that would be safe for the motorhome’s side walls. From a maintenance standpoint, the most important elements to keep an eye on here are the seams. Seams on these roofs can be sealed using one of a couple of processes. In some cases, self-leveling sealants are used. Self-leveling sealants come in a caulk tube, and just about any of the commercial products, such as C-10, Geocel Pro Flex and Dicor, can be used, although it’s always best to stick with the same sealant used by the original equipment manufacturer (OEM).
Another commonly used product is sealant tape, like the one marketed by EternaBond. The tapes are very tough, with an elastomeric sealant, also known as a micro sealant, that pretty much provides a permanent seal on a seam. It’s rare, but these can still fail, especially if the tape is not applied correctly. Some lesser-known brands on the market can fail, with the tape skin separating from the sealant. Application of these tapes can be effective as long as the directions are followed carefully, including prepping the surface and having a roller to activate the sealant once the tape is applied.
Care of TPO, EPDM and PVC roofs is product-specific in that the manufacturers have cleaners and sealants specifically recommended for their products, and those should be used for maximum effectiveness, best appearance and to keep the warranty in full effect.
Many of these roofs have a 10- or 12-year warranty, which sounds great, but the fine print has to be understood and followed to fully realize maximum benefit of the warranty. The warranties are for the roof membrane only, not the seals, installation or underlayment, and if the roof is not installed correctly, and/or not maintained correctly, the warranty is void.
It is best to use a roof cleaner and protectant product on EPDM roofs because the material naturally weathers, resulting in a white film that comes off the roof, leading to black streaks on the sides of the motorhome. This streaking is ironic in that one of the selling points of the early EPDM roofs was a lack of the black streaks caused by oxidation on the then-popular aluminum RV roofs. The cleaner/protectant products not only do a decent job of cleaning the roof, but also include a UV protectant that minimizes the sloughing and black streaks. Spot cleaning can be done using some stronger cleaners; however, never use citrus- or petroleum-based cleaning products. Refer to the roof manufacturer’s instructions or website for more specific product information.
TPO and PVC roofs, like EPDM, are membrane roofs, but are made of a type of plastic. The benefits to these types of roofs are the light weight, and the fact that they don’t degrade the way EPDM roofs do. You can frequently tell that your motorhome has a TPO roof by the texture of the membrane, in that the surface has an alligator-like feel to it (versus EPDM, which is smooth). TPO is made in a number of colors, as are its sealants. Dicor and Alpha Systems make TPO roofs, and market sealants specifically designed for their roofs. (PVC, which is used by few OEMs, is mostly an aftermarket product, and the company that makes it, LaSalle Bristol, recommends using only its branded sealants.)
When in doubt, contact the motorhome manufacturer to find out specifically which roofing product was used. Then you can visit the roof manufacturer’s website for care instructions, and to find out which products are available for servicing that product. This is the best way to proceed, as there are some roofing products that can’t be firmly identified unless the underside of the membrane is accessed. (Hint: to see the underside of the roof membrane, remove the trim from a crank-up roof vent. Most of the time, an “X” is cut in the membrane to reveal the opening when the roof is installed, and there will be four-triangle flaps.)

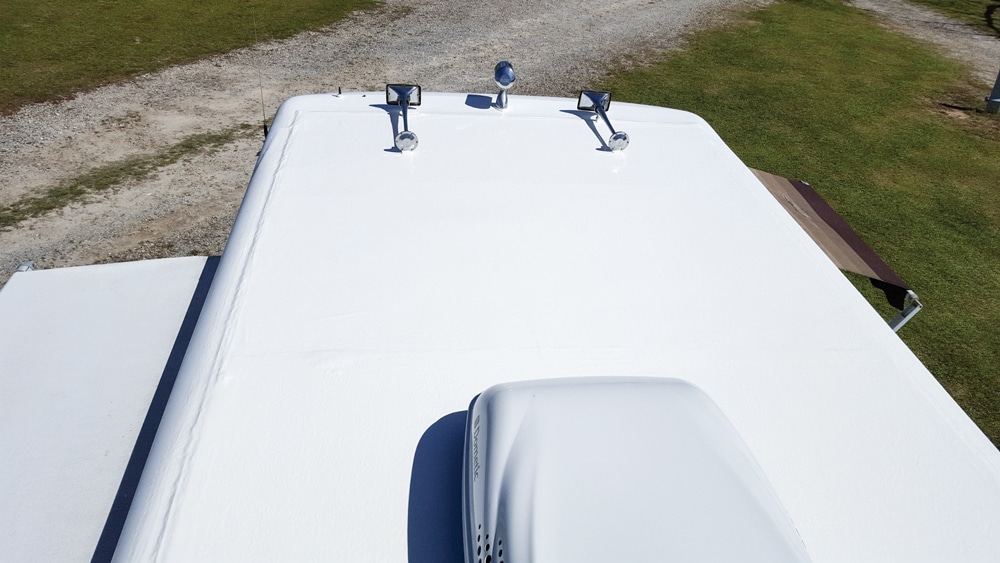
The finished product. This roof was replaced with a professionally applied multi-part roofing product.
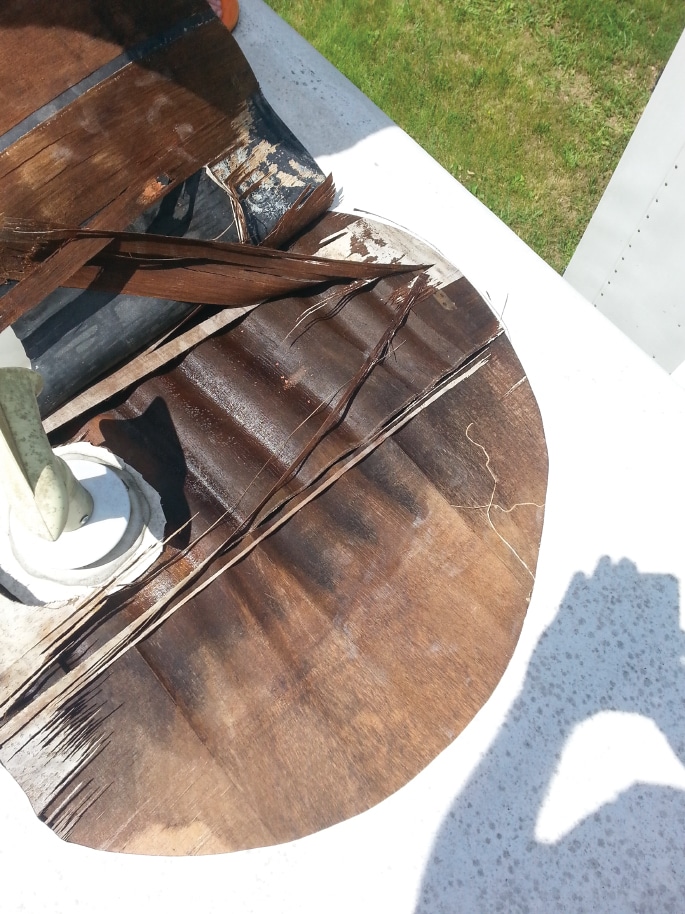
Again, seam maintenance is critical. The seams are usually at the front and rear terminations of the roof, down the sides along the rain gutter if you have one, or whatever other termination is there and around every appurtenance on the roof, including antennas, roof vents, plumbing vents and more. Carefully clean and examine these seams at least four times a year, and immediately any time you think there may be a problem on the roof. If you suspect a leak, look into it immediately, stop the leak, and do what you can to dry out the area affected to prevent damage.
Also, membrane roofs are more susceptible to puncture or tear than a metal roof, so any time you suspect your RV’s roof has been hit, be sure to get up there and have a look. Exercise due caution while working on an RV roof, including making sure your ladder is in good condition, the roof is dry and sound enough to hold your weight. It’s best to carry a roof emergency repair kit to make repairs quickly if something should tear the roof’s membrane while you’re on the road. Dicor makes a roof-patch kit, and EternaBond is an excellent product to use, and is a permanent repair.
Never use any silicone-type sealant on a motorhome roof, or any sealant from your local hardware store or home center. These are fine on the sides, which we’ll cover later, but these sealants are incompatible with RV roofing materials, will separate from the roof, and then will make the proper roof sealants ineffective.
There are now companies providing new, professionally installed liquid roofing, like RV Armor and RV Roofing Solutions. If you are experiencing roofing issues, these types of roofs may be good for you. These systems are not the canned liquid roofing products available at your local RV service center.
According to RV Armor owner Lee Thaxton, the company applies a commercial-duty roof over the existing roof and seams over the course of two days. It is a very precise process that, when complete, provides a permanently sealed, maintenance-free roof for the life of the RV. We detailed the process in “Seamless Solution” in the July issue (www.motorhome.com/rv-travel-news/seamless-solution).
RV Roofing Solutions applies a liquid-acrylic roofing that, according to the company, eliminates roof leaks and the need for caulking.
Side Seals
The sides of a motorhome need resealing too, on occasion, to prevent any water-related damage. In recent years, some RV manufacturers have abandoned butyl or putty tapes for sealing windows, doors and awning extrusions, instead using a foam gasket tape, which is more susceptible to leaking in certain circumstances. To back up the foam tape, they will use silicone caulk around each window, door or extrusion to keep it sealed.
One way to keep these areas sealed is to use a good-quality pure silicone caulk, like GE Silicone II Window and Door, or equivalent. Do not use a latex caulk. Clear is best, but you can get a couple of colors if desired. There are other products you can use for the side seams on your motorhome, like Geocel’s Pro Flex, a polymer-based sealant or Sikaflex 221, a polyurethane product often used by RV manufacturers. These sealants require more skill and care when using, but following the directions will result in an excellent seal.
Clean the surface to be caulked carefully, removing as much loose caulk as possible. Adhesive or caulk remover will help with this, along with non-marring automotive scrapers, available from stores like Harbor Freight.
Cut the end of the tube for a small bead of silicone. Carefully caulk the seam, then lightly spray over the bead and surrounding area with a tooling fluid made of water and a slight amount of dish soap in a spray bottle. Then use a caulk tool to dress the bead, and when it dries, you will have a nice, professional-looking seam.
Some motorhomes with front-facing windows and complex seams, like Class C cabovers, require more seam care and attention and over time, as those sites are often trouble spots for leaks. Other often forgotten leak spots include the side-roof-termination seams that go down the length of the unit, and awning brackets on the side walls.
Whether it’s a full-time home or a vacation motorhome, it’s important to follow a regular maintenance schedule to prevent trouble later on. By spending some time on your motorhome’s seals, water damage can be prevented, insuring your motorhome is ready to go and holds its resale value when it comes time to trade up.
For More Information
Alpha Systems
800-462-4698 | www.alphasystemsinc.com
Dicor Corp.
800-837-2059 | www.dicor.com
LaSalle Bristol XTRM Ply PVC Roofing
800-718-7187
RV Roof Armor
941-209-5600 | www.rv-armor.com
RV Roofing Solutions
888-847-7010 | www.rvroofingsoludtions.com


