Following prescribed maintenance procedures will improve chassis longevity and guard against unscheduled visits to repair shops
Motorhomes provide years of enjoyment as long as the scheduled routine maintenance is performed on a timely basis. Sometimes the excitement of preparing for a trip can find owners overlooking basic maintenance procedures, which can contribute to unnecessary repairs down the road. Even if you don’t plan on completing the actual services yourself, strong knowledge of maintenance requirements and procedures will give you advantages when working with repair center technicians.
Locate your owner’s manual and become familiar with the chassis maintenance schedules. If you don’t have an owner’s manual, refer to Internet Web pages where manufacturers post information that relates to your specific chassis and drivetrain. Hopefully you’ve kept an accurate logbook (with receipts) of all the service procedures that have been performed at certain mileage milestones. This is your best resource for keeping track of maintenance history.
Compile a list of pending maintenance procedures and note those items that need to be completed in the near future. Plan ahead, taking into consideration upcoming trips and how many miles you plan on traveling. Though it’s best to avoid being on the road during service times, that might not be possible, depending on travel plans. Get in the habit of checking your list two or three weeks prior to departure to allow a bit of wiggle room to perform any necessary maintenance or repairs. Most importantly, do not neglect scheduled maintenance just because you’re on the road.
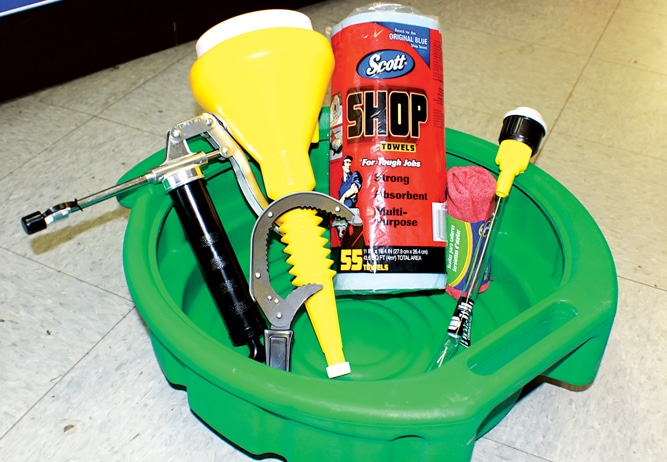
Clockwise from top left: Most auto parts stores carry synthetic or paraffin-based oil for gas and diesel engines. Transmission fluid is available in a variety of specifications, including synthetic. Items commonly used for servicing the rear differential include additives, oil and a hand pump.
To begin a service routine, grab a flashlight and a handheld mirror to perform a visual inspection from one end 
of the coach to the other, scrutinizing all engine and chassis components. Target areas are deteriorating hoses, broken welds and oil leaks. Finding potential issues and addressing them before they become major problems can help keep you out of the repair shop during a hard-earned vacation. Don’t forget to inspect the tires, including the spare. Tires lose air while sitting in storage, and unless they are covered, dangerous cracks in the sidewalls can develop. Inflate to the proper pressure before any trip and check the manufacture date to make sure the tires have not timed out. Generally, replace tires, even if the tread condition is still safe, after seven years. Some 
tire manufacturers extend that interval depending on storage conditions.
Lube, Oil and Filter Change
Newer gas and diesel engines are 
designed for higher mileage intervals 
between scheduled oil changes, unlike engines manufactured 10-15 years ago. Oil viscosity and blend chemistry have also changed, especially for diesel engines. Diesel engines also hold considerably higher volumes of oil than their gasoline counterparts. Later model diesel and gas engines have been designed to run up to 7,500 miles before needing an oil change and filter service.
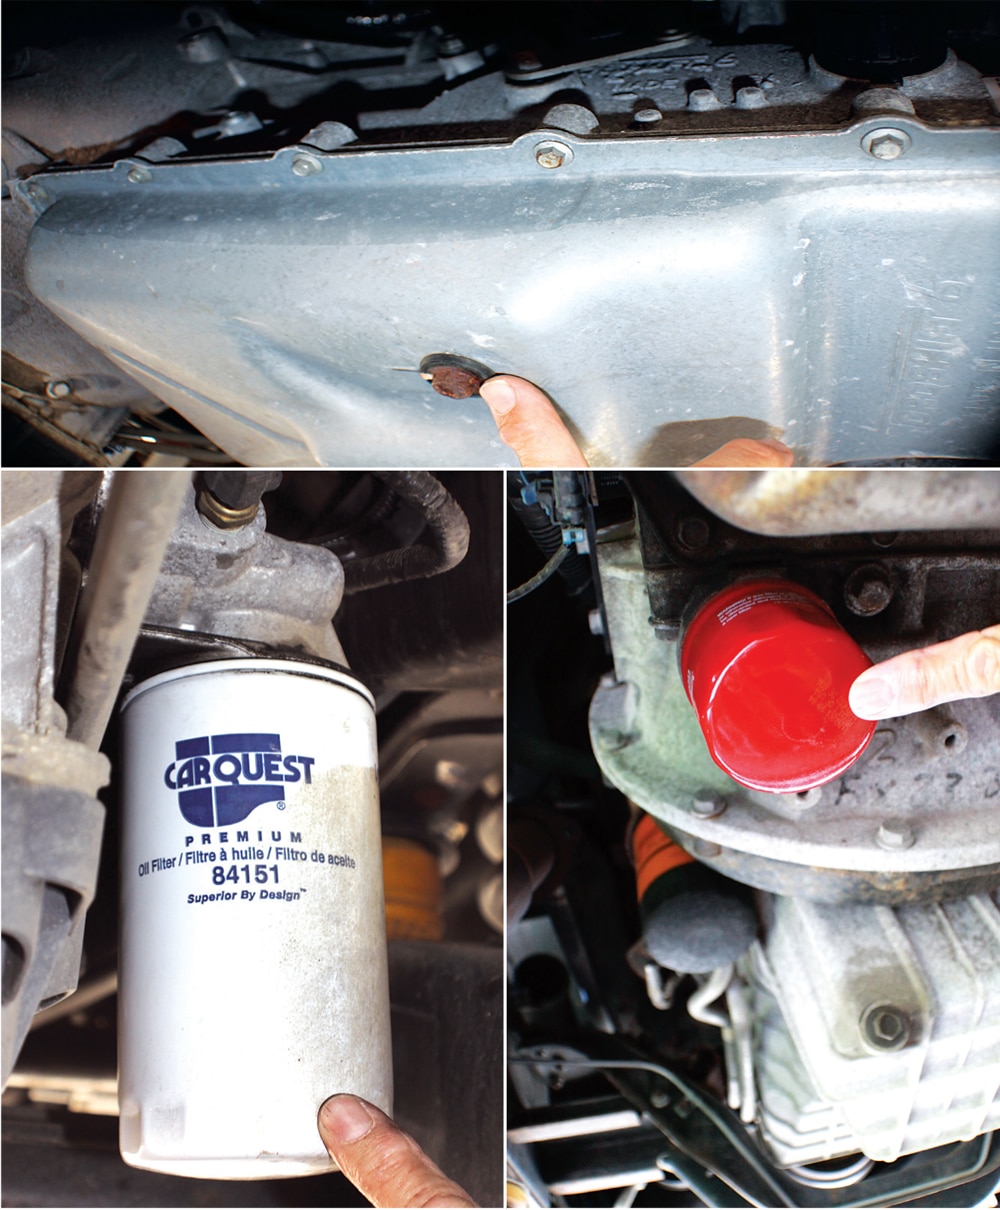
Check the manual carefully to determine the required type and weight of oil as well as the number of quarts necessary to fill to the proper level. Also note the filter part number required for replacement. Don’t forget to take into account the amount of oil required when using a new oil filter. For example, the owner’s manual may list a 12-quart capacity that moves to 13 quarts when the filter is replaced. Be sure to follow the owner’s manual instructions for warming up the engine – diesel or gasoline – prior to an oil change. This step is important; warm 
oil drains better than cold oil, removes more sediment when emptied and the engine is not subject to cold starting after the oil change. If the engine has a vertically mounted oil filter, fill the new filter with oil prior to installation to avoid starving the engine of lubrication for several seconds upon restart.
Wait until the oil drains back into the pan before checking the level on the dipstick. This is the perfect time to lube the chassis. The owner’s manual will identify points to lube. Keep in mind that many newer chassis don’t require grease, since normally greased components such as ball joints are sealed. Be sure to check the driveline as well; many have Zerk (grease) fittings that 
require lubrication.
The basic tools needed for this service include a pan capable of holding the oil drained from the engine, a quality oil filter wrench, a wrench or socket to remove the drain plug, a funnel, a lube gun, a grease cartridge and a few rags. Once the job is complete, be sure to recycle the used motor oil and filter and record in your logbook the details of this service. Many auto parts stores have recycling provisions for old oil.
Transmissions
Along with the advent of overdrive transmissions came the reformulation of transmission fluids. Auto-matic transmission fluids (ATFs) have evolved from Type F to Mercon 5 to full synthetic. Wear additives, friction modifiers, corrosion inhibitors, detergents and more have become necessary ingredients for today’s expensive and complicated transmissions. Heavier motor-homes, coupled with towing a dinghy, only increase the importance of regular maintenance procedures. Heat through friction in the torque converter and clutches is the biggest cause of failure of automatic transmissions. An ideal temperature for oil measured in the transmission sump is 175 degrees Fahrenheit. Unfortunately, there are hills to contend with and towing a vehicle can also influence oil temperature. Any temperatures higher than 250 degrees can cut the ATF life in half. Install a quality gauge to accurately monitor ATF temperature. Consider installing a larger transmission oil cooler if fluid temperature is hard to control while traveling in hot weather.
It is best to consult the owner’s manual for the recommended service intervals as well as the specific fluid type requirement. If the transmission light illuminates at any time while driving, pull over as soon as it is safe and check the fluid level.
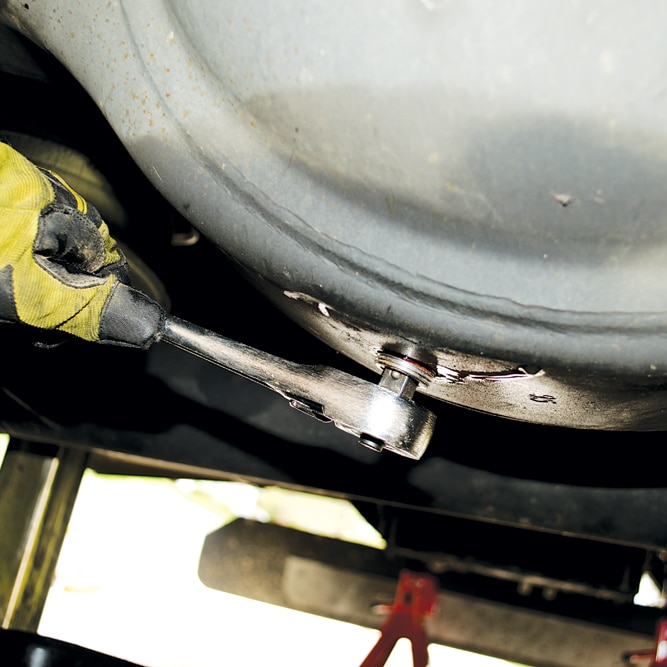
Removal of drain plug on rear differential can be accomplished by using a ratchet.
Start the engine and, using a flashlight and mirror, inspect carefully for leaks, corrosion or any deteriorated parts. Follow the transmission lines to the transmission cooler; check for any leaks or obvious signs of corrosion at the transmission cooler. This inspection is important in older motorhomes as rubber lines were commonly used prior to metal lines found today. The rubber tends to crack over time, resulting in a leak or, in a worst-case scenario, total fluid loss.
Transmission fluid will usually not be low unless there is a leak. Pull the dipstick and follow the instructions at the end of the stick to check fluid level – be sure to comply with recommended procedures. If nothing is imprinted on the dipstick, consult the owner’s manual for specifics.
Color alone does not indicate the quality/condition of the transmission fluid. A quick, simple way to test the quality of the transmission fluid is to purchase test pads from Robinair (No. 92001). These test pads are not as accurate as a chemical analysis, but they will give you a general idea of the current state of the transmission fluid. To use, place a few drops on the pad from the dipstick and the color will change to indicate fluid status. A professional should complete motorhome transmission service. When selecting a service location, call ahead and ask which method is used to change the fluids.
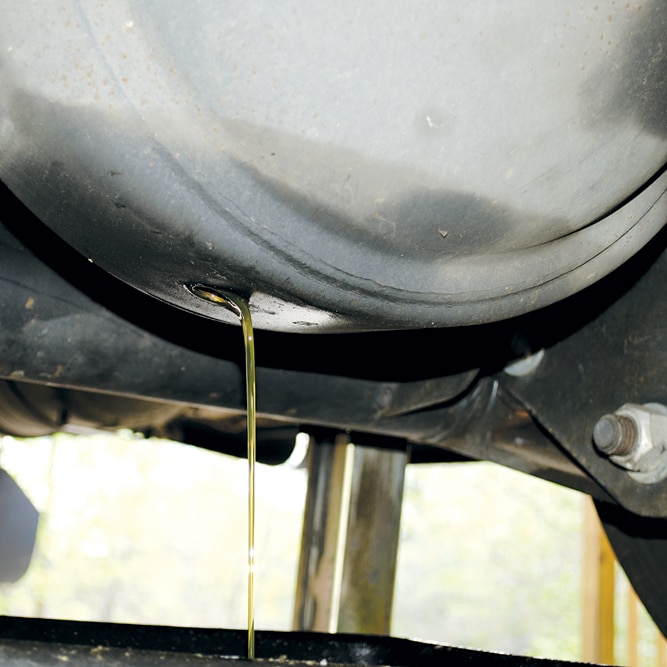
Make sure the oil from a third-member rear differential is completely drained into an oil catch basin.
Flushing with a machine is easiest, but controversial; the owner’s manual usually doesn’t list machine flushing as an option.
While switching to synthetic fluid is more costly, the benefits are superior protection and longer service intervals. For example, an Allison transmission using Mercon 3 has a service interval of 25,000 miles or one year. The same transmission with TranSynd Synthetic has a service interval of 150,000 miles or four years.
If you do take on the task of changing the transmission fluid and filter yourself, you’ll need a large drain pan, a socket set, a funnel and rags. Beyond purchasing the required number of quarts and correct type of transmission fluid, you’ll need a filter and gasket kit that corresponds to your particular transmission. This information can be found in the chassis owner’s manual or by using the cross-reference books at auto parts stores.
If the transmission has a drain plug, remove and drain the fluid into the drain pan. If there’s no drain plug, the pan will need to be unbolted and a corner slowly pulled from the transmission. Once the transmission fluid is finished draining, completely remove the pan to expose the filter. Carefully remove the old pan gasket and clean the surfaces prior to reinstallation. Follow the instructions for replacing the gasket and the filter. Some transmissions have a reusable gasket. Note: 
Allison transmissions also have one or two external filters. Reinstall the transmission pan and torque the bolts to the manufacturer’s specifications.
Determine the fluid capacity of the transmission. Better yet, measure the fluid drained from the transmission. Then, using the funnel, add that amount of new fluid back into the transmission through the dipstick tube.
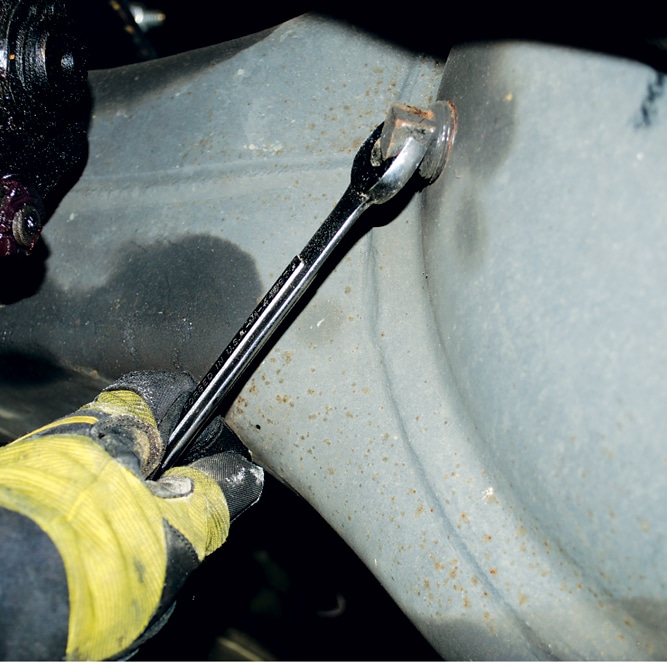
Remove the upper plug from the rear differential and pump in the new oil until the level reaches the bottom of the threads.
Rear Differential
Often referred to as the rear end, the rear differential allows the rear wheels to turn at two different speeds while providing power to propel the coach down the road. Its job is to regulate the number of turns made by the drive wheels in relation to the number of turns of the driveshaft. It also compensates for differences when turning since the inside wheels travel a shorter distance through the turn. Without the rear differential, the tires would scrub and hop during the turning sequence. Lubricated by a specific volume of oil – usually 3 quarts for a gas chassis and 19 pints for a diesel (no filter) – the rear differential has quite a taxing job so paying close 
attention to regular service intervals is 
important. In general, servicing runs every 30,000 to 50,000 miles, depending on chassis manufacturer.
Tools needed for changing gear oil in the rear differential include an oil drain pan, socket set, a gasket scrapper and clean rags. Carefully consult the owner’s manual for the proper oil and/or friction modifiers. Now would be a good time to change to synthetic oil because of its outstanding ability to resist heat and because the oil will usually last two to three times longer than standard gear oil. Consider purchasing a small hand pump to add the new differential fluid since the oil fill hole is usually in a cumbersome location and Murphy’s law generally applies.
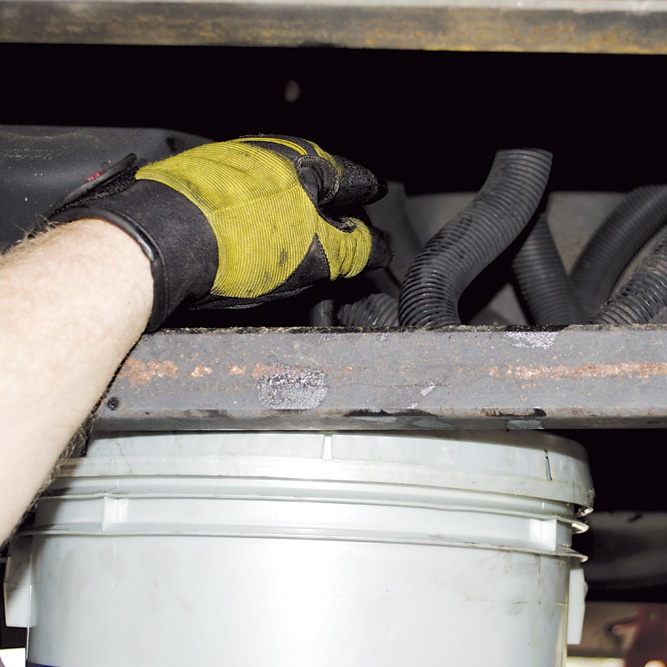
Be certain that you use an appropriately sized catch basin or resealable bucket when you drain any fluids from your RV.
Class C motorhomes – 1980s models – and Chevrolet P-chassis as well as some Ford chassis models prior to 1990 utilized rear differential covers without a drain plug. In the early ’90s, motorhome manufacturers started using a heavier-duty third-member-type differential that includes a convenient drain plug, eliminating the need to remove the differential cover and gasket. Do not forget to use a thread sealant on all bolt threads!
Find the data plate on the rear axle and count the number of bolts on the cover to ensure the proper gasket is purchased from the local auto parts store. You will also need to buy the necessary type and amount of gear oil.
To drain the oil, remove all but the top bolt from the rear differential cover and loosen the top bolt two turns.
With the oil pan under the differential, gently pry the cover away from the rear axle housing so that the oil will drain into the pan. (The reason we leave the top bolt in place is to keep the cover from popping off too quickly, resulting in a gush of gear oil.)
After the oil is drained, remove the top bolt and the cover. Scrape off the old gasket and clean the differential cover, as well as inside the gearbox using clean, lint-free rags. Install the gasket. Bolt the cover to the gearbox and torque to manufacturer’s specs. Add the gear oil through the top fill plug until the oil weeps out the hole. Install the friction modifier before the oil, if needed. Finally, install and tighten the fill plug and check for leaks. Check for leaks again after the first 25 miles of driving.
For those who enjoy getting their hands a dirty, there’s nothing more satisfying than knowing that you have some skin in the game. Be advised to keep accurate records and save all receipts. That way you’ll be protected if a warranty issue requires proof of scheduled maintenance.
Check out MotorHome’s October issue for Part II, which will focus on radiators, belts and hoses, power steering, brake fluid, wheel bearings, tires and brakes.