A DIY diesel radiator flush is an easy-to-do preventive maintenance project.
Keeping the engine on a diesel pusher cool while on the road is no easy task. It requires a large, rear-mounted radiator or two smaller side-mounted ones as well as a water pump, cooling fan, lots of hoses and many gallons of coolant/antifreeze. Flushing the cooling system isn’t a terribly difficult job to perform at home as a DIY project, but if you wait until the engine overheats it’s not nearly as fun or convenient on the side of the road in the middle of the summer to discover that your cooling system capacity has been reduced due to poor maintenance. So it’s important to handle the task while your coach is in the driveway.
Like many systems in a motorhome, the cooling system requires regular service and fluid changes. If your particular diesel is a wet-block design, such as a Cummins ISC, ISM, ISL or ISX; or the Cat C9, C11, C13; or even the MaxxForce 10, it likely came prefilled with either an extended life coolant (ELC) or a fully formulated coolant with supplemental coolant additives (SCAs), as was the case with the 36-foot Tiffin Phaeton coach featured here. The disadvantage of fully formulated coolants is that they need to be tested every six months for proper levels of key additives, which at first doesn’t seem like a challenge but as time wears on the testing routine gets old and is really easy to forget. If your coach has a smaller Cummins ISB or a Cat C7, it has a dry-block engine and the coolant could be different. Before you decide to change to a different type of coolant or to even perform a flush and refill, it’s best to check your motorhome’s owner’s manual and use the exact product specified for your particular engine.
Since all coolants have a service life, once the coolant on this coach required a change we decided it would be easier in the long run to convert it from a fully formulated coolant with SCAs to an ELC. Not only do ELCs have a longer change interval, they don’t require periodic testing for additives. The only regular check that needs to be performed is to ensure the freeze point is acceptable.
We decided to use a product from Peak called Final Charge Global. It is approved for use in Cat, Mercedes-Benz, Cummins and many other engines and has a guaranteed life of 1 million miles or 8 years per the manufacturer. In the past this product required adding an extender at 3 years or 300,000 miles to achieve that long life, but it was recently reformulated and the newest specs no longer require the extender. Some other benefits of this product are that it is silicate- and nitrate-free, which means long seal and water-pump life, and it offers better heat transfer.
Although several chassis manufacturers use this same coolant in their motorhome chassis, they usually opt for a more conservative six-year change interval as opposed to eight years. As always, make sure you are following the chassis manufacturer’s requirements on maintenance as well as the type of coolant you are using.
After making sure the Final Charge was approved for our engine (meeting Cummins CES 14603 standards), we went to a local truck supply parts store and bought 6 gallons of 100 percent concentrated coolant. A 50/50 blend with water already added is also available, but it is much more economical to buy the concentrated version. And, since there are always several gallons of coolant remaining in the heater hoses and engine block after draining the system, the only way to achieve the proper 50/50 ratio is to begin with a 100 percent concentration of coolant. That way you can add half the total system capacity of pure coolant and top it off with distilled water to ensure the 50 percent dilution needed for proper antifreeze protection.
Next we bought a lot of distilled water (you will have to determine how many gallons based on your cooling system size and the number of rinses you intend to perform) for the flushing process. The reason for using distilled water is to help prevent the introduction of harmful minerals into the cooling system that can lead to scale forming inside the radiator core. Three complete flushes should ensure most of the old SCA-type coolant is removed from the cooling system if you follow the correct procedure.
Freightliner specs on this coach show a cooling capacity of 10 gallons, but that doesn’t include the hoses and heater core for the coach heater, which likely adds another 2 gallons for a total of 12 gallons. At each drain we recovered about 7 gallons, or 58 percent of the total capacity. So we needed 3 times 7 gallons of distilled water (21 gallons) for flushing and then 2 to 3 more for the final fill (a total of 24 gallons).
The goal of the flush is to completely drain the cooling system as much as possible, then refill it with distilled water. Then slightly warm the engine (120 degrees to 140 degrees Fahrenheit) at fast idle to circulate the water through the heater core and block. When changing coolant types it usually takes three complete fill-and-drain cycles to ensure the old coolant is gone. After each warming cycle of the engine make sure you do not drain the old coolant until it has cooled off enough not to burn you, and also never open a hot radiator cap or else the coolant will overflow as the pressurized cap is removed.
As you complete each flush and drain you can collect the drained coolant as it gradually changes color (from pink in our case to light pink, which was the color of a fully formulated coolant originally in this engine). The Final Charge coolant (which is red) we used for the refill states that it can accept up to 25 percent concentration of other coolants without affecting its performance, but if you perform three complete flushes you will likely end up with less than 10 percent of the old coolant remaining.
When draining it is important to capture the old coolant and dispose of it properly; it should not be poured on the ground or in a storm drain. It should be recycled at a local designated center that accepts antifreeze. Also, you need to be careful not to leave open containers of the old coolant lying around, as animals will be drawn to it and it will be fatal if they are allowed to drink it. One easy way to capture everything is to use large 10-gallon catch pans and then refill the empty distilled water jugs with the drained coolant.
If your coach is currently using an SCA coolant and it has a coolant filter, that filter is often precharged with SCAs. If you change over to an ELC it is important that you remove that filter and replace it with a blank filter that has no SCAs. When using ELC products you do not want to contaminate them with SCAs, so keep that in mind if your coach has coolant filters. Also, make sure the service facility doesn’t test for SCAs and add them when having the motorhome serviced.
Every chassis manufacturer has a different network of hoses, heater-valve cutoffs, drain petcocks and water-pump drain petcocks and therefore can require a slightly different method of draining and refilling the radiator. The steps described here are what we used on this coach and its configuration. However, your motorhome may be different enough to make a significant change in the process, so check the owner’s manual to see if it contains any special instructions for avoiding an air bubble in your engine’s cooling system. If you experience an air bubble, the most likely symptom will be that the dash display/temperature gauge will not show an increase in temperature during one of the idle cycles. If that happens, shut off the engine and follow the correct procedure to purge the air from the cooling system.
Another likely issue is that after you start the engine after a flush-and-refill cycle the low-coolant alarm can sound. This occurs as the air is released from the system into the surge tank, which may have shown full before. The cure is to shut down the engine and add more flush water into the surge tank (location of the low-coolant sensor) until at the proper level. Then you can resume the warming of the engine and the low-coolant alarm will cease after a few minutes.
Now that you are armed with a basic understanding of the task, you’re ready to get started.
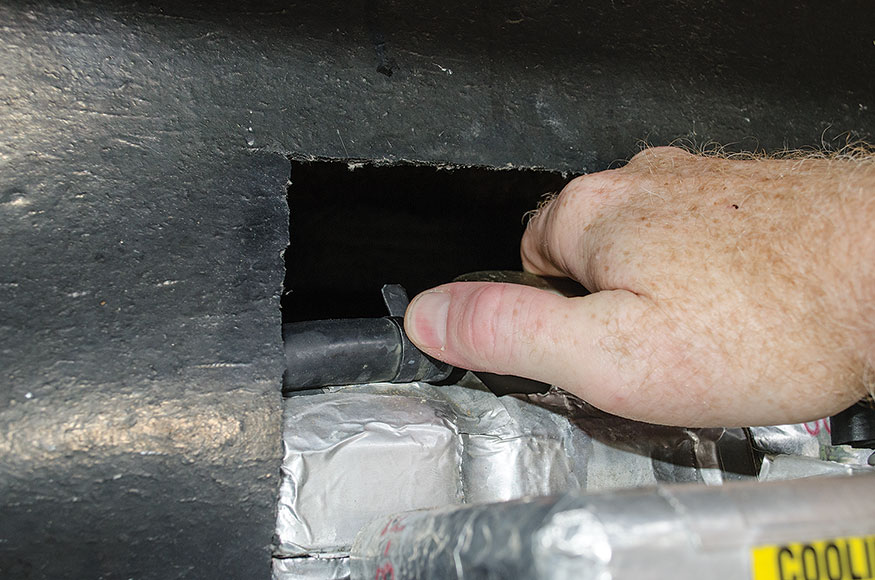
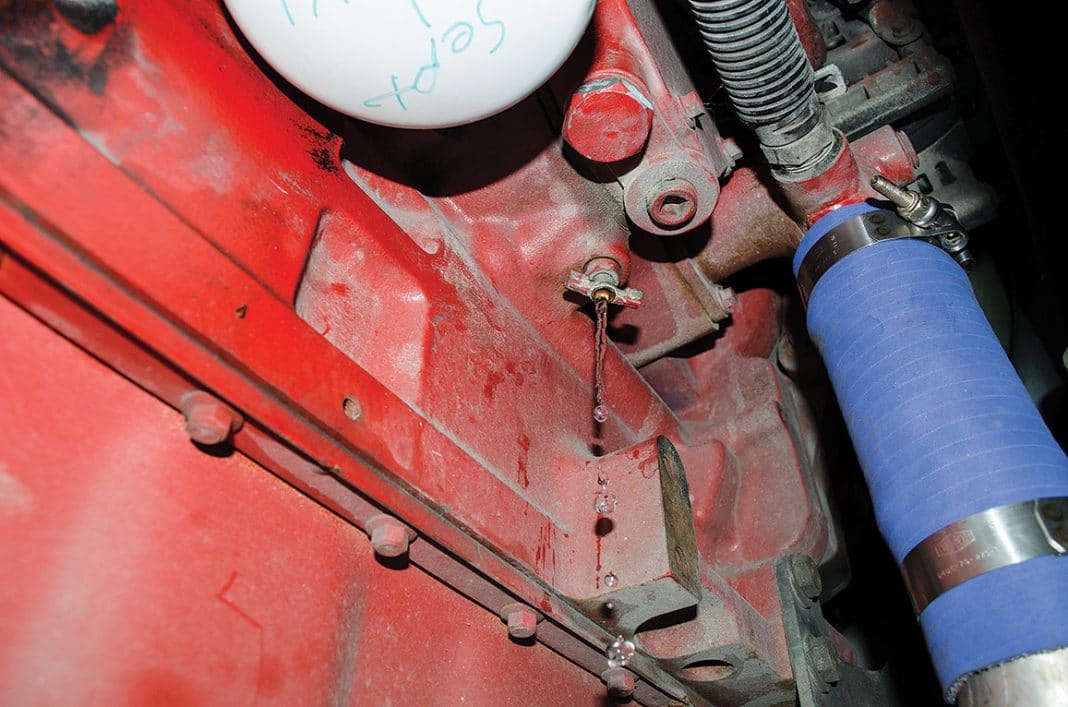
After locating the radiator cap (surge tank) of the cool engine, remove it to allow the radiator to easily drain. Never open a hot radiator cap.

There are several different ways to drain a radiator. Since this one didn’t have a large drain at the bottom, we simply loosened the hose clamp on the bottom radiator hose. As soon as the clamp is loosened the coolant will drain quickly, so have a catch pan in place and be prepared for a fast dump when you pull the hose off. Usually there are several low hoses here to choose from depending on the layout. Just pick the one that has the lowest drain point in order to drain the most coolant. We removed two different hoses each time to maximize the volume of water removed.
After draining the coolant you will need to reinstall the radiator hose and tighten the hose clamp.
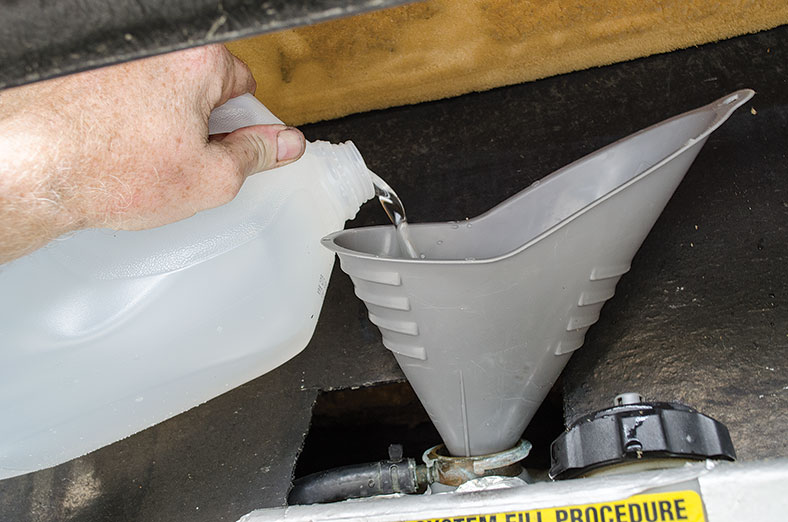
Next, we refilled the radiator through the surge tank until it showed full. This required 7 gallons of distilled water each time.
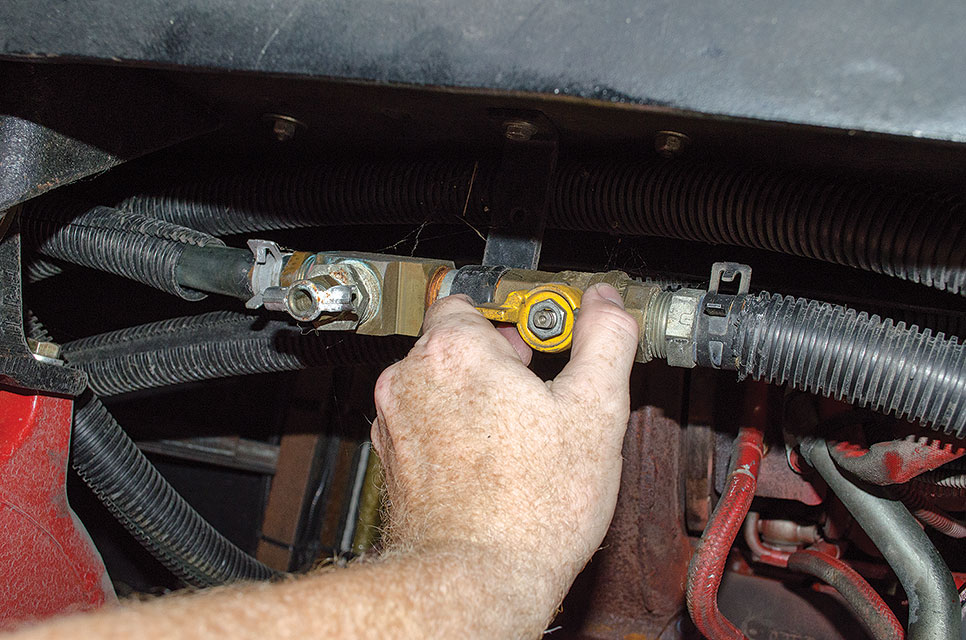
If your chassis manufacturer called for closing the heater core lines, reopen them now, as this allows the warm coolant to flow through the heater core and flush it as well. Note there is also a drain petcock here that can be used on some coaches to drain additional coolant from the system and to bleed air bubbles after refilling.
Another step to speed the process is to turn the coach heater to full hot before starting the engine. First, allow it to run at slow idle and then raise it to high idle for several minutes. This allows the heater system to pull the warm coolant through the heater core and flush it as well. As soon as the air from the heater starts to warm, shut down the engine. Remember, you must wait for the engine to cool before draining the flush water to prevent burns.
On some coaches it may be possible to locate the drain petcock at the water pump and open it slightly to allow air and water to escape while the engine is idling. This helps purge any air from the system. It can only be done before the engine is warm, otherwise the coolant is too hot. Though there are no moving parts near the water pump area of this coach, be careful as you reach up to open and close this drain valve with the engine running. Turn off the drain petcock once a steady stream of coolant is released.

If you watch closely while draining after each flush, the color of the coolant will change from bright pink to a much lighter pink (when draining a fully formulated coolant). Don’t fret, however, if it never returns completely clear as you may expect. The sample on the right only contains 5 percent SCA coolant yet still shows a lot of color. If you flush properly three times, the level will be well below the acceptable 25 percent limit before refilling with new coolant.
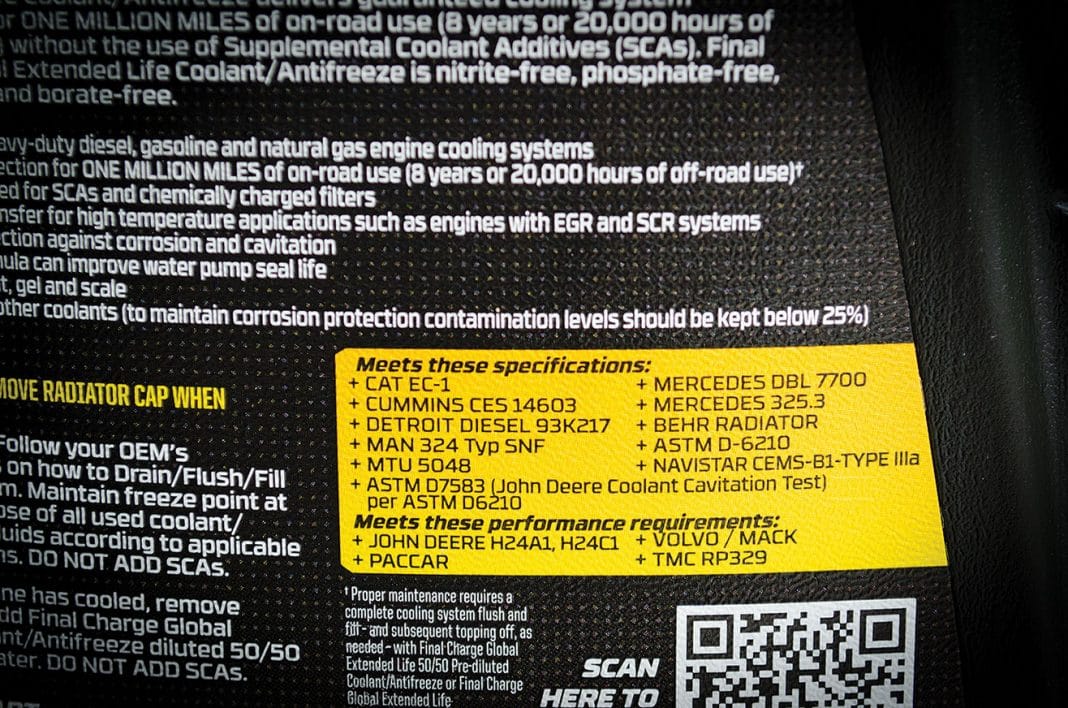
The Final Charge Global Coolant we used is approved for a wide range of engines and is rated to last an incredible eight years or 1 million miles without the use of additional additives or extenders.
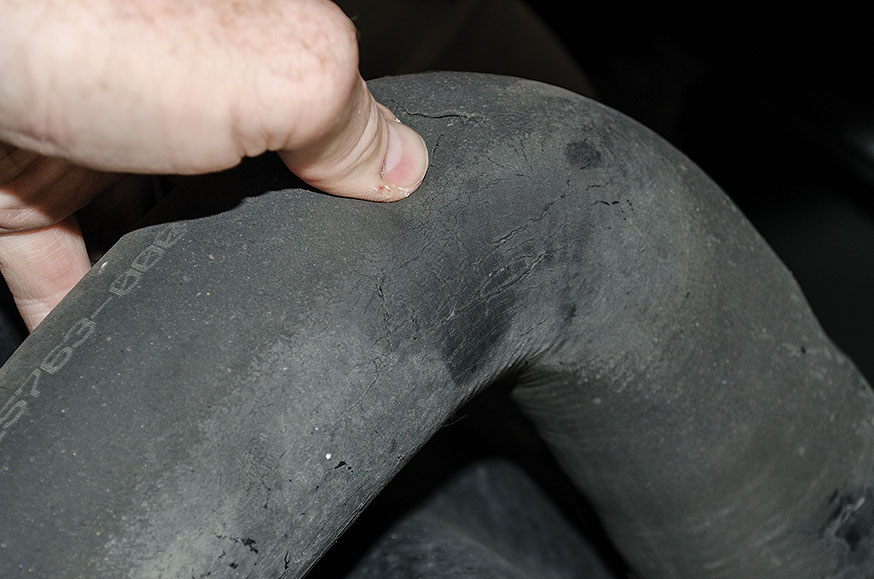
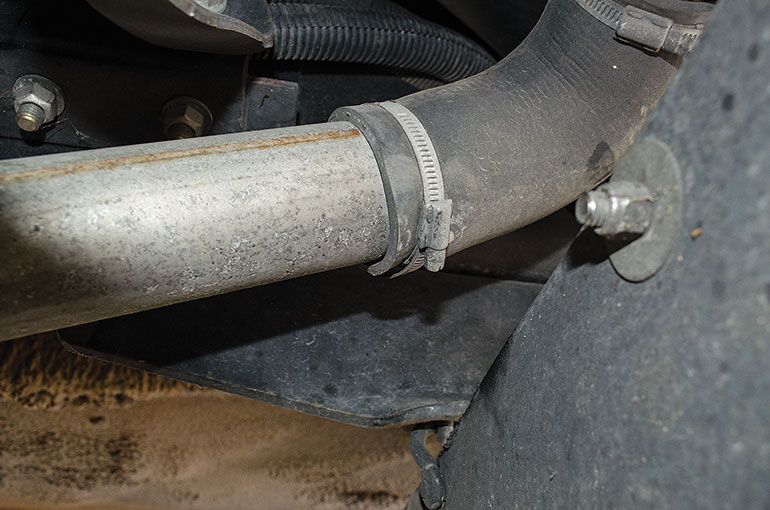
When flushing the coolant, it is a great time to inspect the hoses as well. As you see, the lower radiator hose on this coach was starting to show signs of cracking so we replaced all three bottom radiator hoses at a total parts cost of about $130. The top radiator hose showed no sign of cracking so it was not replaced.
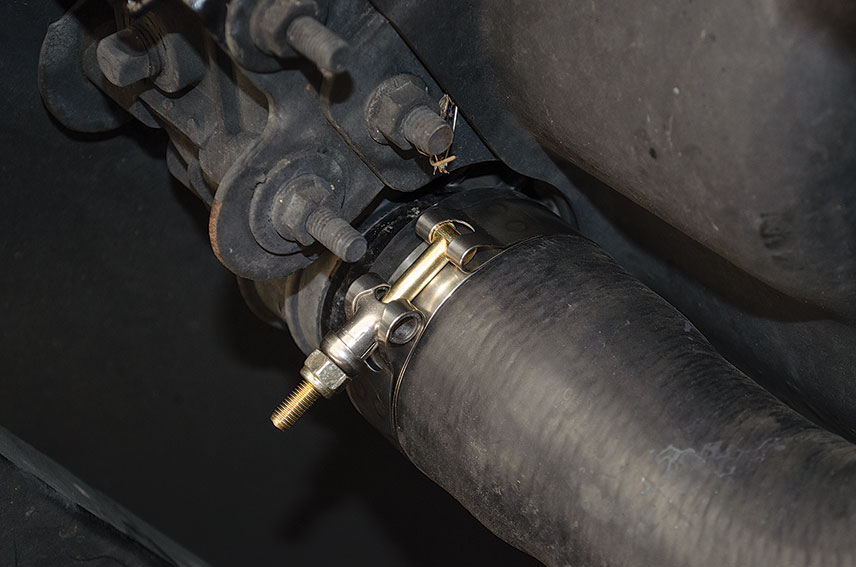
When changing the hoses it’s always a good idea to replace the hose clamps as well. Instead of the standard narrow band clamps that were originally used, we took the opportunity to upgrade ours to a wider stainless-steel, T-bolt hose clamp. Not only are these types wider for more clamping surface, they use a bolt, which is a much stronger way of clamping the hose securely.
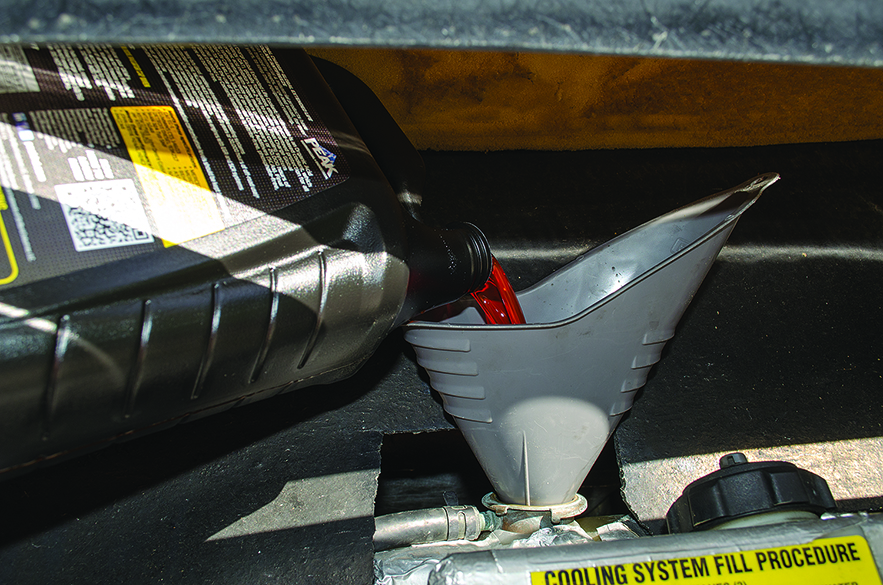
After three complete flushes with distilled water we then added 6 gallons of 100 percent concentrated coolant (not 50/50 premixed) to the empty radiator surge tank. In this coach, 6 gallons is half the total capacity of the system, which will yield a perfect 50/50 ratio after adding enough distilled water to top it off. Then it took an additional two gallons of distilled water to show full in the surge tank. The amount of water you add to reach full is not critical as long as you fill it to the proper level. Remember, there is residual water in various hoses, the heater core and engine block to reach the proper mixture. After filling the radiator for the final time, you will once again need to bleed the air from the lines if your coach is equipped with drain petcocks, and run the engine on high idle long enough to bring it up to full temperature. Then recheck the surge tank level to ensure it is at the proper level. If the coolant level is below the full mark wait until the engine is cool and top off the tank as needed. Your only other service going forward will be to test the coolant for the proper freeze point.
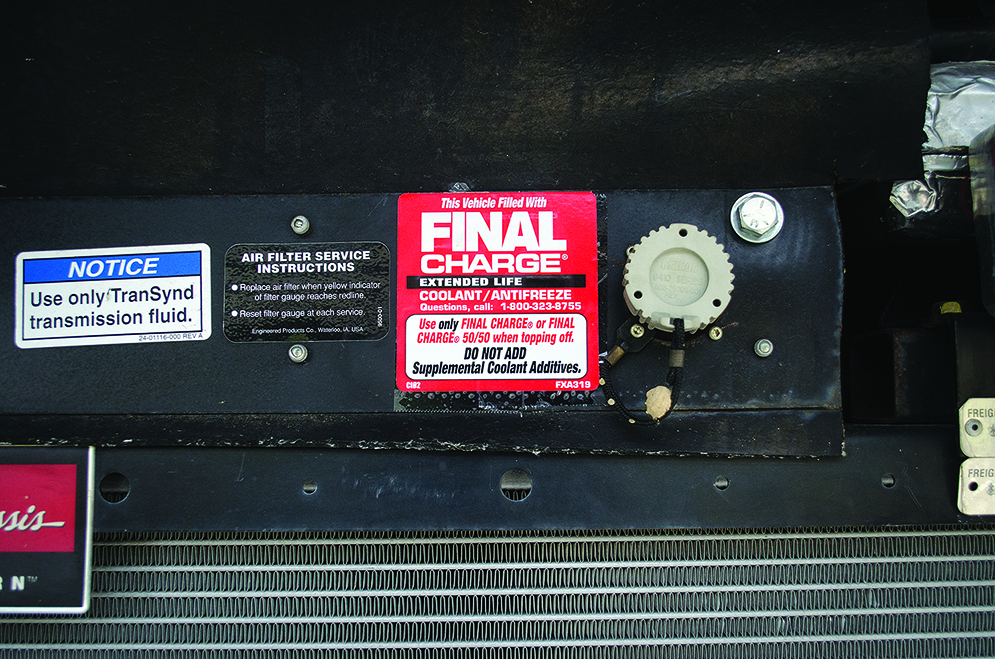
After converting the coach to a different type of coolant it’s a good idea to label it properly to prevent any confusion if you take it in for service. Most supply houses that sell coolant keep these stickers in stock.
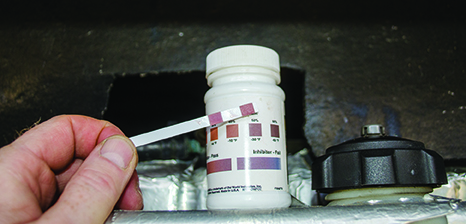
After everything is topped off and the engine has been run to full operating temperature and cooled down, you can use a test strip (make sure you get the right one for your type of coolant) to ensure the mixture comes out at 50 percent.