Backing a motorhome can be a precarious maneuver. While backup cameras immensely improve rearview vision, distracted drivers – or even ones paying attention – can miss obstacles, especially those on the smaller side.
Technology has made it possible to alert drivers when unexpected obstacles are in their path, and many cars and trucks are equipped right from the factory. For motorhome owners, Mobile Awareness offers an obstacle detection sensor system, SenseStat, which can be installed as an aftermarket project to give drivers extra security when backing up.
SenseStat is an alarm system that identifies obstacles outside of the 
driver’s field of view – or when something or someone unexpectedly enters the backing zone – and communicates this information to the driver using a dash-mounted warning display unit that provides visual and audible alerts.
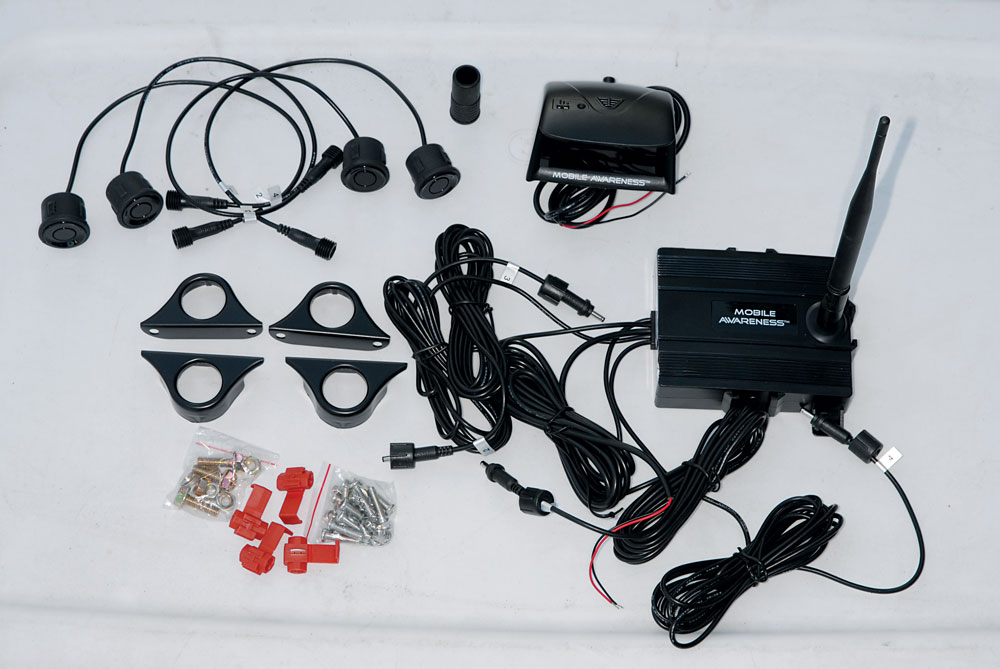
The SenseStat Wireless Obstacle Detection Sensor System comes complete with all the necessary brackets, screws, wires and bolts for a straightforward installation.
The SenseStat system, using wireless technology, requires only a 12-volt DC and ground connection and is relatively easy to install. Four-zone ultrasonic sensors are used to detect objects up to 8 feet away from the rear of the 
motorhome or any vehicle on which they’re installed. The unique sensor-scanning algorithm reads each of the four sensors simultaneously, and displays the sensor that’s closest to the obstruction on the LED dash-mounted readout, which results in a greater degree of blind spot coverage. The LED display indicates the actual distance to the closest of the four distinct field zones within 1 inch. 
The SenseStat display monitors in real time and offers three adjustable levels of audible alarms.
Before starting the installation, we took the time to find the most 
logical places to install the four rear 
sensors, the dash-mounted LED monitor and the electronic control unit (ECU). The placement of the ECU is very important, as its antenna must face downward in order to transmit the signal to the monitor.
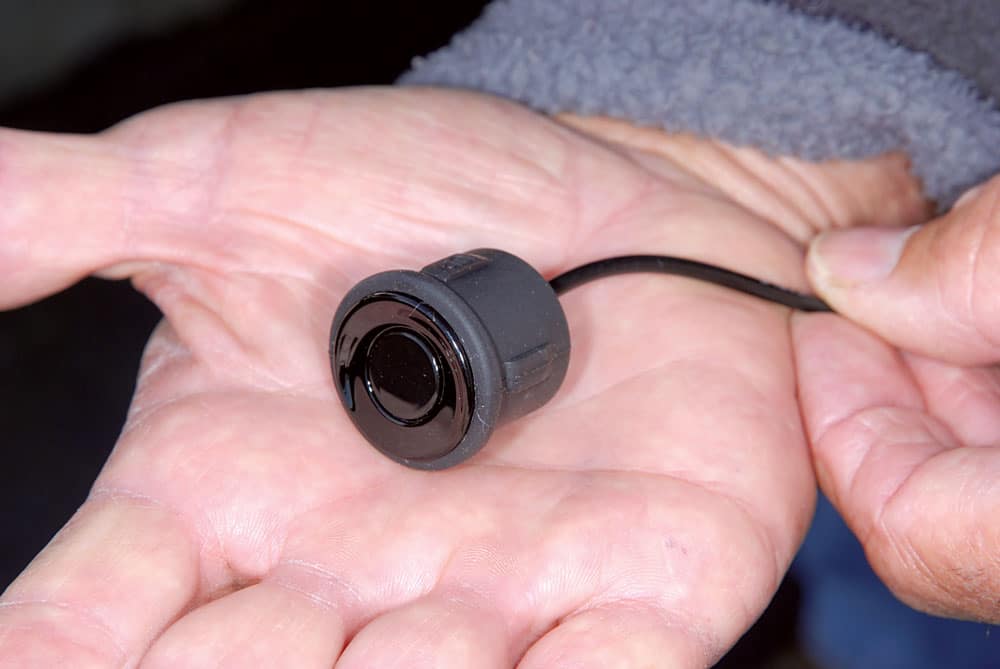
Each of the four SenseStat sensors are compact, lightweight and waterproof.
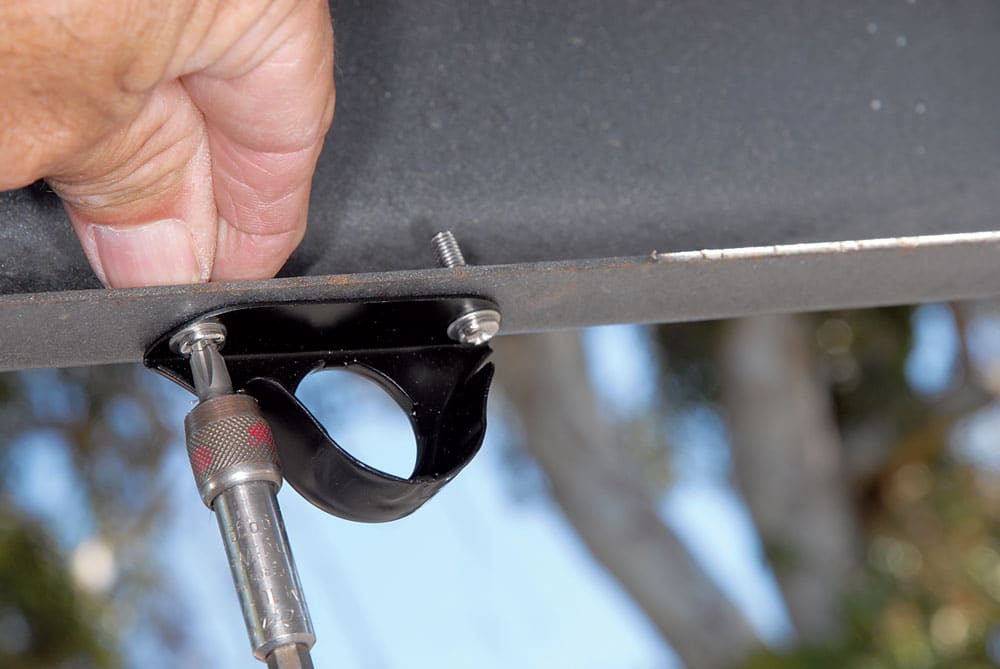
The unit was installed on a Class C motorhome, which provided a challenge to find an adequate location for the ECU since the rear of the motorhome sat so low to the ground. Thanks to the clever design of the SenseStat ECU antenna, and its ability to pivot in one direction, we were able to mount it to the bottom of the rear storage compartment using the two supplied bolts. Most installations will likely require mounting on a steel frame cross member. The ECU must be positioned to allow the antenna to pivot front-to-rear, so it can collapse if struck by an object.
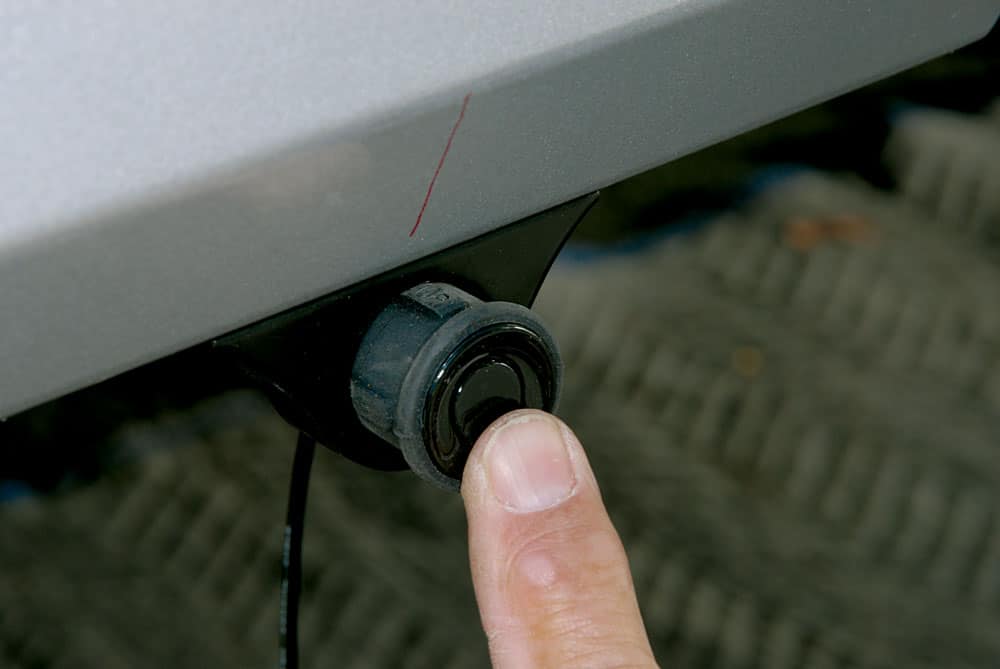
Installation of the four rear sensors to the bottom of the rear bumper is fairly straightforward using the supplied brackets and eight bolts. Specific instructions for spacing the four sensors are provided. All four sensors are tagged (1, 2, 3 and 4); the No. 1 sensor is mounted on the driver’s side, No. 2 and No. 3 in sequential order in the middle, and No. 4 ends up on the passenger side. With the sensors securely mounted, each one is simply plugged into the corresponding pigtails that terminate at the ECU. The exposed wires are secured using cable ties.
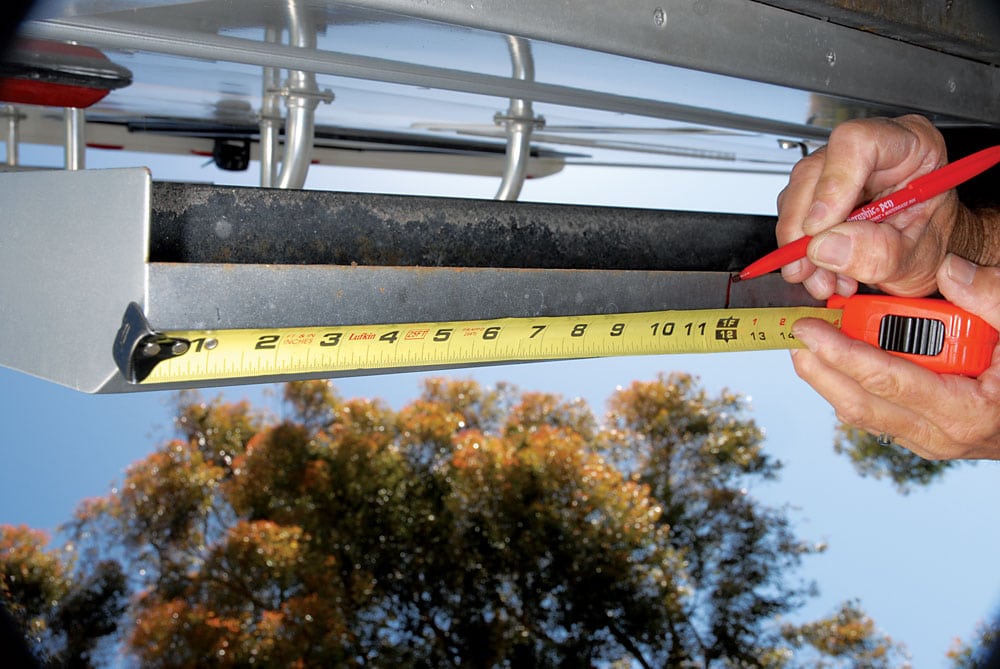
Measure carefully and mark the location for mounting each sensor bracket for proper operation of the SenseStat system.
For the next step, the ignition is turned on and the transmission placed in reverse. Be sure the emergency brake is engaged and that the wheels are chocked. Using a 12-volt DC test light, the motor-home’s backup light wire is located and the wire from the ECU is spliced in using a butt connector, though the kit supplies a Scotchlok connector. The ground wire is attached to the frame.
Once the sensors in the rear have been installed, the LED monitor is 
mounted at a desired location on the dash. Our location of choice was on the far left of the dash, just to be certain the power wires would reach the fuse box in the 
engine compartment. A hole was punched through the existing boot in the firewall so positive and negative wires could be routed to the fuse block. After removing the fuse box cover, we inspected the fuse numbers on the cover to determine the reverse fuse and installed a fuse tap that was purchased at a local auto parts store. We then connected the positive wire to 
the tap and grounded the negative wire nearby on a metal fender well.
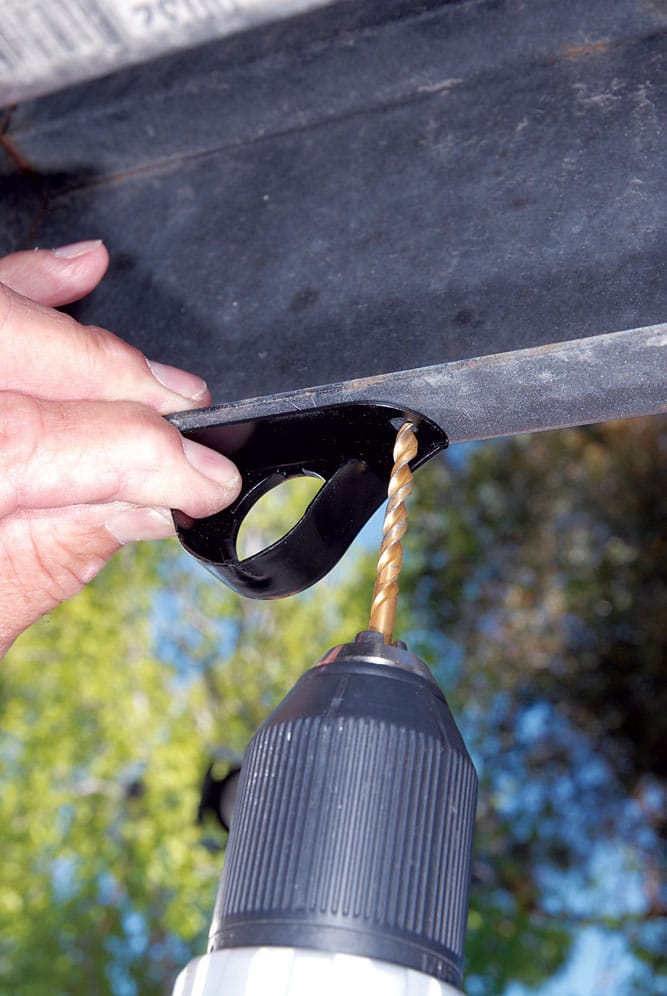
Using the sensor bracket as a template, drill the appropriate holes in the rear bumper.
The individual mounting brackets are bolted to the bumper using the provided fasteners.
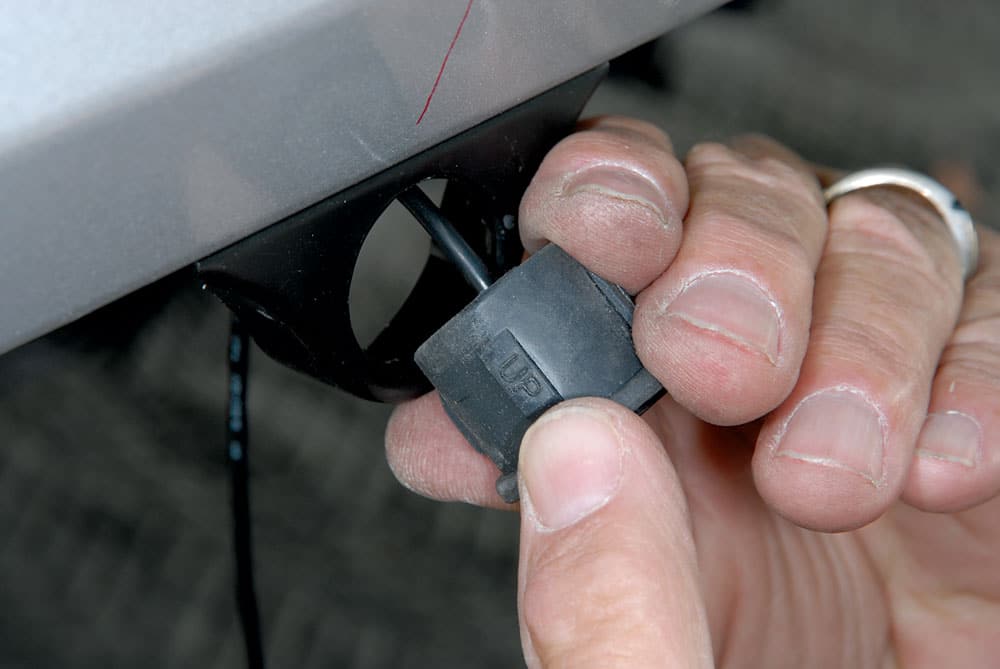
Prior to installing each sensor, be sure that the arrow is facing in the upward position for proper function of the SenseStat.
The next step is setting up the zero point adjustment on the SenseStat monitor. To begin, a measurement is taken of all equipment (ladder, etc.) that is attached to the rear of the coach. The SenseStat also offers a stop-line adjustment that easily adjusts the zero point for detection of overhanging objects such as a spare tire or a bicycle rack. The monitor is then programmed to offer visual and audible alarms of all potential hazards.
Once the zero point on the motor-home is set, the specific zones are tested. With a person in the driver’s seat, put the motorhome in reverse and depress the brake. While in reverse, have someone slowly walk past each sensor, starting 
at No. 1 and continue to pass the other three sensors. This allows the driver to confirm the distance from each sensor to set the audible tone to a desired level.
Make sure each sensor is installed in numerical order, beginning at the driver’s side.
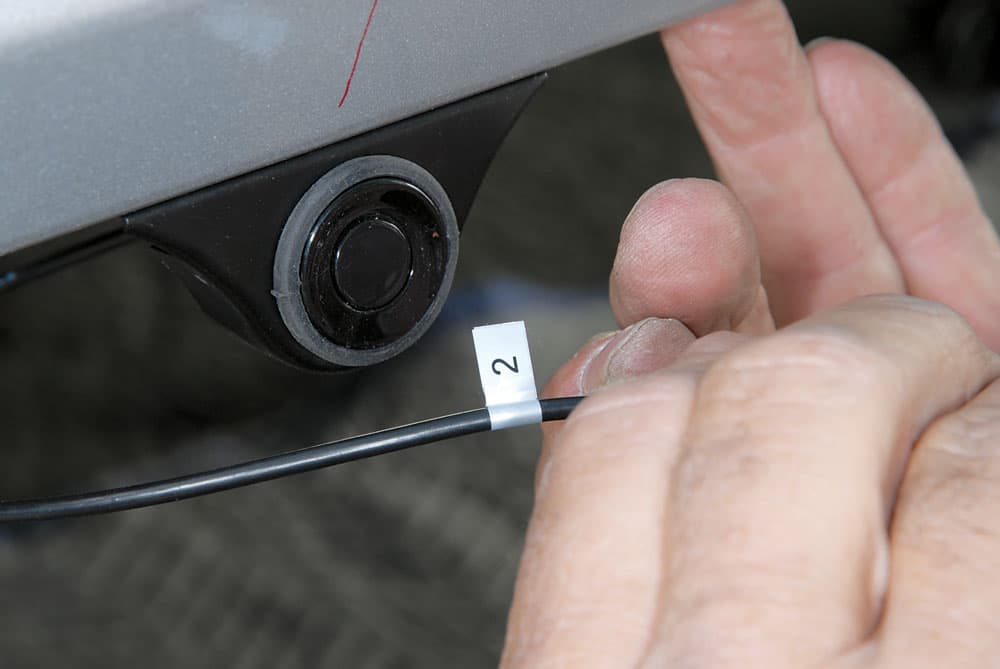
Make sure each sensor is installed in numerical order, beginning at the driver’s side.
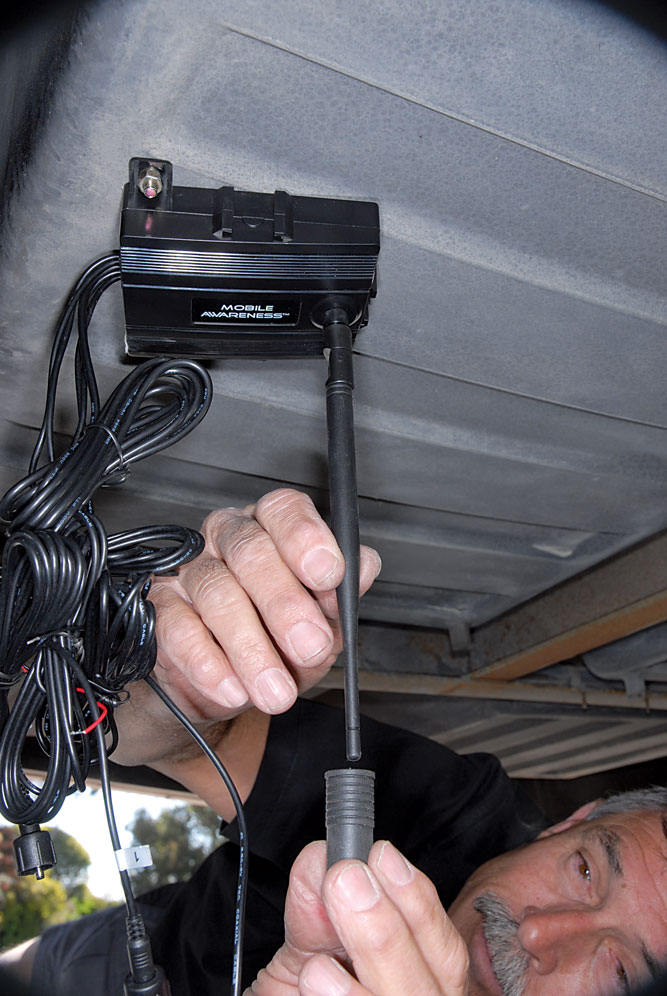
With the ECU bolted in place, install the flexible sleeve over the antenna to 
prevent it from folding up while driving.
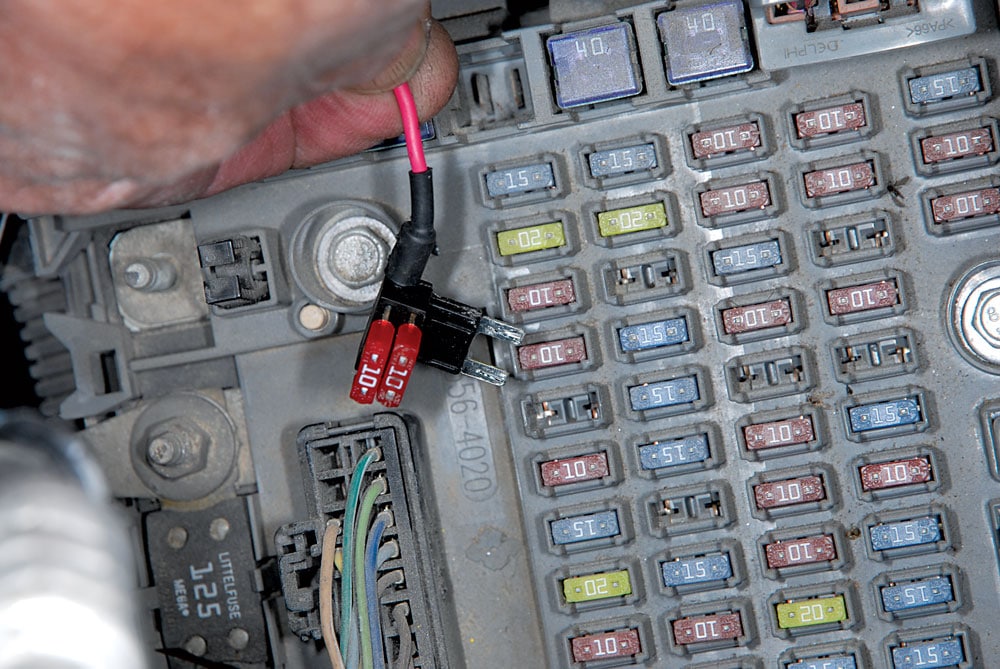
You will encounter many different fuse blocks and fuse types during installation. We found this handy fuse tap at an auto parts store that made installation of the power wire much simpler.
The next test involved backing up to a building to confirm that the zero point distance setting and the audible tone were in the correct sequence to properly alert the driver of nearing obstacles. Subsequent testing revealed that a fast-moving object, such as a bicycle, did not register the alert tones; it seems like the sensors need more time to work since they are wireless. There were no issues with solid objects. Backing a little slower will help ensure proper activation of the SenseStat sensors. SenseStat can also be installed at the top of any motorhome, split between the top and bottom, or even in both the front and rear
for additional protection. The waterproof system 
operates in temperatures ranging from minus 22 degrees Fahrenheit to 176 
degrees Fahrenheit.
The SenseStat includes informative instructions for a one- to two-hour 
installation and is backed by a two-year limited warranty. The MSRP is listed at $303 for the Wireless Obstacle Detection Sensor System and $271 for the 
SenseStat Wired Obstacle Detection 
Sensor System.
Even if a motorhome is equipped with a backup camera, the SenseStat is
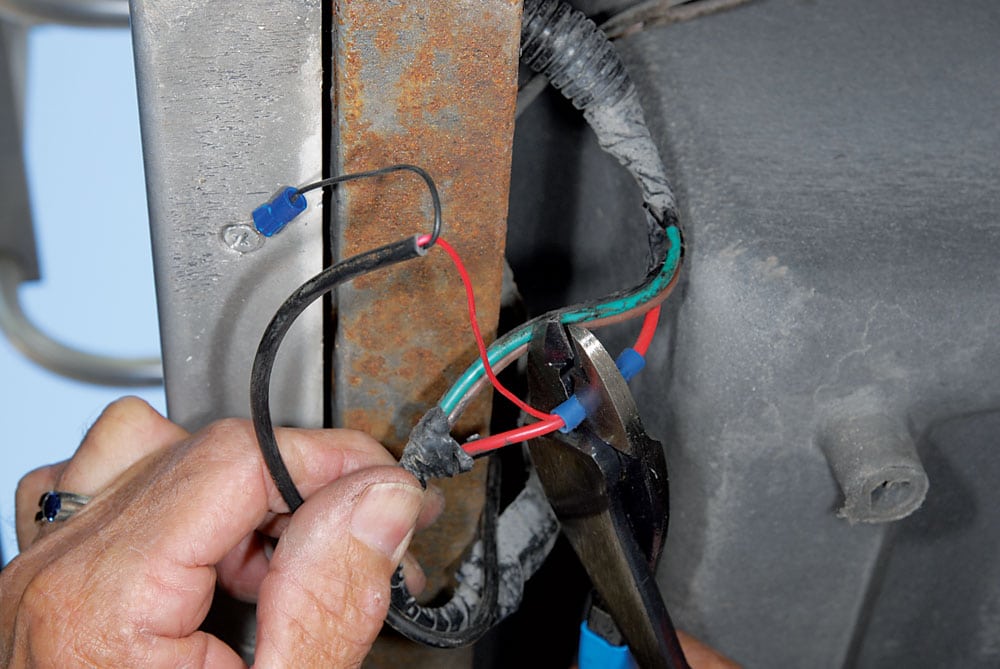
When tapping into the reverse wire of the coach, we chose to use a butt connector, rather than the supplied Scotchlok, as the butt connector offers a longer-lasting connection. A steel cross member made a convenient spot for the ECU ground wire.
a valuable tool for assisting the driver in safe backing. For less than the cost of an insurance deductible, SenseStat offers detection technology that could save your motorhome from external damages and help protect private property – as well as your pride.
Mobile Awareness
866-653-5036, www.MobileAwareness.com