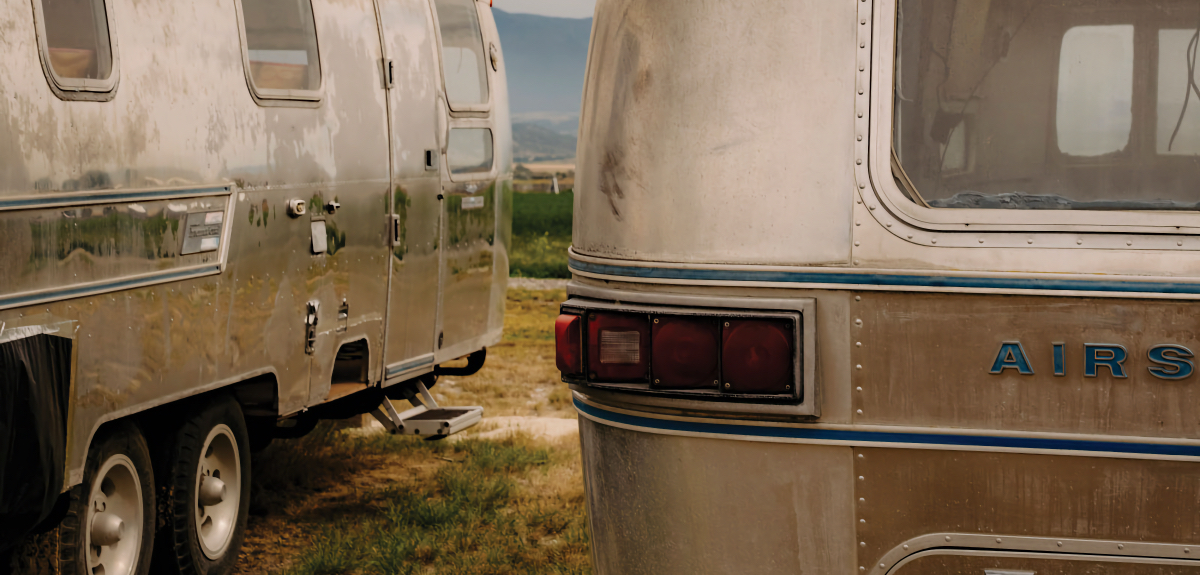
De-Winterizing Your RV
How to Get Your Rig Ready for the Road
Image Caption:
Spring is upon us. That means it’s time for planting, spring cleaning, and, if you’re an RVer, de-winterizing your RV. If you’re new to RVing, you may have just learned about “winterizing” last fall.
Winterizing gets your RV ready for storage, particularly in colder climates, preventing any possible damage that could incur. But DE-winterizing, its springtime counterpart, is even more important. Because unlike winterizing, when it’s completed you and your family are going to be IN the RV. You really want to get this right.
Can You DIY It?
The exact steps vary from RV to RV and could include things like opening water-line valves, reinstalling parts, filling and draining the water, and generally making sure everything works. You’ll find the specific steps for your RV in the owner’s manual.
Rather than get into that level of detail, I’m going to walk you through the general tasks that need to take place.
Don’t worry if this starts to sound intimidating! Almost every RV dealer offers a de-winterizing service. The goal here is to help you decide if you need to pick up a wrench . . . or the phone.
Water System
This is the first thing everyone thinks of when it comes to de-winterizing, so it makes sense to start here. Where winterizing got your rig ready to store by removing water from its plumbing system, de-winterizing reverses that and gets the plumbing system ready for use again.
Ensuring the plumbing and water in your RV is safe is a pivotal first step in de-winterizing your RV.
If your RV was winterized using RV antifreeze (the pink stuff), the first thing you’ll need to do is to get that antifreeze out of the water lines. It’s nontoxic, but it doesn’t taste all that great and you don’t want to drink it. The exact procedure to do this will be in the owner’s manual, and it will involve using freshwater to push that antifreeze out of the plumbing lines. You’ll have to drain lines, adjust valves (such as the winterizing valves near the water heater), and flush each water outlet.
Once all of the RV antifreeze is out of the water lines, you should sanitize the water system. The most common way to do this is by adding a solution of household bleach to the water tank, running it through all the rig’s plumbing, and letting it sit for several hours. About ¼ cup of bleach for every 15 gallons of water is the correct ratio. Then, you’ll drain that bleach solution and rinse the system thoroughly. If you have trouble locating the exact procedures in the owner’s manual, they’re readily available online.
Refrigerator
Your RV’s refrigerator may not smell up to snuff after months in storage. Hopefully, the doors were left cracked open a bit to allow air circulation and avoid mildew buildup. Use a mild bleach solution to gently wash the interior surfaces and racks, and then rinse those same surfaces with fresh water. Then, allow the fridge to stand open for a while and it should be nearly as good as new.
Batteries
Getting your batteries up and running before hitting the road, is a key step toward de-winterizing your RV. The process to do so depends on the type of batteries your RV has and the steps that were taken to winterize them. For example, if there are newer “smart” lithium batteries in your rig, the process could be as simple as turning them back on.
If you live in a climate with harsh winters, the batteries may have been physically removed from the RV for winter storage. If so, those will need to be reinstalled—safely, and without sparks flying. Once the batteries are live, you’ll want to charge them and make sure they hold that charge.
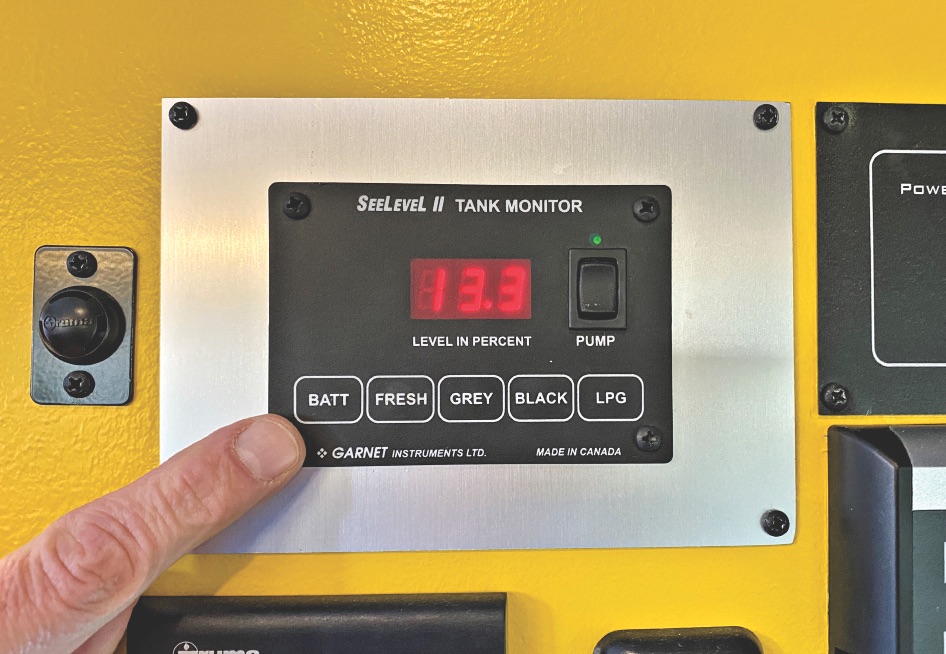
Most RVs make it easy to check battery levels.
The easiest way to charge your RV’s batteries is to simply plug the RV in and let its converter charge them. Ideally, you had the batteries connected to a battery-maintainer trickle charger while in storage as that helps keep them charged and in good condition for their next season of use.
Depending on the type of batteries your RV has, there could be other steps you’ll need to take. If you have flooded-cell batteries, you may need to add distilled water. If the water level in the batteries is critically low, you need to add water before you charge them. And you’ll want to check all the battery terminals for corrosion and clean them as required. A solution of baking soda and water is a good cleaning agent for the battery terminals.
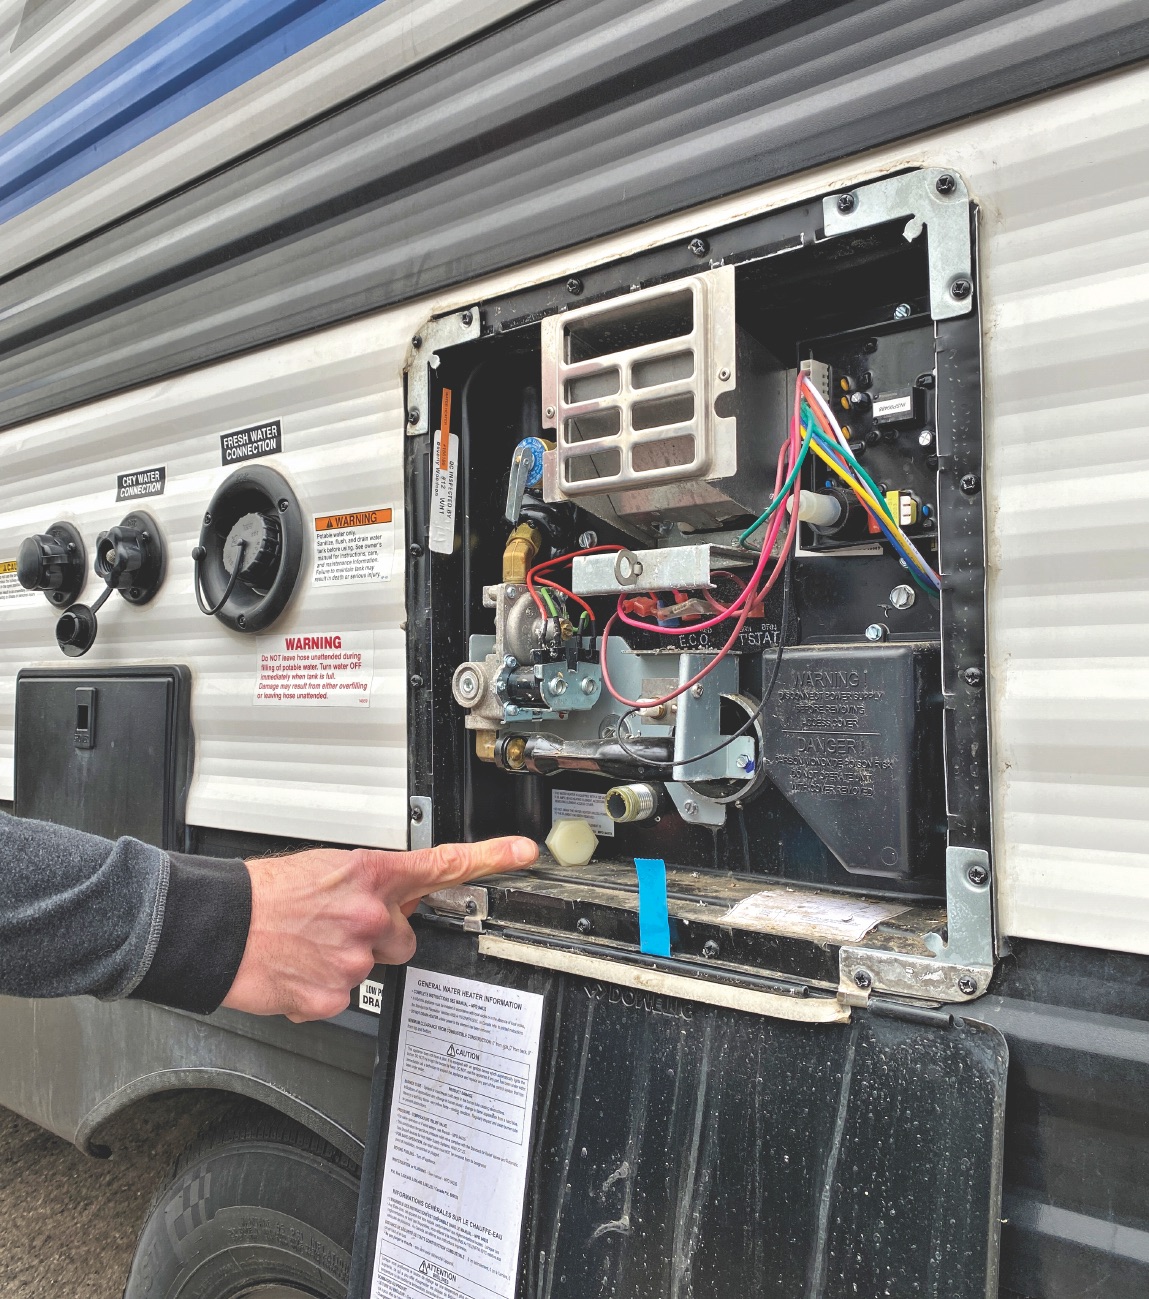
Propane
Think carefully about your abilities before working with the propane system. Since we’re dealing with flammable gas, this may be an area where it makes sense to call in a pro.
IF you decide to proceed, you’ll be verifying that anything in your RV that has a burner is working and safe. If you’ve ever tried to light a patio barbecue grill where spiders have taken up residence over the winter, you have some idea of what we’re doing here. Depending on how your rig is equipped, there may be propane at the cooktop, oven, furnace, water heater, and probably the refrigerator. You’ll need to check each of them. Let the owner’s manual be your guide.
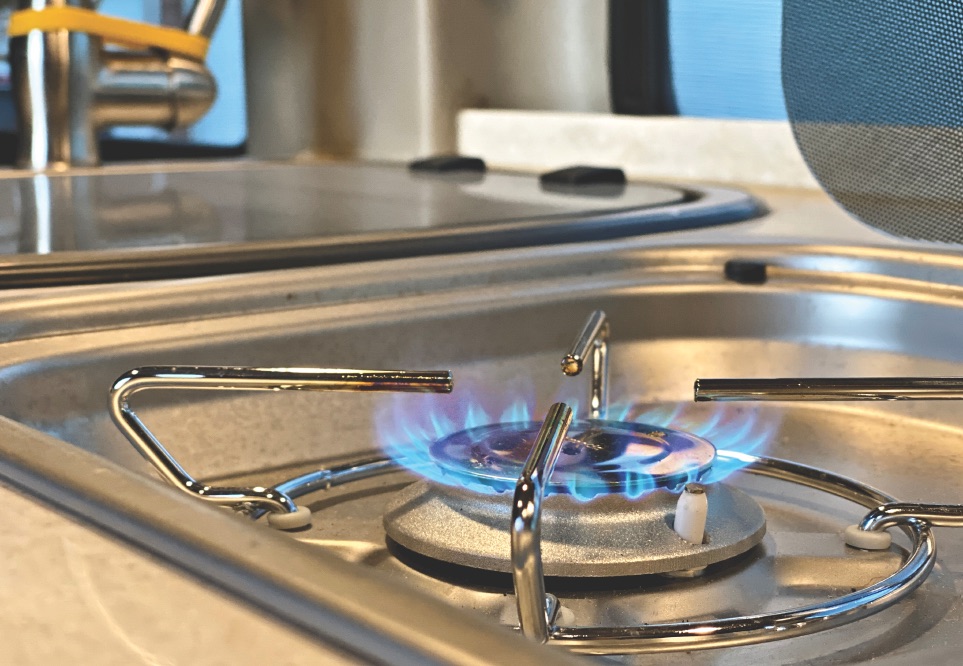
Make sure all appliances that run on propane are working.
For example, if the refrigerator runs on propane, there will be a procedure in the manual for checking and potentially cleaning the burner.
You’ll need to follow that. If the water heater uses propane, you’ll want to make sure it’s full of water before you test its burner. For appliances like a cooktop, the startup procedure can be as simple as verifying that it lights.
If you run into difficulties completing any of the steps in your owner’s manual, that’s the time to stop, assess the situation, and take your rig in for service. Some things really are best left to a professional. If you do take your RV in for propane service, ask them to perform a leak test of the propane system. It’s a good idea to have that done annually.
Electrical
Your RV has two electrical systems: one for 12-volt DC loads such as lights and the water pump, and another for 120-volt AC components including the air conditioner and microwave. You’ll want to check both and make sure they’re working before you hit the road.
Much of what you’ll do here is easy. Plug something in and see if it works. Be sure to do this for both the 12-volt and 120-volt systems. To test the 12-volt system, you’ll need to make sure the RV’s batteries are connected and switched on. To check the 120-volt system, you may need to plug your RV in. Check all GFCI outlets for function by pressing the test button, then resetting them, while the RV is connected to shore power.
This is where things can get tricky. If you’re just plugged into a wall socket in your garage, you probably can’t run large loads like an air conditioner. You may need to run the generator to get the power needed for some of these checks or plug into a 30- or 50-amp shore power connection at a campsite.
Let’s talk about generators for a second. Even if you’re lucky enough to have a 50-amp RV hookup in your driveway you still want to test the generator for proper operation. The generator’s owner’s manual will contain procedures for seasonal maintenance items like checking and replacing the oil and checking the generator exhaust for leaks. Again, you can always employ an RV service center to do this if you’re not equipped or interested in doing it yourself.
Seams and Seals
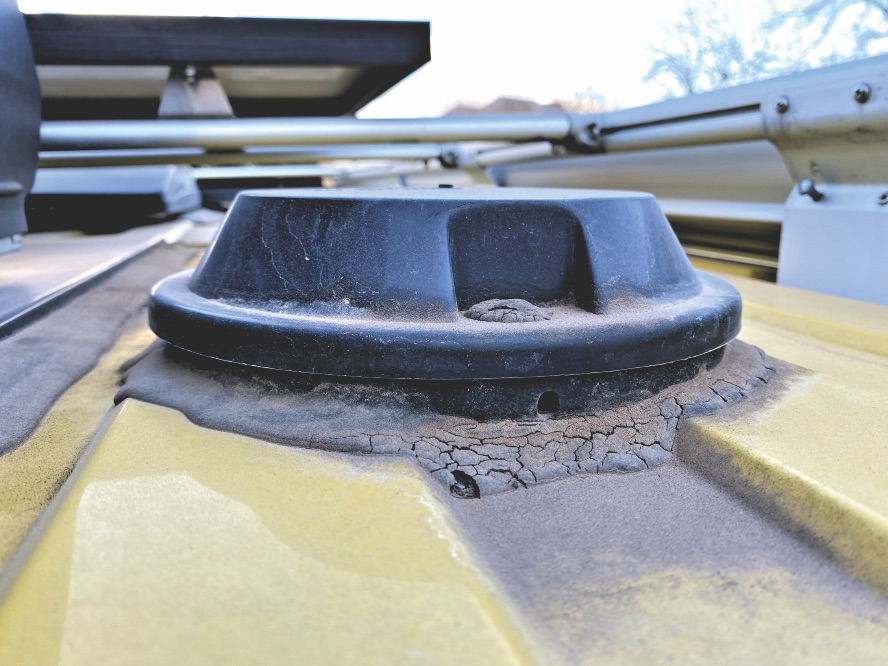
Check all sealants for cracks.
Wherever something passes through your RV’s walls or roof, whether it’s as small as a screw or as big as a window, there will be a seal or some sealant to make sure the elements don’t find their way inside. De-winterizing your RV isn’t complete until you take the time to inspect all these seals and sealants and make sure they’re still up to par.
A great way to do this is to wash your RV. As you wash it, pay special attention to all seams and seals. Make repairs any place you see a gasket that’s torn or missing or any sealant that’s deteriorated. You also want to check sealants inside the RV, in the shower, for example. Make sure all of those are still watertight. As you’re washing the RV, pay close attention to the roof. Check the lap sealant on every roof penetration.
If it needs attention, use sealants recommended by the manufacturer for your RV’s type of roof, be it metal, fiberglass, rubber, or plastic. And while you’re up there, check the roof itself for cracks, or, in the case of a rubber roof, tears. Some manufacturers require the owner to perform inspections and sealant repairs every three months to maintain the roof warranty coverage, although we’ve never figured out how they verify the owner maintaining this schedule.
But—and this is important—make sure you can get onto the roof safely! You’ll be getting the roof wet, and a slip or fall from the roof would be no laughing matter. If you don’t think you can do this safely, it’s best to hire it out.
De-Winterizing Your RV Wrap-Up
De-winterizing your RV, in combination with your normal pre-trip departure checklist such as checking tire pressure, testing smoke detectors, and so on, will ensure you’re ready to roll. If you’re new to RVing, this may seem like a lot of work.
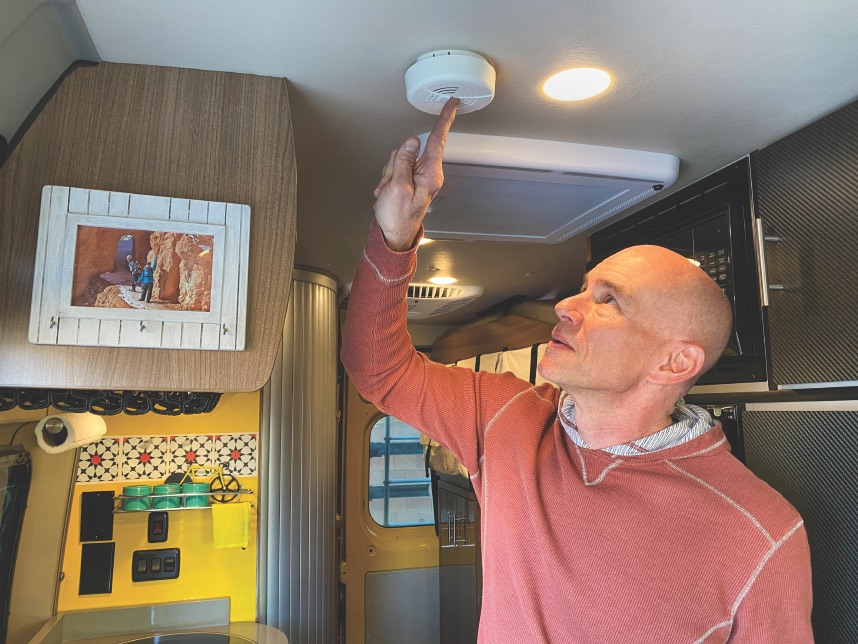
Along with de-winterizing steps, also make sure you go through your regular pre-trip checklist.
But once you’ve gone through these steps, you’ll realize it’s really not that difficult. Still, I know not everyone enjoys this stuff as much as I do, and that’s why it’s good to know you’ve always got the option to pass it off to RV professionals. The important thing is to make sure it gets done either way. Going through these procedures will ensure your RV is safe and ready for the camping season ahead.