Everything You Need to Know About RV Solar Systems
Image Caption:
Did you know that an area the size of a 32-foot travel trailer’s roof receives enough energy from the sun during six hours in the middle of the day to power the typical American home for five days? It’s true. Studies show the energy from the sun shining on an area approximately 516 square feet is equivalent to 288 kilowatt hours (kWh) of electricity, and the average household uses about 30 kWh per day.
Hence the reason an ever-increasing number of RVers are looking skyward as a way to capitalize on the sun as a source of energy to supplement their existing dependency on shore power and generators. New, more efficient technology helps further that desire to put solar power to work.
Solar Power is Freedom
“Solar power is freedom. Freedom to camp wherever they want, regardless of if there are hookups or not,” says Garret Towne, president of AM Solar in Springfield, Oregon, one of the leading RV-oriented solar companies in the country. “We have customers in here every day having us install solar systems on everything from pickup campers and off-road tent trailers to goosenecks and fifth-wheels.”
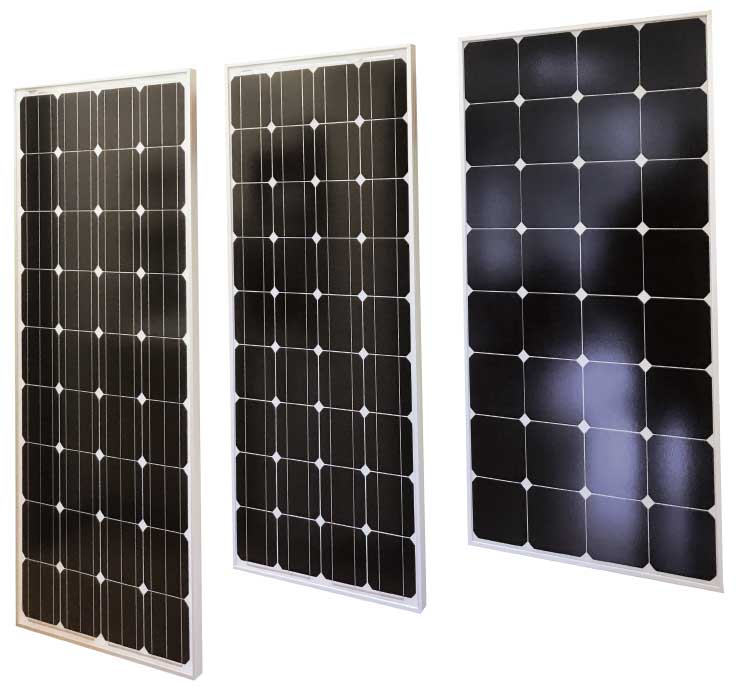
Monocrystalline solar panels are a good choice for RV use. Standard mono panels show all the wire traces on the front. Back-contact mono panels (far right) have clean black squares and are slightly more efficient, and thus have a smaller footprint for the equivalent output.
“A lot of people have the misconception that using solar power is a political statement, which is trying to be ‘green’ or ‘environmentally friendly,’” says Towne. “And while that’s a nice benefit, installing a solar system really just comes down to having all the electrical comforts of home in your RV, using the most efficient, economical and silent way to do it.”
Taking that First Step Toward Solar
Getting to that point of having freedom from always being connected to shorepower or cranking up a generator for hours at a time when boondocking requires taking a close look at one’s energy needs. The first step toward installing solar power is doing a power-consumption survey of your RV, and figuring out how much electricity is being used during a typical outing or over a period of time.
With that information, one can then decide on how best to build a system that accommodates those electrical needs — as well as possible future needs.
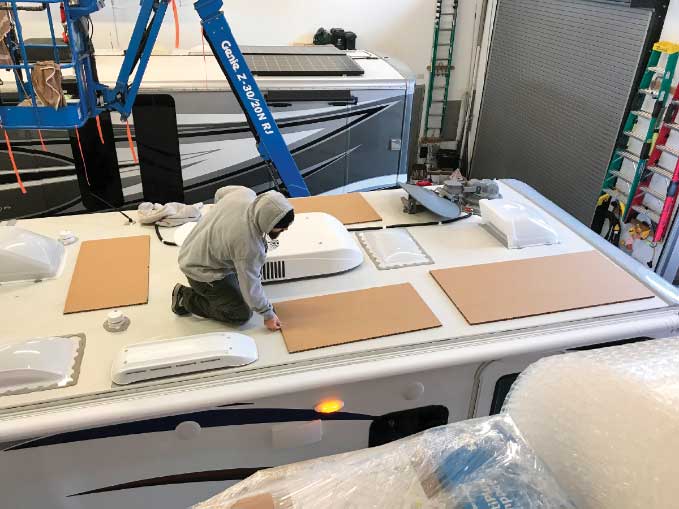
When deciding on solar-panel array, get up on the roof and scope out the layout. Take cardboard cutouts the same size and shape as the solar panels you are contemplating. Leave at least 2 inches between the panel edges and any obstructions, and allow room to walk around when the panels are in position. Once templates are set, record the number of cutouts and their sizes to make it easy when price shopping.
Photos by Bruce W. Smith, Larry Walton and courtesy of the manufacturers
The most accurate and easiest method to measure daily power consumption is employing a kilowatt meter for the 120-volt AC appliances and accessories, and a battery monitor to record the DC loads. Kilowatt meters come in a variety of types, including inexpensive ones that monitor the kilowatt hours of whatever appliance is plugged into the device. They are readily available on Amazon and through some of the sources listed on page 43. Smart battery monitors, like the one from Thornwave Labs, will transmit your battery-usage data to a smartphone, and are particularly useful with lithium batteries that have a nominal change in voltage across the discharge cycle.
If you don’t have a kilowatt meter or want to invest in one, you can go the old-fashioned route: call a solar RV expert or figure it out yourself. Take the watts rating listed on each appliance/accessory you use and divide that by 120 (volts) to get the load in amps. Then do the math to determine the usage in 12-volt DC amp-hours (Ah) for any given day. For example, a single-cup coffeemaker powered by an inverter might be rated at 1,420 watts, so dividing by 120 (volts) equals about 11.8 amps. If the coffeemaker is used only 20 minutes a day, that would equate to about 4 Ah per day.
A typical RV refrigerator running on LP-gas uses about 19 Ah per day to operate the 12-volt DC electronics, while a 40-inch LED TV that is rated at 150 watts and watched four hours a day consumes 5 Ah. Be sure to include items such as the water pump, stereo, lights and fans, and power to operate the inverter and even chargers for phones, tablets and laptops. Anything that consumes electricity needs to be in the tally. This will give the numbers you need to build an adequate battery bank and solar array. Keep in mind that AC loads powered by an inverter need to be multiplied by a factor of 10 to determine the current in 12-volt DC.
Batteries: The Heart of the System
There are three types of batteries used in RV solar systems: flooded, absorbed glass mat (AGM) and lithium.
Flooded batteries have wet cells, which have to be maintained with distilled water on a regular basis. AGM batteries are sealed, and unlike flooded-cell counterparts, do not gas, which makes them safer to use in unventilated environments. Of the two, AGMs are better because they are able to withstand more charge/discharge cycles and generally have a longer lifespan than wet-cell batteries.
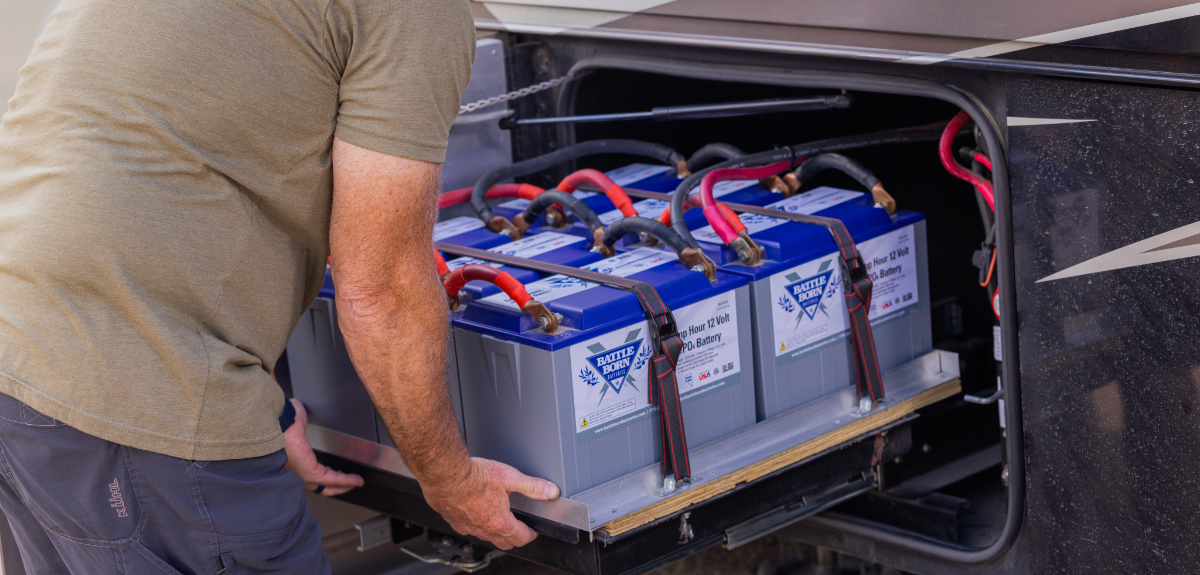
Selecting the proper batteries for the battery bank is the key to the entire solar-charging system. Either flooded, AGM or lithium-iron-phosphate batteries can be used, with the latter the most efficient. Here, AM Solar installed two Lifeline 300-Ah AGM batteries to store the power from three 100-watt solar panels.
Lithium batteries are the best. They are considerably more expensive than the best AGMs. The upside is lithium batteries last up to three times as long as AGMs and their output level stays constant through the entire discharge cycle, whereas AGM and flooded batteries begin falling off even before they are at 50 percent charge. If money isn’t a deciding factor, go lithium. Keep in mind that several peripheral electronic devices might be needed in addition to the cost of the batteries themselves.
Battery type aside, amp-hours, not cranking amps, is the important number. Then it comes down to how many batteries in the bank are needed to supply the demand. That’s because batteries power everything that operates on 12 volts DC. And the amp-hour capacity determines how long those items can run without the battery bank needing a recharge. Batteries are the heart of the system. Don’t skimp.
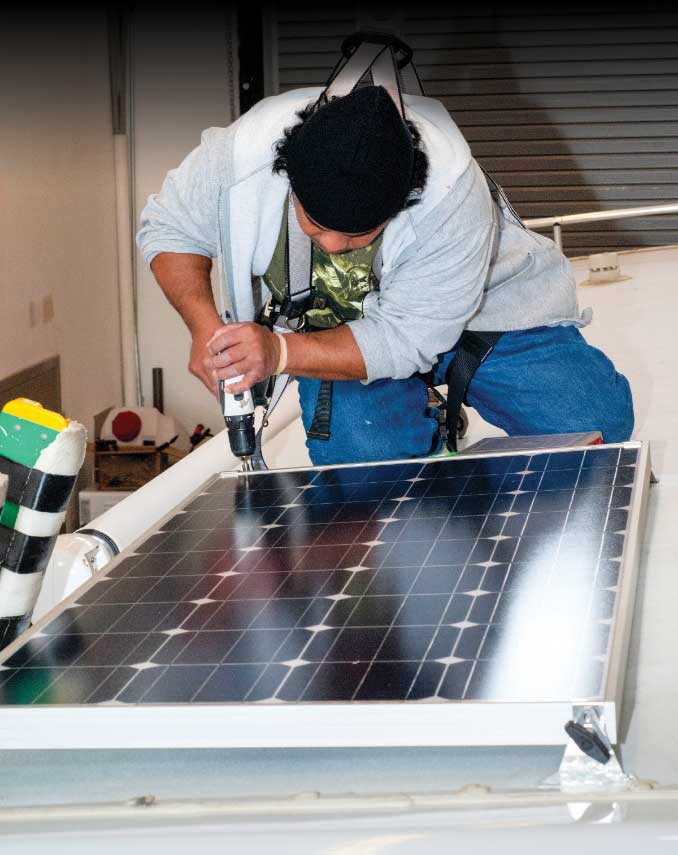
Solar panels can be mounted by drilling into the roof and using screws and/or industrial-strength adhesive tape on flat, smooth surfaces. Most panels for RV use come with mounting hardware and cabling to the combiner box.
Solar Panels: The Truth
Despite what solar snobs might say, the truth is, there’s not much difference in solar-panel efficiency, as far as the RV owner is concerned. Polycrystalline solar panels are not quite as efficient as monocrystalline solar panels because they use a less-pure silicone in the manufacturing process. But experts at companies that specialize in manufacturing solar components and installing them on RVs say variances in weather far outweigh the 5 percent difference in the per-square-foot of energy production between the two.
On monocrystalline panels, the difference is between conventional panels, which show all the little wires in the front, and back-contact panels, where the front looks like clean black squares. Back-contact mono panels are slightly more efficient and slightly more expensive, and have a slightly smaller footprint for the same watt rating as conventional counterparts. For example, a 100-watt back-contact panel measures 20 by 40 inches, whereas a conventional version will measure 22 by 48 inches and cost about $100 less.
Charge Controller: The Core of the Matter
Once the power needs and storage issues have been figured out, the next part is the system core — the charge controller. The charge controller regulates the voltage and current to the batteries.
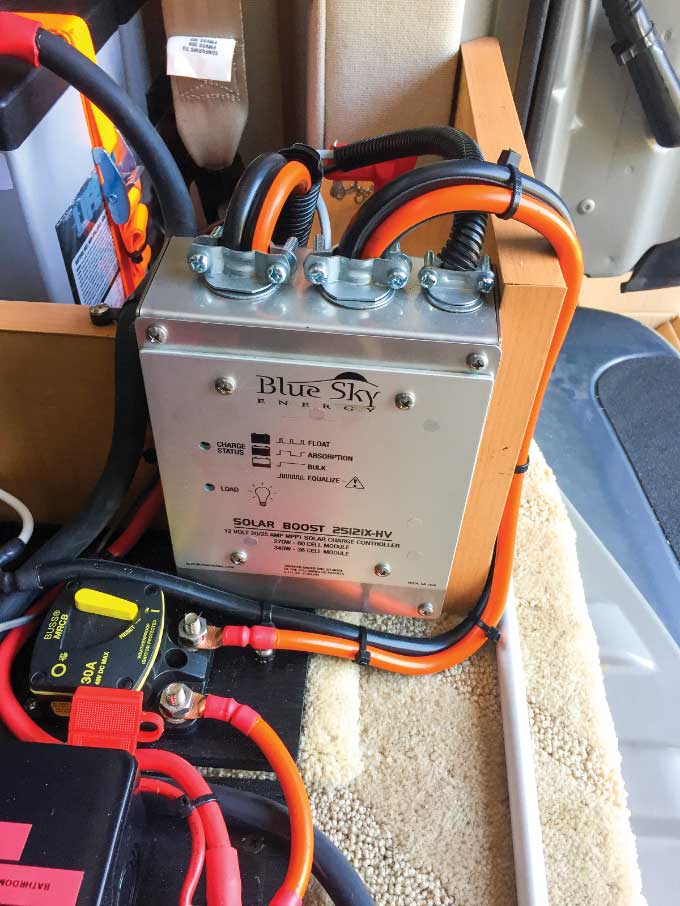
Heavy-gauge cabling leading to and from the charge controller is critical for optimum performance of any solar wiring system. The charge controller should be sized to accommodate future expansion.
Solar-charge controllers come in two varieties: pulse width modulation (PWM) and maximum power point tracking (MPPT). PWM is a post-direct connection from the panels to the battery. MPPT, the high-end state-of-the-art technology, has a transformer in it that allows the panels to operate at the voltage they perform most efficiently for the temperature, and then it steps that voltage down and boosts the current to safely feed it to the battery bank. The downside is, while MPPT controllers are about 20 percent more efficient at power conversion, they can cost twice as much as a PWM controller of the same rating.
According to Towne, AM Solar recommends customers on a tight budget go with PWM controllers if the system is less than 200 watts, and step up to MPPT technology when the system exceeds 400 watts. “I personally prefer, even on small systems, the MPPT, just because of the quality and Bluetooth connectivity,” says Towne. “It’s a high end, it’s going to last a lot longer, and it gives you precision programming to match the charging profiles of your batteries.”
Selecting the right charge controller for the system is relatively easy, as suppliers are usually very clear on what the products can handle, based on the design of your system and your needs.
Wire Matters…a Lot
The last element of an RV solar-charging system is wiring. It’s a critical element, and the one thing Towne and other solar-installation experts say the DIY crowd messes up on the most. If you are contemplating doing a solar installation yourself, be aware that routing the cabling from the combiner box on the roof to the controller and battery bay can be quite complicated, unless there’s already a conduit to use for such purposes. Holes need to be bored through the RV’s roof and cabinetry, and wiring routed through all kinds of weird angles. Expert installers have seen it all and know the tricks and techniques to make a solar installation work.
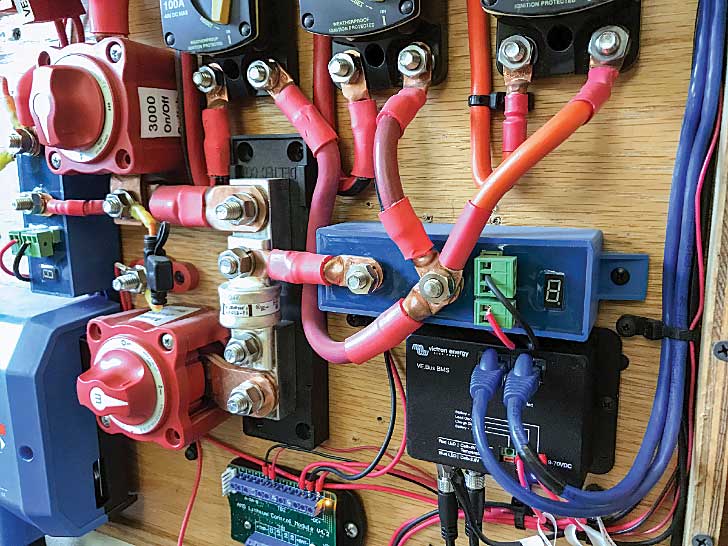
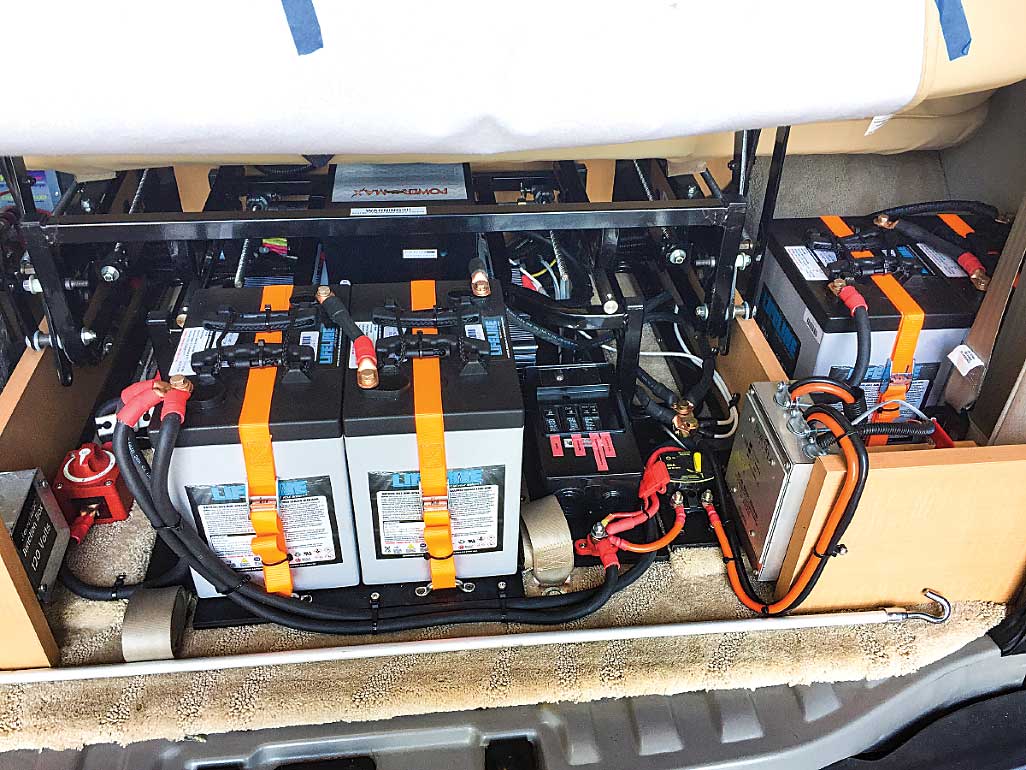
Wiring is a big factor in solar systems. The key is to use as heavy-gauge wiring as practical to keep voltage drop between the roof-mounted panels and the batteries at less than 5 percent. Clean wiring from top to bottom reflects the professionalism of an installation. Note: The complex system shown is part of the AM Solar test and demonstration hardware at its headquarters and does not reflect a typical RV installation.
The next biggest challenge is keeping the voltage drop between the panels and the charge controller minimized, so using the proper size cabling is very important. Voltage drop is proportional to the gauge of wire and distance of the run. “Total voltage drop should be limited to a maximum of 5 percent (calculated from panels to battery),” says Steve Bouton, technical manager of Grape Solar.
Ideally, installers try to keep the reading around 2 percent. If there’s more than a 5 percent voltage drop, then there won’t be enough voltage differential between the charge-controller input, the solar array and the charge-controller output to the battery array to push current from the panels to the batteries.
That’s why solar installers recommend using at least 10-gauge wire to connect the solar panels to the combiner box, and heavier (8-, 6-, 4- or even 2-gauge) to connect the controller and batteries. AM Solar’s website has some handy tools to help figure out such things. There’s nothing wrong with going too big on cabling; it’s just more expensive and a little bit more difficult to work with.
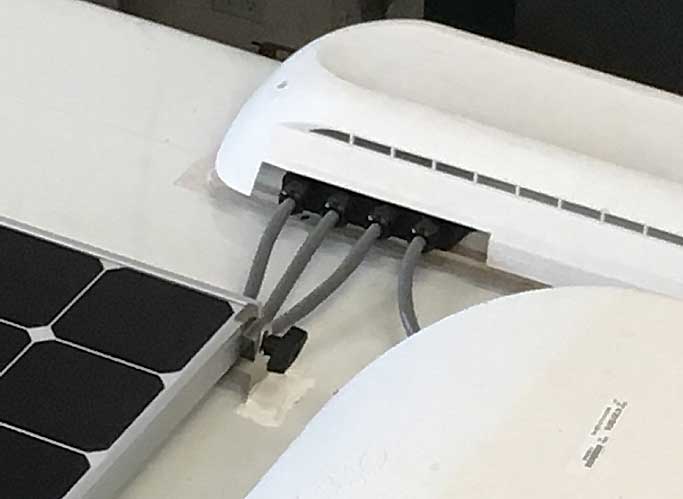
Single- and multiport roof caps allow for a single-point connection for solar panels, with ports in place for later expansion. No rewiring required.
Many readers ask if having an RV “prewired” for solar from the factory helps cut down installation costs. Surprisingly, no, according to solar installers. “It’s a waste of money if you’re installing more than a 200-watt solar unit,” Towne says. “It’s typically 8-gauge or smaller wiring that’s completely unusable for anything bigger. It has to be pulled out and replaced with at least 4-gauge cabling.”
Speaking of costs, solar-charging systems run the gamut in pricing. A simple DIY single-battery, single-panel 100-watt system can run as little as $500. On the other end of the solar spectrum, a top-tier installation on a big quad-slide fifth-wheel can cost from $12,000 to $50,000 with lithium batteries, the best cabling and a proper inverter, Towne said. Cost depends on what you need and whether or not you do the install or have it professionally done.
Big system or little, taking advantage of the sun’s free energy shining down makes a lot of sense. It’s silent technology hard at work, even on overcast days. Such a system extends battery life when the RV is parked for long periods outdoors, it’s nearly maintenance-free, and it reduces expenses when camping because you don’t need to use fuel or pay electrical-hookup fees to keep the lights on. That’s freedom.
Choosing an Inverter
If you are going to be using any AC-powered appliances, electronics or power tools, an inverter will be necessary to convert 12-volt DC from the battery bank to 120-volt AC. What size power inverter you choose depends on how many watts are consumed by the item(s) you need to power. Total those numbers up, add 15 percent for a safety margin and choose the inverter that has that rating or a little larger.
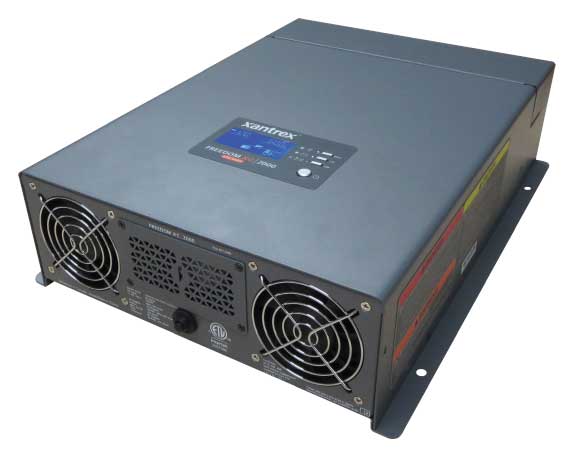
Power inverters come in two basic types: modified sine wave and pure sine wave. Without getting into the details, modified-sine-wave inverters are less expensive, but pure-sine-wave inverters, such as Xantrex’s Freedom X Series, are the ones to buy if you are going to be powering appliances, TVs, computers or other sensitive electronic devices. Compare inverters’ power consumption to see which one is the most efficient, and pay attention to peak capacity, which is needed for operating items such as microwaves, refrigerators and power tools.
Other must-have features for an RV-solar application include automatic overload and shutoff, thermal protection, multiple AC outlets, short-circuit and low-voltage protection, and built-in AC-to-DC battery charging, including lithium-ion, which cannot be connected to a charger designed for typical lead-acid batteries.
Solar Sources
AM Solar