A Complete RV Solar System Install
Everything you need to know before buying solar panels
Image Caption: The basic solar-charging system consists of roof-mounted solar panels running through a combiner box, then dropping down to the charge controller and on to the batteries. Solar is typically a supplement that works seamlessly with shorepower or generator (if so equipped).
RV Solar System
Harnessing solar power has been around since 1839, when French scientist Alexandre Edmond Becquerel discovered one could turn the sun’s energy into electricity if he/she used the right materials. In the race for space during the 1950s, Bell Laboratories helped the quest for solar energy take another giant leap when it invented the first solar panels.
Today, 179 years after the rays of the sun first helped generate an electrical current, solar power is used to provide electricity for everything from cellphones to the space station – and everything in between, including RVs. You just need the right components.
A lot of people mistakenly see RVers who use solar power as environmental activists making a political statement. While “being green” is a nice benefit of utilizing solar power, reducing one’s existing dependency on shorepower and generators means having the ability to dry camp for extended periods of time without spending money on fuel to run a generator.
“Employing solar power in an RV is freedom. Freedom to camp wherever you want, regardless if there’re hookups or not,” says Garret Towne, president of AM Solar in Springfield, Oregon, one of the leading RV-oriented solar companies in the U.S. AM Solar installs complete solar-power systems on everything from small Class B motorhomes to multimillion-dollar Class A coaches. “Investing in a solar system really comes down to just having all the electrical comforts of home in your RV using the most efficient, economical and silent way to power them,” says Towne, who is also an electrical engineer.
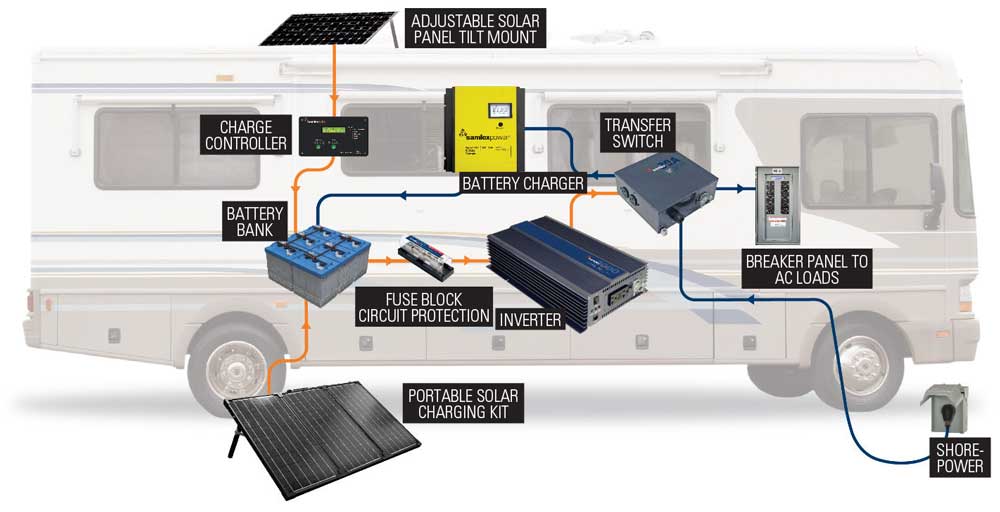
The basic solar-charging system consists of roof-mounted solar panels running through a combiner box, then dropping down to the charge controller and on to the batteries. Solar is typically a supplement that works seamlessly with shorepower or generator (if so equipped).
Watts Up
Getting to the point of having freedom from the need to be connected to shorepower, or from cranking up a generator for hours at a time when boondocking, requires taking a close look at one’s energy needs. The first step toward installing solar power is doing a power-consumption survey of your motorhome; figuring out the cumulative amp-hours (Ah) or watts being used during a typical outing, or over an extended period of time. The most accurate and easiest method to measure daily power consumption is employing a built-in kilowatt meter such as the Victron BMV-712 (Amazon ASIN BAM030712000, $218.99), which connects to your smartphone via Bluetooth and lets you monitor the complete battery system. Less expensive meters, such as the Lanmu Power Meter (Amazon ASIN B0789B1QQC; $18.99) can monitor the kilowatt hours (kWh) of whatever appliance is plugged into them.
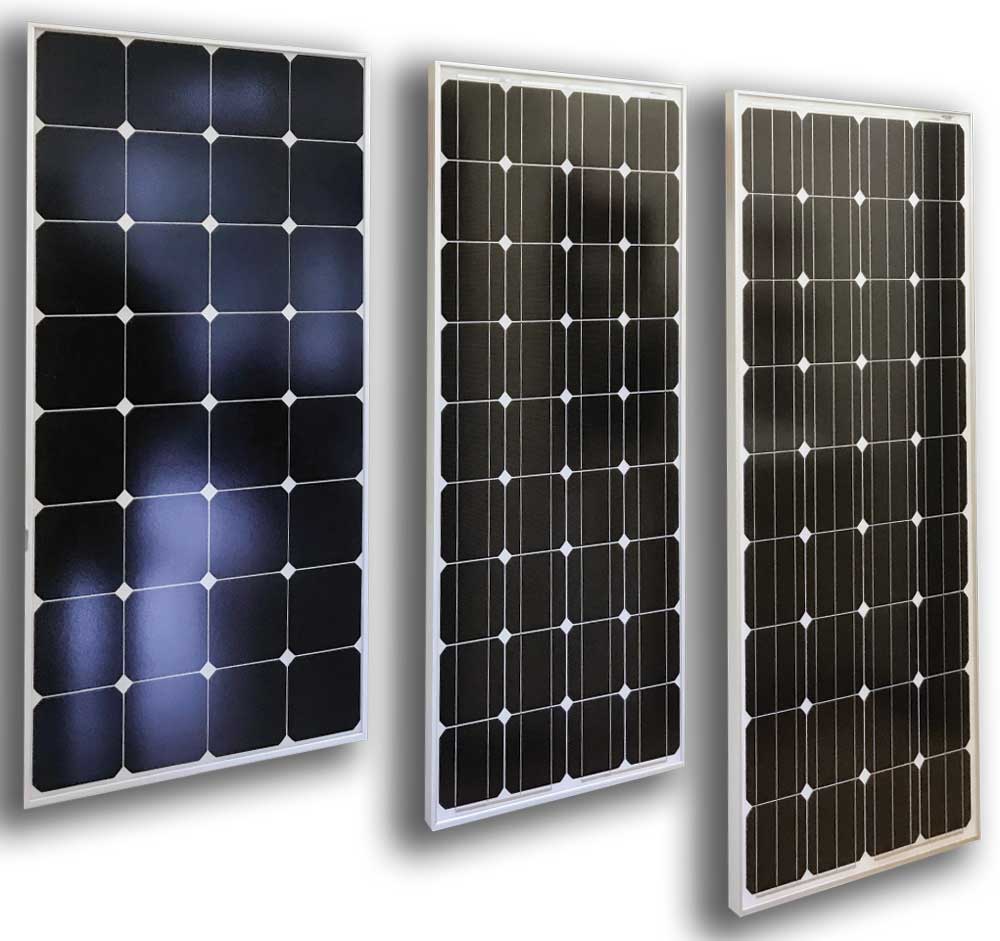
A good choice in solar panels for RV use are the monocrystalline type show here. The standard mono panels have all the wire traces showing. Back-contact mono panels (on far left) have clean black squares. Back-contact mono panels are slightly more efficient; thus, they have a smaller footprint for the equivalent output.
If a meter isn’t available, there’s always the old-fashioned route: figure it out yourself. Take the watts rating listed on each appliance/accessory you use and multiply that number by how many hours it’s used per day to get the daily watt hours. Then, divide this by 12 (volts DC) to get your daily Ah consumption. For residential refrigerators with compressors that aren’t on all day, you can refer to the FTC EnergyGuide label, which provides the annual power consumption in kWh. Take that number, multiply it by 1,000 to convert it to watts, divide it by 365 (number of days) to get a daily consumption and then divide that by 12 (volts DC) to get a daily Ah consumption. For instance, a typical residential-size refrigerator uses about 90 Ah per day, while a 40-inch LED TV could consume 150 watts. Watch TV four hours a day, that’s 50 Ah a day (4×150/12=50), according to Towne.
Be sure to include items such as the water pump, stereo, lights, fans, inverters and even chargers for phones, tablets and laptops. Anything that consumes electricity needs to be in the tally.
For example, a single-cup coffeemaker might be rated at 1,420 watts, so dividing by 12 (volts DC) equals about 118 amps. If the coffeemaker is only used 20 minutes a day, that equates to about 40 Ah per day.
Money in the Bank
Once daily power consumption is determined, the next step – which is the most critical of a solar system’s performance – is deciding how many batteries are needed to provide an adequate bank of power, and the number of solar panels needed to recharge the batteries.
Lead-acid batteries need to be regularly brought up to a full charge to maximize longevity. To do that, RV solar experts recommend the solar-panel output to battery Ah ratio stay between .5:1 to 2:1. That’s the equivalent of a 100-watt to 400-watt solar charging array feeding into a 240 Ah battery bank, for example. Charging efficiency increases with the bigger solar array.
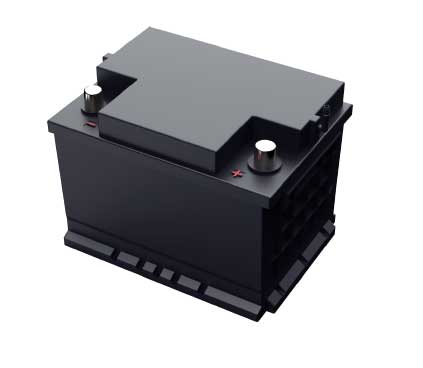
There are two types of batteries used in RV solar systems: lead-acid and Lithium-Iron Phosphate, or LiFePO4 (Lithium). Lead-acid come in either wet-cell (flooded), gel or absorbed glass mat (AGM.) Flooded batteries are maintained by adding distilled water, while the latter two are sealed, requiring no maintenance. AGMs are the best of the three lead-acid types because they withstand deep-cycling better than wet-cells or gel batteries, and AGMs endure more recharge cycles, so they typically have twice the lifespan of the other two.
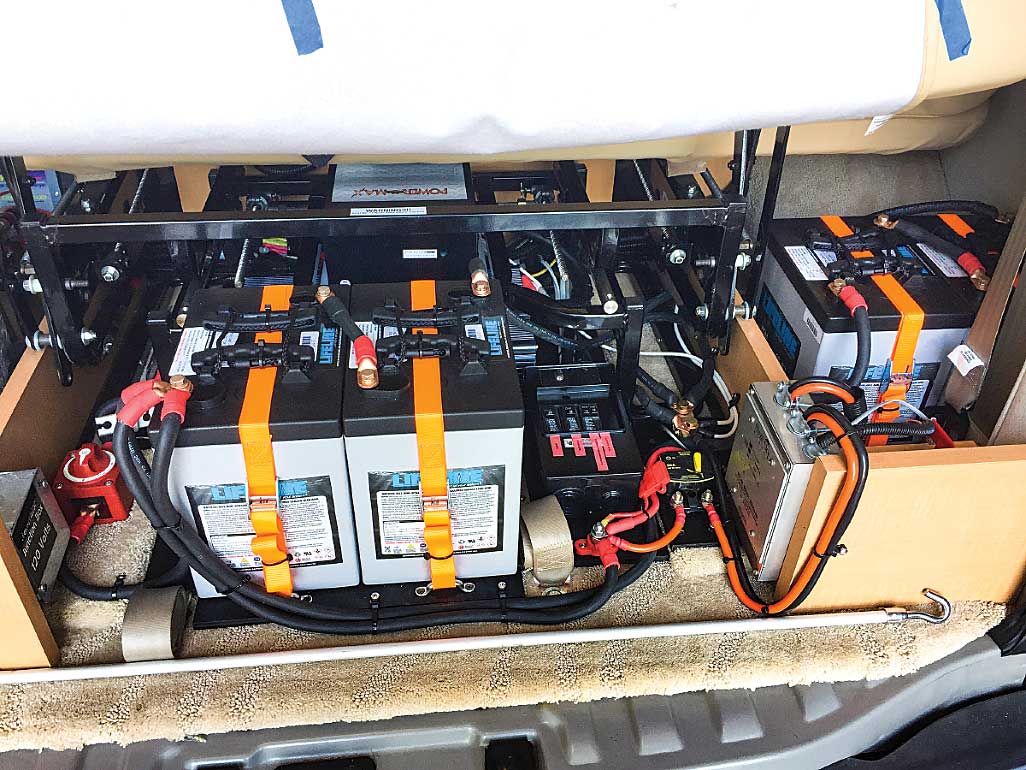
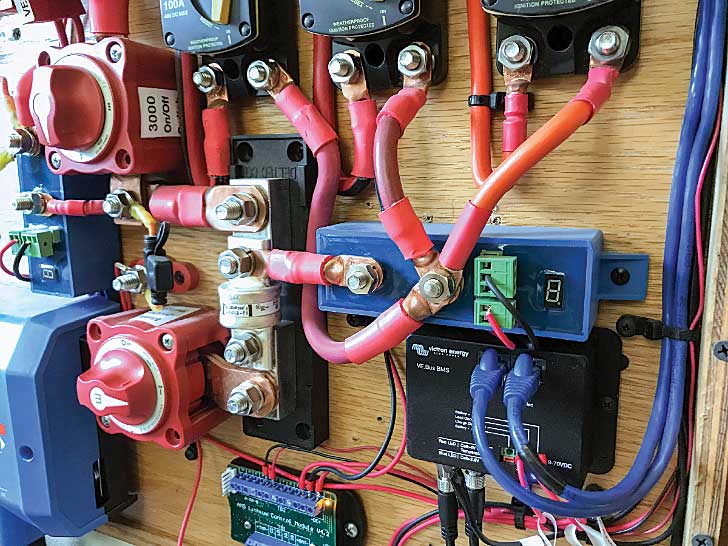
Selecting the proper batteries for the battery bank is the key to the entire solar charging system. Either AGM or Lithium batteries can be used, with the latter the most efficient. Here AM Solar installed two Lifeline 6-volt 300Ah AGM batteries in series to store the power from three 100-watt solar panels.
Lithium batteries are by far the best, although the batteries and their charging and regulation systems are very expensive. Even though they cost several times more than the best AGMs, Lithium batteries typically last seven to 10 years and, unlike flooded batteries, their output level remains constant right up to total discharge. When charge cycle lifespan is taken into consideration, Lithium batteries become the most economical.
Regardless of the battery type, the most important consideration when choosing batteries is what combination of batteries will serve your power requirements. The higher the Ah capacity, the longer the battery or bank can supply the motorhome’s electrical needs before it requires a recharge from the solar panels, generator, the motorhome’s alternator or from plugging into shorepower.
Poly or Mono?
Solar snobs and high-pressure solar sales folks put a lot of emphasis on how solar panels are built and which types are the best. Truth is, there’s not much difference in solar-panel efficiency as far as the motorhome owner is concerned. Polycrystalline solar panels are not quite as efficient as monocrystalline solar panels because they use a less-pure silicon in the manufacturing process. But experts at companies that specialize in both the manufacturing and installation of solar components for motorhomes claim that variances in weather far outweigh the 5 percent difference in the per-square-foot of energy production.
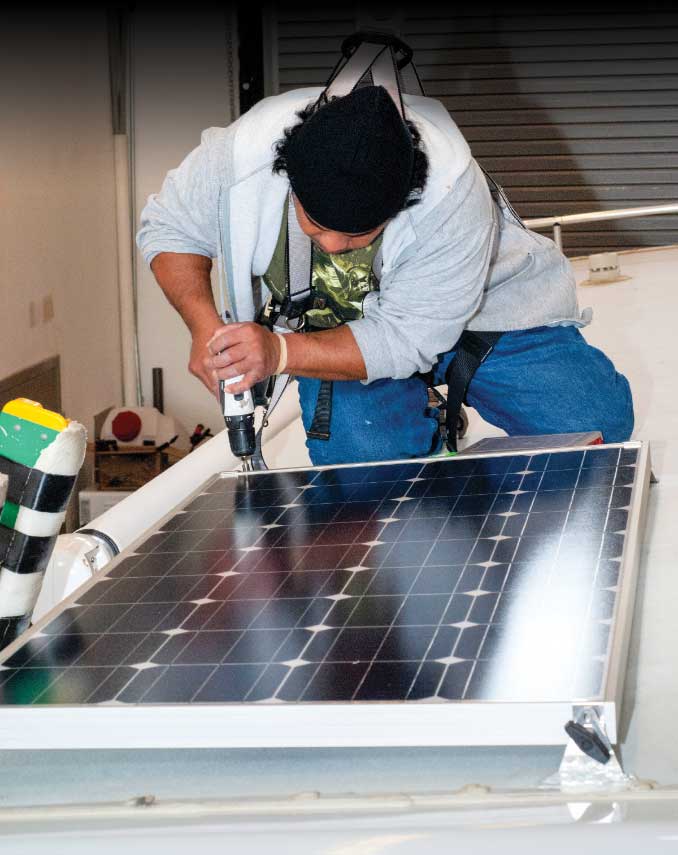
Solar panels can be mounted to the roof by either drilling into the roof, or by using industrial-strength adhesive tapes (on flat, smooth surfaces). Most solar panels for RV use come with mounting hardware and cabling to the combiner box.
That said, if you are going to invest in a solar installation, monocrystalline panels are the way to go because they maximize the energy production for the limited roof space that’s available. There are two types of monocrystalline panels: conventional and back-contact. Conventional monocrystalline panels have all the little wires showing on the front, while the front of back-contact monocrystalline panels look like clean, black squares.
Back-contact monocrystalline solar panels are slightly more efficient, slightly more expensive and have a slightly smaller footprint for the same output as their conventional counterpart. For example, a 100-watt back-contact monocrystalline panel measures about 20 by 40 inches, whereas a conventional version of the same rating measures about 22 by 48 inches – and costs about $100 less. Let the electrical demand and the roof space dictate which panels are best for your particular installation.
Taking Charge
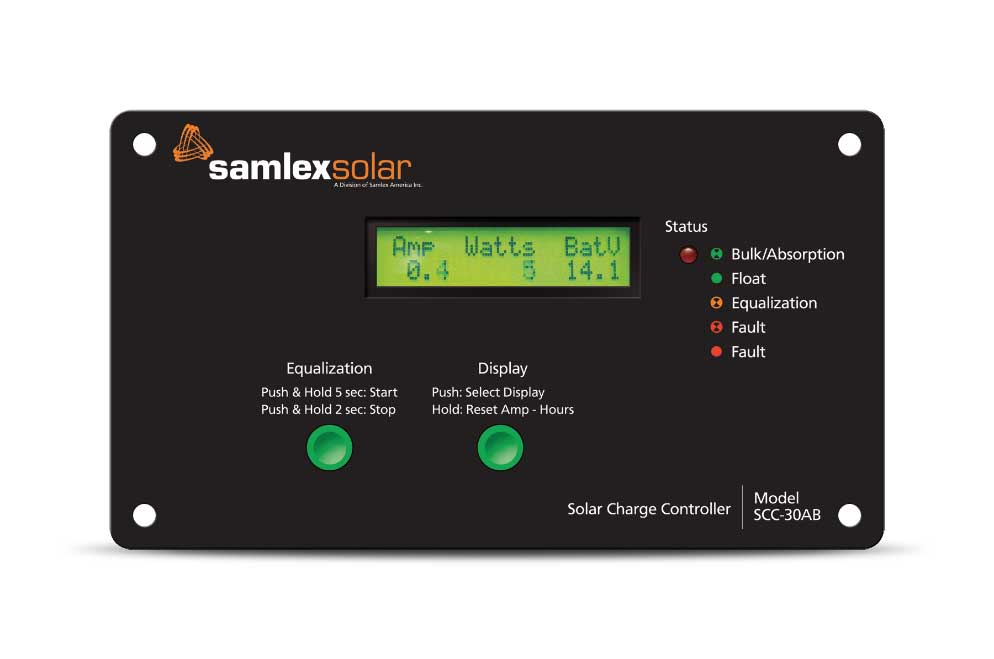
Charge controllers, such as this Samlex SCC-30AB, are one of the essentials of an RV solar-charging system. They take the 21-plus volts DC produced by the panels and regulate it down to the 10.5-14.6 volts DC, depending on the needs of the battery bank.
Once the power needs and storage issues have been figured out, it’s time to get the current they produce regulated before it gets to the batteries for charging. The charge controller regulates the voltage and current to the batteries.
Solar charge controllers come in two varieties: pulse width modulation (PWM) and maximum power point tracking (MPPT). A PWM controller checks the battery charge status, and then sends a series of pulses modulated in power and duration depending on the battery charge. PWM is a post-direct connection from the panels to the battery. MPPT, using high-end state-of the-art technology, has a transformer that allows the panels to operate at the most efficient voltage and temperature, and then it steps that voltage down and boosts the current to safely feed the battery bank. The downside: while MPPT controllers are about 20 percent more efficient at power conversion, they can cost twice as much as a PWM controller of the same rating.
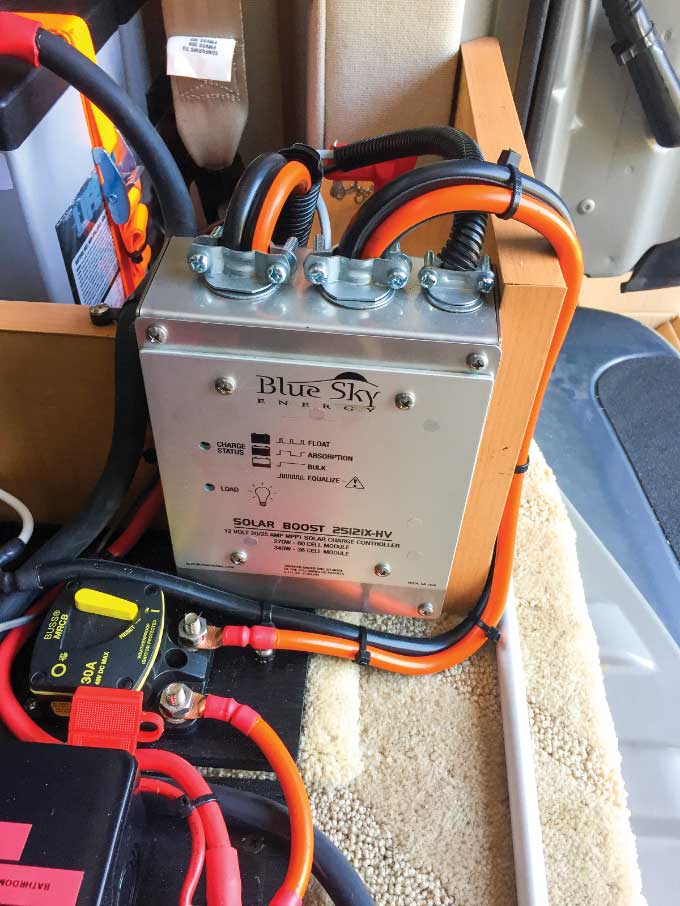
The charge controller is critical for optimum performance of any solar system. The type and size of the charge controller should be chosen to accommodate future expansion. Here is a dual 30/40-amp Blue Sky MPPT charge controller just for that purpose.
According to Towne, AM Solar recommends customers on a tighter budget go with PWM controllers if the solar panel output is 200 watts or less. Outputs greater than 400 watts should always use MPPT technology. “MPPT charge controllers are going to last a lot longer and provide precision programming to match the charging profiles of the batteries.”
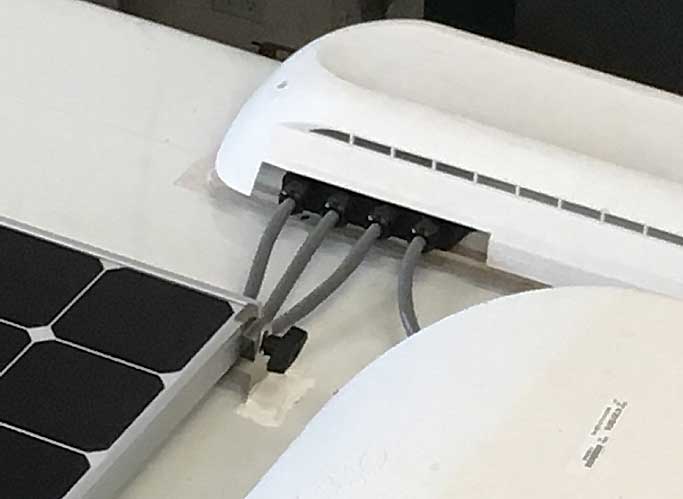
A combiner box is required to route the cables from the rooftop panel array into a single cable running down into the charge controller that’s usually mounted inside the battery bay.
Making the Connections
Maximizing roof space results in meeting the electrical demands required when boondocking. Having such a system professionally designed and installed also maximizes the highest return on the investment, which can be sizable.
The last element of a solar-charging system on a motorhome is wiring. It’s a critical element, and the one area where hands-on DIY installers may mess up the most. If you are contemplating installing a solar system yourself, be aware that routing the cabling from the combiner box on the roof to the battery bay can be super complicated unless there’s already a conduit to use for such purposes. Holes need to be bored through the roof and through cabinetry, and wiring must be routed through weird angles. Expert installers have seen it all and know all the tricks and techniques to make a solar installation successful. For best results, consider leaving these tasks to the pros if your budget allows.
The next biggest challenge in a motorhome installation is to minimize the voltage drop between the panels, the charge controller and the batteries. Voltage loss is proportional to the gauge of wire and distance of the run. “Total voltage drop should be limited to a maximum of 5 percent (calculated from panels to battery),” says Steve Bouton, technical manager of Grape Solar Inc. “This is especially important to consider when using multiple panels in parallel, as is typical for RV systems.”
Ideally, installers try to keep the reading around 2 percent. If there’s more than a 5 percent voltage drop, then there won’t be enough voltage differential between the charge-controller input from the solar array and the output to the battery bank to push current properly from the panels to the batteries.
That’s why solar installers recommend using at least 10-gauge wire to connect the solar panels to the combiner box, and heavier (6- , 4- or even 2-gauge) for the run down to the charge controller and on to the batteries. “There’s nothing wrong going too big on cabling, it’s just more expensive and a little bit more difficult to work with,” says Bouton.
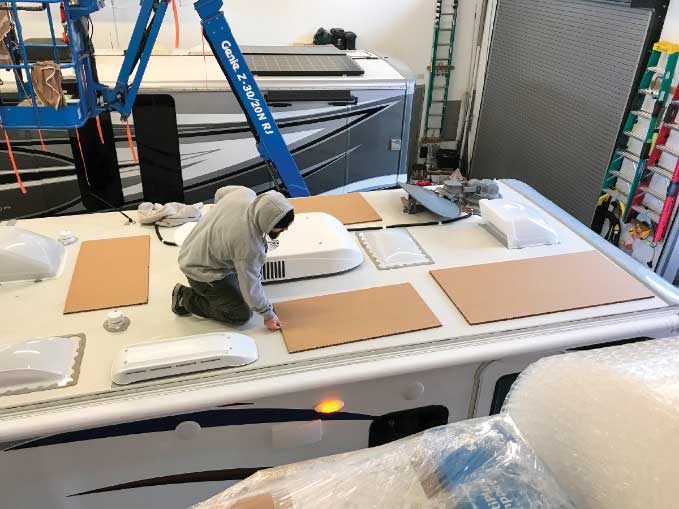
The Roof Puzzle: When deciding on how much the solar panels are going to cost for your solar system, get up on the roof. Scope out the layout, and then make cardboard cutouts the same size/shape as the solar panels you are contemplating using. Expert installers suggest leaving at least 2 inches between the panel edges and any vents, A/C units, roof edge or other obstructions. This gives space to run connecting cables and install the panel’s mounting hardware. It’s also important to leave room to walk around once the panels are in position. Once templates are set, record the number and size of cutouts to make it easy when price shopping.
Many RV owners ask if having an RV pre-wired for solar from the factory helps cut down installation costs. Surprisingly, no, according to solar installers. The typical factory pre-wiring uses 8-gauge or smaller wiring, which is too small for use with multiple panel installations. If anything, having an empty conduit installed to run cabling from the roof to the battery bay would be a far better factory alternative.
Many RV owners ask if having an RV pre-wired for solar from the factory helps cut down installation costs. Surprisingly, no, according to solar installers. The typical factory pre-wiring uses 8-gauge or smaller wiring, which is too small for use with multiple panel installations. If anything, having an empty conduit installed to run cabling from the roof to the battery bay would be a far better factory alternative.
Choosing an Inverter
If you are going to be using any AC-powered appliances, electronics or power tools, an inverter will be necessary to convert 12-volt DC from the battery bank to 120-volt AC. The size of inverter is dependent on how many watts are consumed by the item(s) you need to power. Total up those numbers, add 15 percent for a little safety margin and choose the inverter that has that rating – or a little larger.
Power inverters come in two basic types: modified sine wave and pure sine wave. Without getting into the details, modified-sine-wave inverters are less expensive, but pure-sine-wave inverters, such as Xantrex’s Freedom X Series, are the ones to buy if you’re going to be powering laptops/computers, TVs, appliances and/or any digital devices. Compare inverter power consumption for the most efficiency, and pay attention to “peak” capacity, which is needed for operating items such as microwaves, refrigerators and power tools. Other must-have features for an RV-solar application include automatic overload and shut-off, thermal protection, multiple AC outlets, short-circuit and low-voltage protection, and built-in AC-to-DC battery charging (including Lithium, which cannot be connected to a charger designed for typical lead-acid batteries).
Cost of Watts
RV solar-charging systems run the gamut in pricing. It all depends on need, the quality of the components used, and whether or not the install is professionally done. A basic DIY 150-watt, 10-amp system with a 200Ah AGM battery for a small Class B or Class C motorhome could be done for less than $600. Stepping up to a multi-panel 200-watt, 30-amp kit could easily double the price. To get a 200-400-watt system professionally installed, plan on spending $3,000-$5,000, while a 600-watt or bigger solar system typically costs $7,000-$15,000. Price depends on the application, components, battery type and labor involved. “On the high end of the solar spectrum, a top-tier professional installation on a big quad-slide coach could top $50,000 with a roof full of solar panels, bay full of Lithium batteries, the best cabling, multiple charge controllers and inverters in a system capable of powering everything in the coach along with a couple nearby houses,” Towne says.
Big system or little, taking advantage of the sun’s free energy makes a lot of sense. Solar power isn’t for everyone, but if you spend more time in your RV than your house, or enjoy weekends and extended camping off the grid, it makes sense. Solar-power systems are nearly maintenance-free, they run silent and they reduce operating expenses because there’s little need to use fuel or pay electrical hook-up fees if the system is installed and sized correctly.
Sources
- AM Solar | 541-726-1091 | www.amsolar.com
- EEZ RV Products | 928-317-8899 | www.eezrvproducts.com
- Go Power! | 866-247-6527 | www.gpelectric.com/applications/rv-marine-power
- Grape Solar Inc. | 877-264-1014 | www.grapesolar.com
- Lifeline Batteries | 909-599-7816 | www.lifelinebatteries.com
- Nature Power | 800-588-0590 | www.naturepowerproducts.com
- Renogy | 800-330-8678 | www.renogy.com
- Samlex Solar | 800-561-5885 | www.samlexsolar.com
- Solarland USA | 800-605-9718 | www.solarlandusa.com
- Sunforce Products | 888-478-6435 | www.sunforceproducts.com
- Wholesale Solar | 800-472-1142 | www.wholesalesolar.com
- Xantrex | 800-670-0707 | www.xantrex.com
- Zamp Solar | 541-728-0924 | www.zampsolar.com/rv-solar-products