RV enthusiasts get great satisfaction in having all the creature comforts of home — until something pops up, like a toilet that’s no longer holding water and is creating unpleasant odors inside the trailer. Replacing the waste ball or blade seal will usually put that smile back on their faces.
Some toilet models have a blade and a seal while most later-model toilets have a ball and a seal. Over time, constant use, grit, friction, toilet paper and hard water deposits take their toll on the seal and the ball (or blade) in the toilet.

Once the water is disconnected, remove the four 1/2-inch nuts so the bowl can be separated and the old seal removed.
If your toilet has a blade and seal, it’s common to struggle with toilet paper that becomes lodged in the groove where the blade closes. A simple solution that works most of the time is to use a flat-bladed screwdriver bent at a 90-degree angle 1 inch from the tip. While holding the foot pedal down (water off), insert the tip of the screwdriver into the groove and dislodge the toilet paper. If this trick doesn’t solve the issue, the blade and/or seal will need to be replaced. Use caution here; sharp objects, like a screwdriver, can damage the seal. Experienced techs have no problem with this, but if it’s your first attempt, you might want to opt for a similar tool that’s made of plastic or nylon.
During the last several years, toilet manufacturers have been using the ball and seal to alleviate toilet paper buildup in the mechanism. And that’s the type of seal we replaced in a Thetford Style II toilet that was no longer holding water between flushes.

New waste ball seal is positioned with the flat side down.
The process takes about 45 minutes and you will need a half-inch wrench and a tool to remove the water line from the back of the toilet. We also recommend having several old towels on hand … just in case!
Getting Dirty
After turning off the pump or closing the hookup faucet, release water pressure by holding down the foot pedal. Remove the decorative cover and disconnect the water line before using the half-inch wrench to remove the two nuts from the flange bolts that hold the toilet to the bathroom floor. Now would be a good time to place those old towels around the toilet to absorb the water that will inevitably escape from the water line once it’s removed.

The bowl is then placed back on the plastic base and new washers are used before loosely tightening the nuts.
Lift the toilet from the floor and place it on a solid work surface that has been covered with a protective towel to guard against damage to the exterior of the toilet.
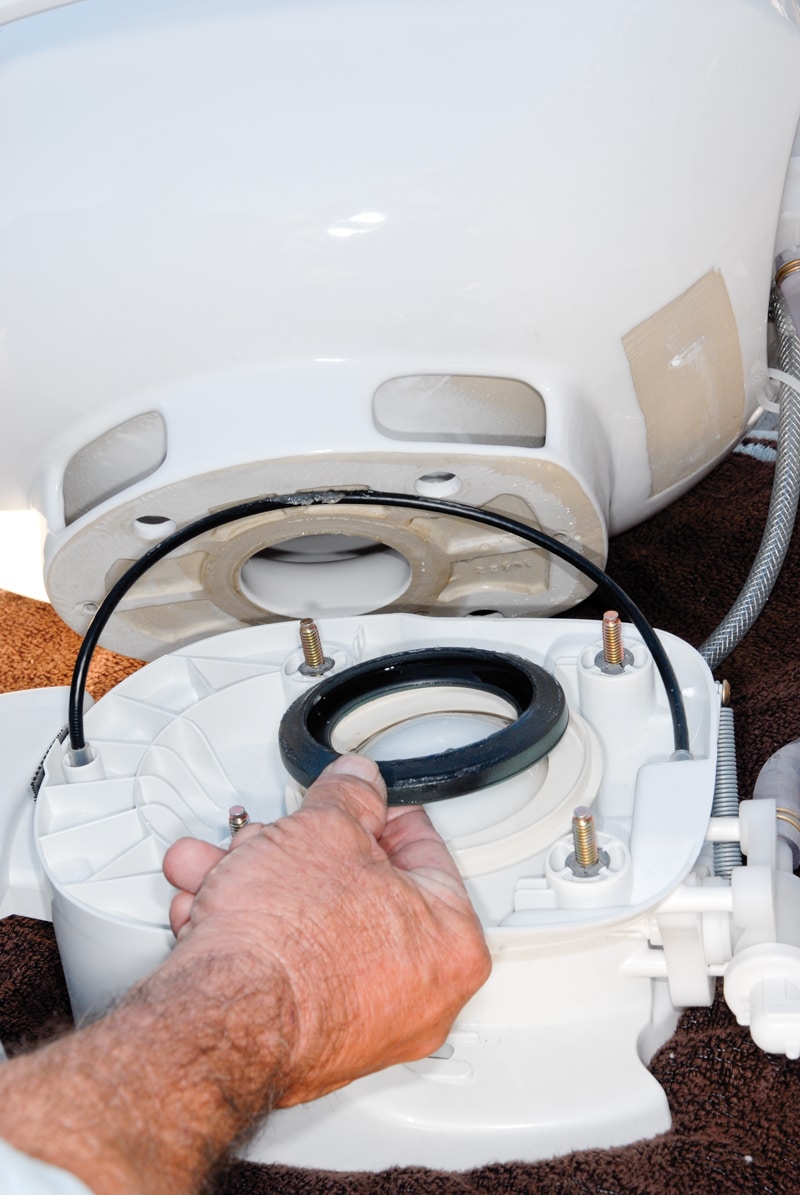
Remove the old closet flange seal. Then remove the four half-inch nuts that hold the porcelain bowl to the plastic base. Discard the four plastic washers under each nut. Separate the bowl from the base and you will see the seal lying directly on top of the ball. Remove and discard the seal and inspect the ball for any obvious scratches or gouges. Replace the ball if it’s damaged to keep it from compromising the new seal.
Install the new Thetford waste ball seal with the flat side down. Add supplied grease to the underside of the bowl where it meets the seal.

New flange seal is positioned before the toilet is placed back on the floor.
Replace the bowl onto the base; loosely install the new plastic washers and half-inch nuts. Lift the toilet seat up and center the bowl onto the new seal. Finish by carefully tightening the nuts until they are snug, making sure the seal does not move. Do not over tighten or you will be buying a new toilet!
Reinstall the toilet in the RV with the new flange seal in place, reattach the water line, check for leaks, replace the decorative cover and you’re done. The bowl seal should now hold water and help ward off any nasty fumes.
The Thetford Style II Waste Ball Seal Replacement Kit (part no. 34120) retails for $39.95 and includes everything you’ll need.
Thetford Corporation, (734) 769-6000, www.thetford.com.
 Before final tightening of the bowl to the base, the waste ball seal here needs to be centered. |
 This can be accomplished by opening the toilet seat and lifting the bowl from the base and gently centering the seal. The nuts are then tightened. |
 Nuts holding toilet to the closet flange are tightened before the water line is reconnected. |