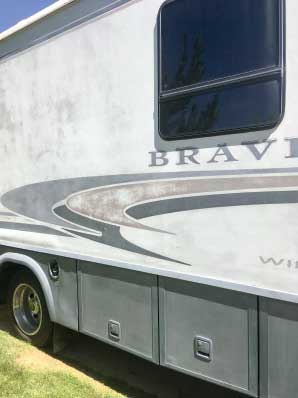
2001 Winnebago Brave that was sun-faded on the outside before the DIY restoration
I purchased a 2001 Winnebago Brave that was sun-faded on the outside. I wanted to improve the exterior, but didn’t want to spend an arm and a leg doing it. After contacting the manufacturer for a new decal set (not available), pricing a full paint job ($5,000-$8,000) and researching a vehicle wrap ($2,000-$4,000), I decided to restripe the outside myself. I didn’t remove the decals as I knew how difficult that would be. With the help of a friend, I used the existing decals as a template and rough sanded them with steel wool, and then cleaned them with denatured alcohol. I ordered vinyl automotive tape from Letters Unlimited Inc. in colors that matched the originals in size and width. The tape can be cut to fit any size, so I measured all of the stripes and ordered two rolls of the tape (one for each side).
We started on one side, and using a mix of dish detergent and water, laid each of the stripes over the existing decals, spraying and smoothing the bubbles out as we went. For the larger swooshes, I bought 6-inch-wide rolls of vinyl and overlaid them horizontally from the bottom up, overlapping each 1⁄8-inch so water would run over the lap joint. Once the tape was on, using a razor blade and a steady hand, we cut around the decal shape (NOT into the fiberglass). You can see the shape through the new tape by the shadow of the overlaying decal. We did the whole job for less than $400, in about 12 hours.
Ken Bishop | West Jordan, Utah