Employing a portable tank eliminates the need to break camp while staying in parks without sewer hookups
Taking a motorhome to an RV park that has a dump station but no sewer hookups requires additional planning, especially for a family. The same rule applies while boondocking; after just one day off the grid, you may notice the gray and black tanks can fill up fast. Having to break camp every time the holding tanks need emptying is downright inconvenient, making the purchase of a portable waste tank money well spent.
Portable tanks come in a variety of sizes, with varying features, depending on the size and price point. The problem, in many cases, is where to store the tank in an RV. A 35-gallon tank is quite large and can displace needed stored items that tend to fill up compartments. However, using a portable tank that’s smaller than the onboard holding tank entails an attentive transfer process to avoid an overflowing mess. A portable model that’s equal
in size or larger than the onboard tanks is preferred.
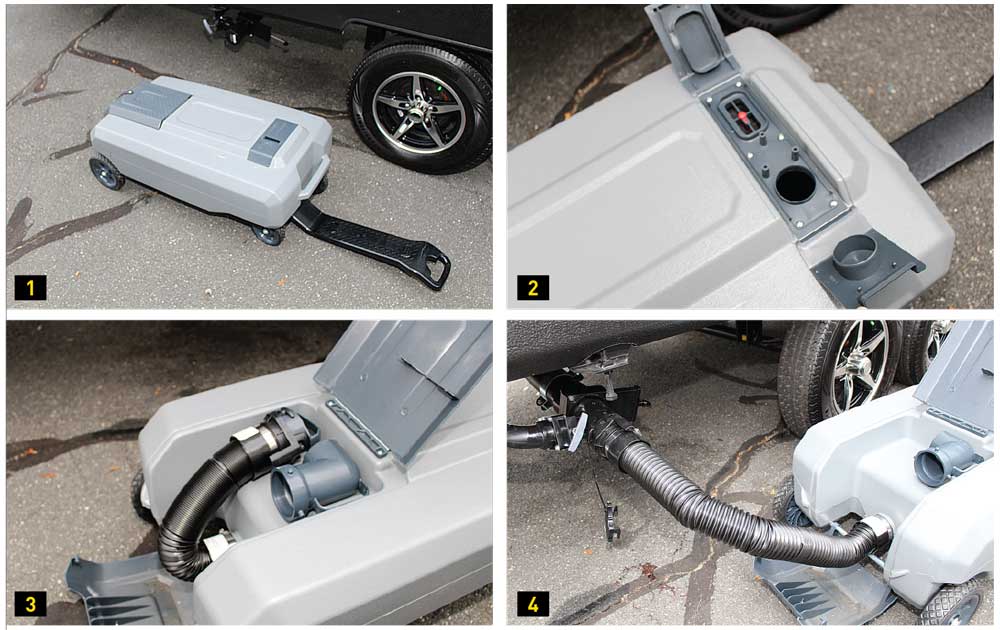
1) After removing the SmartTote2 LX from the packaging, the handle is unfolded, and the tank can be pulled easily. The handle extends for more leverage, if needed. It fits over the tow vehicle’s 25â„16-inch hitch ball for slowly towing the tank to the dump station. 2) The LX has a floating AutoStop level gauge/vent and a rinsing port toward the top. When getting ready to transfer waste from the RV or to empty the contents at the dump station, open the gauge side to see when the tank is full and allow the tank to vent when dumping. Leave the rinse door (right) closed until it’s time to flush the tank with clean water. 3) The PermaStore cabinet houses a heavy-duty collapsible sewer hose with an ergonomic bayonet fitting and cap, and a 90-degree elbow for use with a sewer connection. The elbow is shallow, so it’s best to use a sewer donut. 4) The hose connects to the RV’s sewage outlet for evacuating the tanks. While dumping, watch the AutoStop level gauge closely.
One of the best-designed portable tanks on the market is the Thetford SmartTote2.
Thetford started from ground level and developed the SmartTote2, a portable tank that is light, strong and easy to use. The tank is made of a durable plastic that’s relatively lightweight but can handle the stress of carrying heavy contents, being pulled around and then dumped.
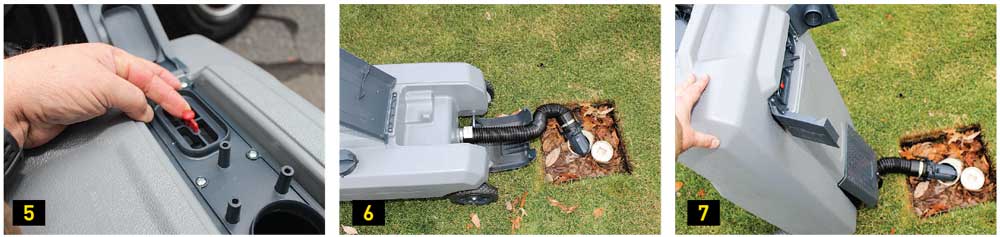
5) When the level rises, close the RV’s termination valve. While keeping the end of the hose elevated above the tank, replace the cap, collapse the hose and secure the compartment. Close the AutoStop gauge hatch and proceed to the dump station. 6) Once at the dump station, open the compartment and remove the hose, keeping it elevated; do not open the AutoStop gauge compartment yet. Remove the cap, attach the elbow and place the donut in the sewer connection. While keeping the center section of the hose elevated to help prevent flow, place the elbow in the sewer connection, then depress the center section of the hose to allow free flow of the contents. Open the AutoStop gauge hatch to vent. 7) Once the tank has dumped, open the rinse door and fill the inside of the tank with the water hose, then tilt the tank up to drain the last bit out of the tank, and you’re done.
The SmartTote2 is available in four two-wheel models in capacities from 12 to 35 gallons. The more elaborate four-wheel models come in 18-, 27- and 35-gallon sizes with an extendable towing handle, an AutoStop level gauge so the fill level can be determined, a vent for fast emptying, and a rinsing port. There is also a built-in hose with connectors mounted inside a closable PermaStore compartment. The four-wheel SmartTote2 LX we tested is the company’s deluxe tank.
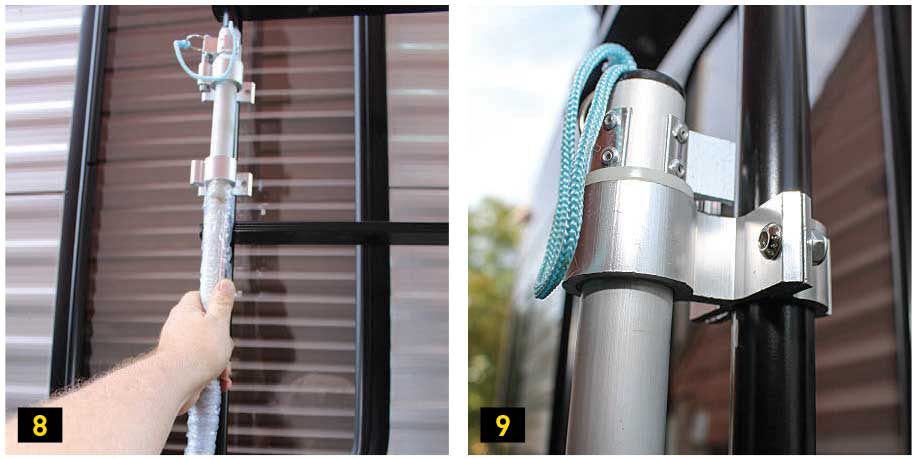
8) The Tote Storage System ladder mount has a left and right arm, which must be mounted in the proper position for unlocking and folding, and high enough
so the tank doesn’t block the taillights. 9) The arms feature an aluminum bracket to lock the rotating arms in place.
The LX comes with almost everything needed, but to dump the tank cleanly and safely requires a few more things. First, a donut for the sewer-hose elbow attachment helps ensure that the hose remains sealed to the sewer connection. Second is a rinsing hose dedicated to black and gray water; never use a potable-water hose for sewage purposes. Short hoses are available in black and gray colors to differentiate them from freshwater hoses. Lastly, rubber or latex gloves and safety goggles should be used to protect against sewage spills and splashes.
The tank requires no assembly and is ready to use out of the box. The included attachments make the process as clean and easy as possible.
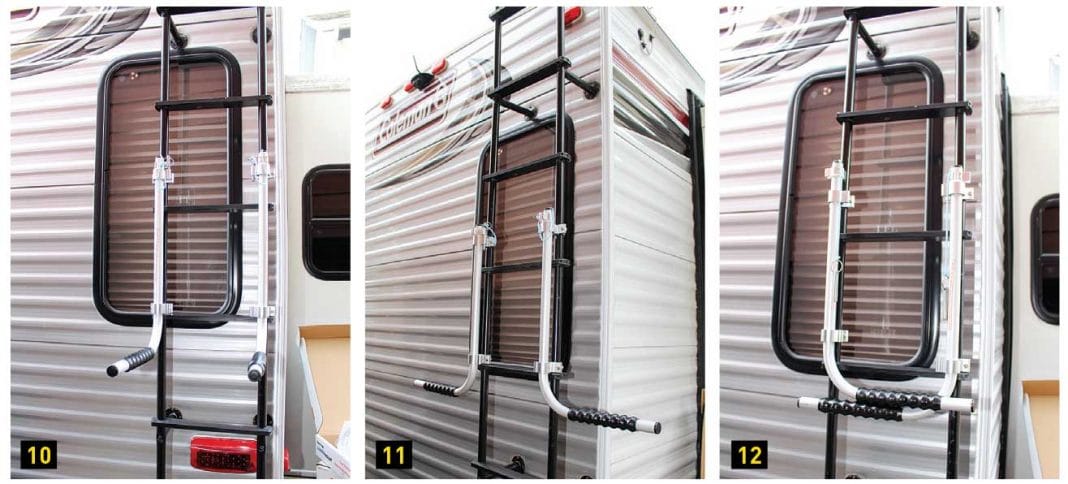
10, 11, 12) The arms lock straight out for carrying the tank and to the outsides for climbing the ladder. When the tank isn’t mounted, the arms remain unlocked, folded inward and strapped down.
Transporting a portable tank in an RV can be a challenge because of the size, and – let’s face it – we don’t want a sewage tank near anything we touch regularly. Thetford has come up with the Tote Storage System ladder mount that is designed to support an empty portable tank, no matter the size, on the RV’s roof-access ladder.
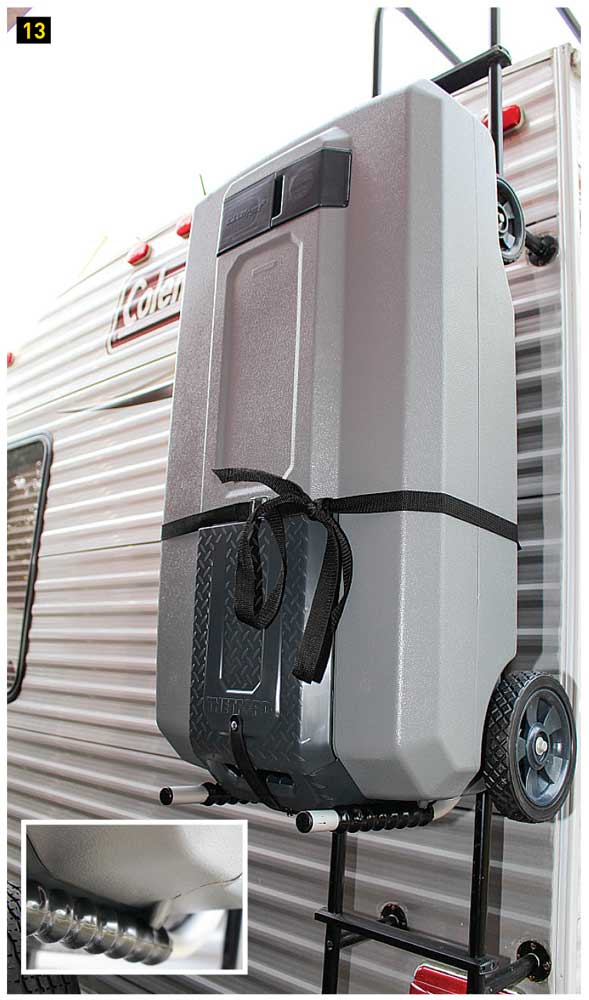
13) The tank is secured to the ladder with the included cinch-strap. It sits nicely on the bracket, with tabs on the tank (inset) that help secure it to the arms.
Thetford
800-543-1219
www.thetford.com/products/evacuation/smarttote
The lightweight aluminum ladder mount has swiveling arms that are wrapped in a rubber sleeve on the bottom to cradle the tank, which is held in place with a pull-strap. The mount permanently attaches to the ladder via swivel brackets that allow the arms to swing out of the way. It took about 20 minutes to install the mount on an RV ladder. SmartTote2 LX tanks sell for $225 to $325 and come with a one-year warranty. The Tote Storage System ladder mount has an MSRP of $74.99.