Replacing a worn kingpin assembly strengthens the truck-and-fifth-wheel connection and improves towing stability
We keep our one-ton diesel truck and 36-foot fifth-wheel trailer in top shape by inspecting key components on a regular basis. We check the kingpin assembly a few times a year, ensuring that the bolts are tight and the welds are good. We also verify that there is no play in the kingpin base by grabbing it with both hands and twisting sideways.
On a recent check, we found the kingpin base felt a little sloppy and the assembly plates were warped away from the Demco Glide Ride pin box. Both the pin assemblies and the links inside the pin box needed to be replaced to make sure the connection between the truck and trailer was as rigid as possible. We had towed our trailer more than 40,000 miles in the course of seven years of ownership, so this kind of wear came as no surprise.
The replacement of the pin assemblies and links is an easy half-hour job that requires an extra set of hands for a few minutes to remove the kingpin base from the pin box.
|
|
||||
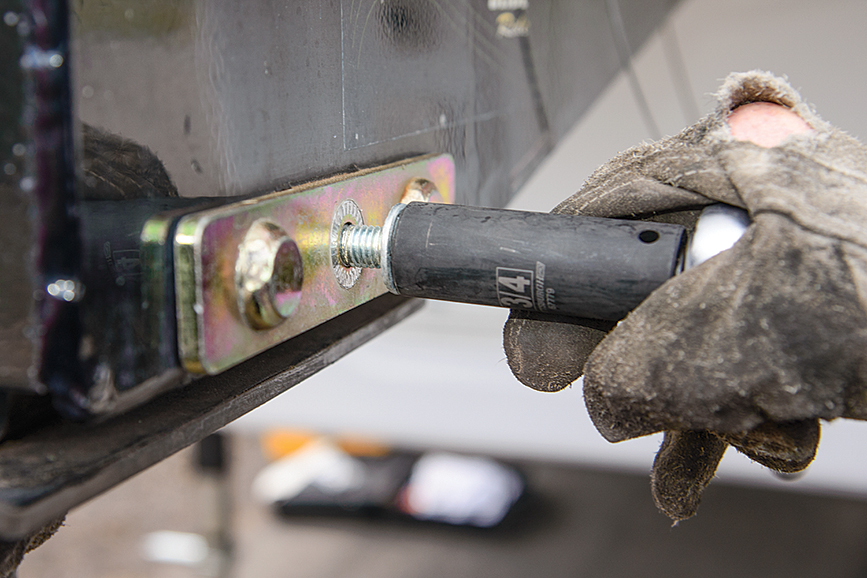
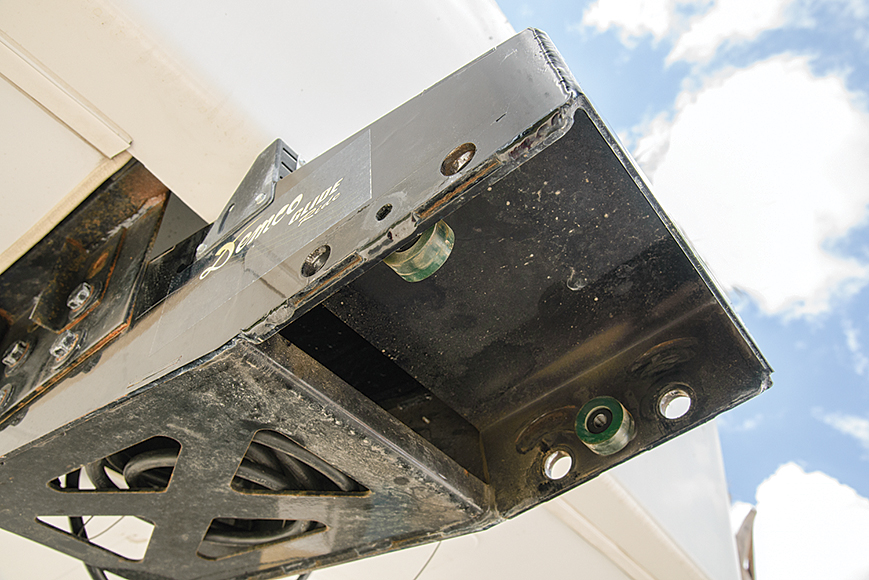
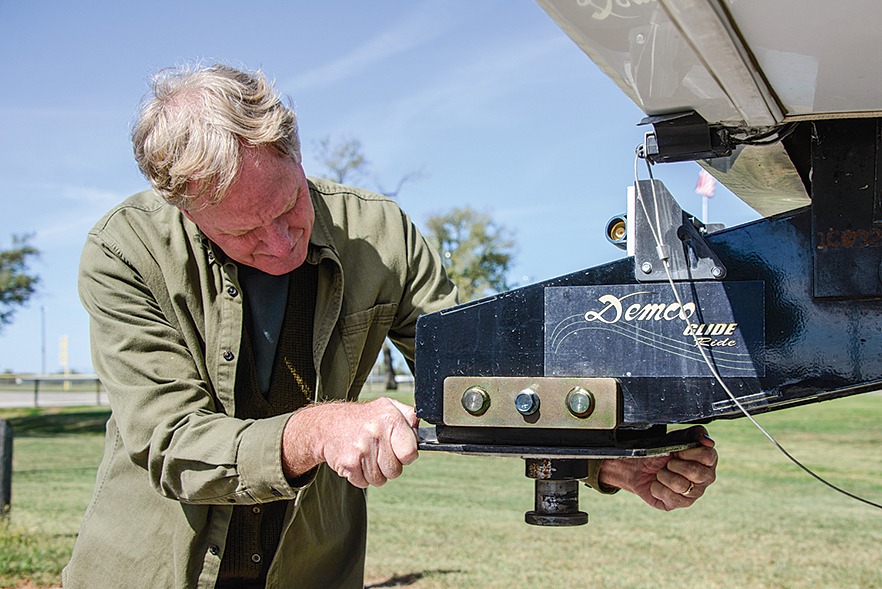
| (1) First, loosen the serrated flange bolts (above) that hold the kingpin base onto the pin box. There is one bolt on each side of the pin box. We couldn’t break the bolts loose with a regular ratchet and were concerned that using an extension handle would risk breaking the ratchet and/or the socket. Instead, we used a long-levered breaker bar with a hardened-steel six-sided ¾-inch impact socket. A long-handled torque wrench would also work. Don’t use a 12-point socket, as this might strip or break the socket.
|
||||
|
||||
|
|
||||
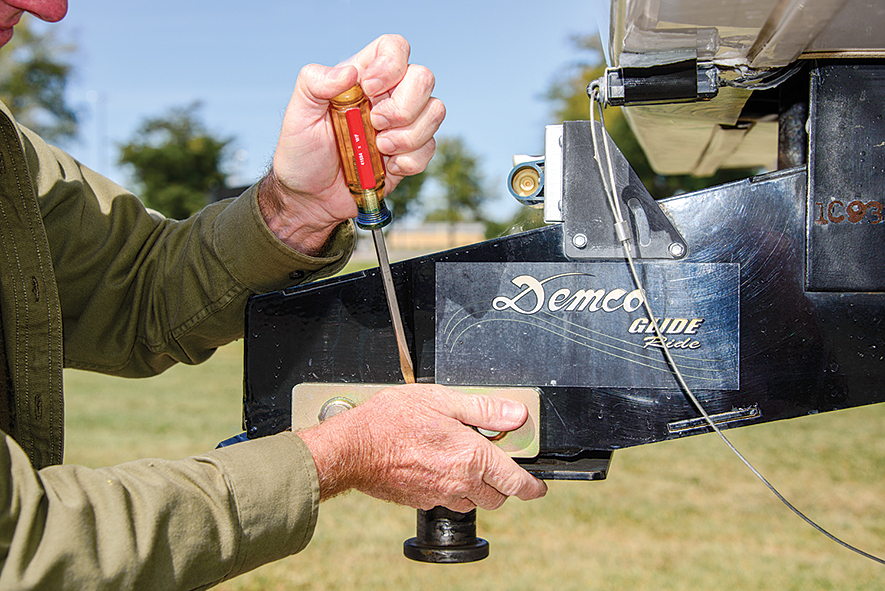 (4) It may be necessary to use a screwdriver to pry the pin-assembly plates from the pin box before they can be removed. (4) It may be necessary to use a screwdriver to pry the pin-assembly plates from the pin box before they can be removed. |
||||
|
|
||||
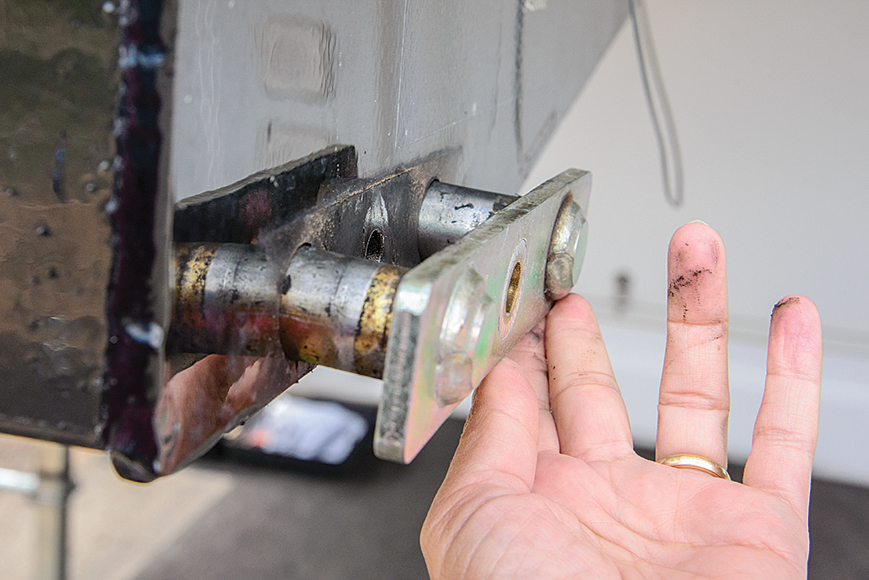
 (5) After removing the kingpin base from the pin box, place it on the ground or the tailgate of the truck and slide the links off the posts. There are two links on each side of the kingpin base, and they pull straight out. Then slide the new links in place. (5) After removing the kingpin base from the pin box, place it on the ground or the tailgate of the truck and slide the links off the posts. There are two links on each side of the kingpin base, and they pull straight out. Then slide the new links in place. |
||||
|
|
||||
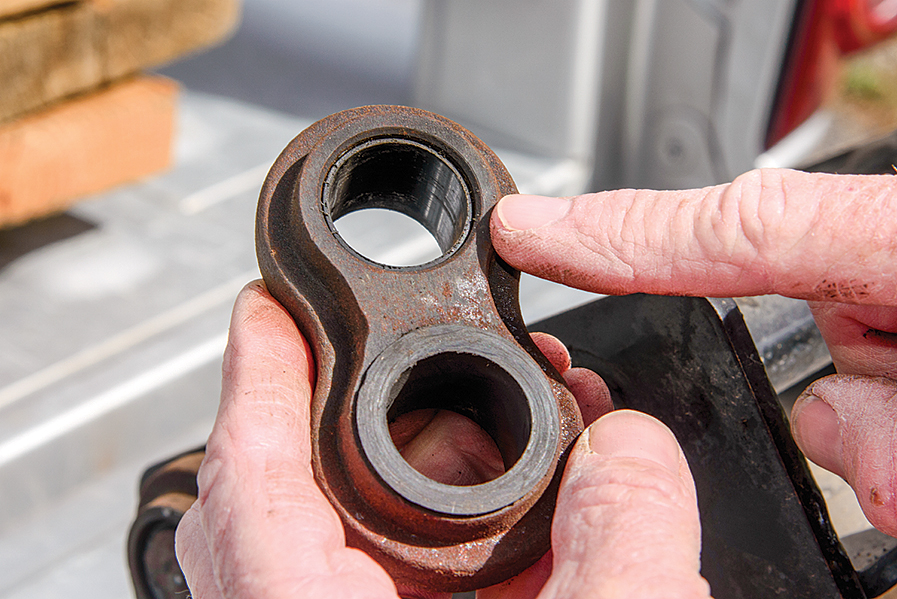 (6) The original bushings in the links were worn, which caused play in the pin assembly plate. (6) The original bushings in the links were worn, which caused play in the pin assembly plate. |
||||
|
|
||||
 (7) Inspect the interior of the kingpin box for signs of wear. Verify that the rubber bumpers look OK, and that the welds are solid and there are no cracks. Then reattach the kingpin base to the pin box by having one person hold the kingpin base while the other aligns the pin assemblies with the pin-box holes and slides them in. (7) Inspect the interior of the kingpin box for signs of wear. Verify that the rubber bumpers look OK, and that the welds are solid and there are no cracks. Then reattach the kingpin base to the pin box by having one person hold the kingpin base while the other aligns the pin assemblies with the pin-box holes and slides them in. |
||||
|
|
||||
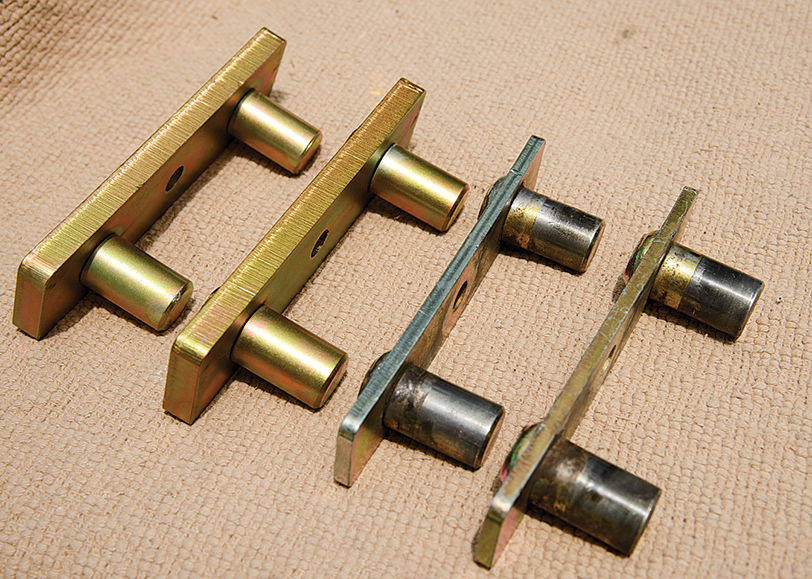 (8) In our case, the new pin assemblies were much more rugged than the original ones. Each new pin assembly plate was about 1/8-inch thicker than the old one, requiring a longer serrated flange bolt to be used to bolt it to the pin box. These longer bolts did not come with the replacement pin-assembly kit. We purchased grade 8 bolts of the correct length and matching pitch. Once both pin assemblies are in place, snug up the serrated flange bolts using a ratchet. Use a torque wrench to tighten them to 85 ft-lbs. (8) In our case, the new pin assemblies were much more rugged than the original ones. Each new pin assembly plate was about 1/8-inch thicker than the old one, requiring a longer serrated flange bolt to be used to bolt it to the pin box. These longer bolts did not come with the replacement pin-assembly kit. We purchased grade 8 bolts of the correct length and matching pitch. Once both pin assemblies are in place, snug up the serrated flange bolts using a ratchet. Use a torque wrench to tighten them to 85 ft-lbs. |
||||
|
|
||||
 (9) After we replaced the pin assemblies and links, there was no slop or play when we twisted the kingpin base. We also found the difference while towing was very noticeable. Now the connection between the truck and trailer is rock solid. (9) After we replaced the pin assemblies and links, there was no slop or play when we twisted the kingpin base. We also found the difference while towing was very noticeable. Now the connection between the truck and trailer is rock solid. |
||||
|
|