Getting an RV ready for winter travel will take the frost off the windows, holding tanks and plumbing fixtures
The temperature has dropped dramatically, flakes are falling, and the moisture in the air is far more prevalent. All of these elements point a giant arrow at Old Man Winter and another freezing season for those of us who live in northern communities. For some, the onset of winter signals the end of the travel season and the time to put the RV into hibernation. Those who want to take advantage of winter will need to have an RV that’s four-season-ready, but the majority of RVs are not equipped from the factory to handle extreme temperatures. Fortunately, a number of things can be done to make any RV more capable of handling cold weather.
It all begins with looking at what’s insulated from the elements at the factory level. Quite often in a non-four-season-prepped RV, there’ll be totally exposed holding tanks and plumbing that can freeze and burst during extra-cold weather. Even when there is some sort of winter protection offered from the factory, there’s still room for improvement.
 |
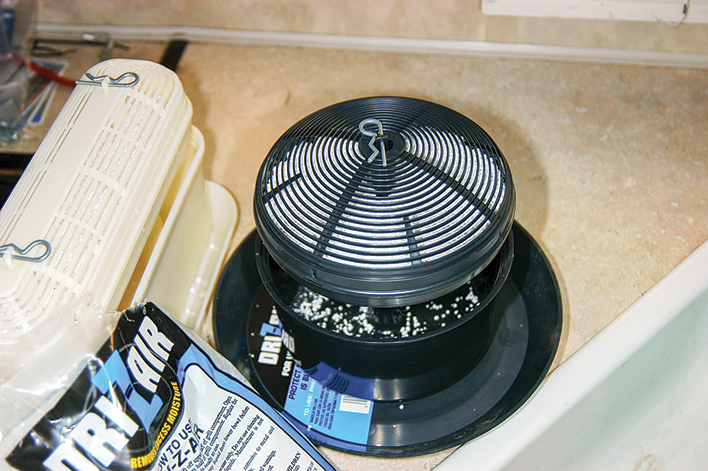 |
| Dri-Z-Air dehumidifiers utilize special crystals that pull moisture out of the interior air. The system requires no power and is available in Decorator (left) and Classic (right) designs.
|
|
The key elements to cold-climate protection are insulation, insulation and more insulation in one form or another. The first type of insulation to consider is the use of air, or specifically, dead air. Although cold air is what’s being battled against, it can also provide a great amount of insulation when used the right ways. A perfect example of this is to trap a bubble of air between two sealed surfaces, as with dual-pane windows. This can be quite costly, however, if the windows don’t currently exist in your RV.
One cost-friendly option is the use of window-insulation products developed for home windows. These kits are available from various makers at most home-improvement stores (more so in northern regions), usually for less than $10, and in many formats, including a heavy-duty variety. Frost King’s heavy-duty Window Insulation Kit consists of three 42 x 62-inch, 1.5-mil-thick polyethylene plastic sheets and extra-heavy-duty double-sided tape for attachment. This special film is claimed to improve an average single pane’s R-value by up to 90 percent, so it’s like putting that second pane on but a lot more affordable.
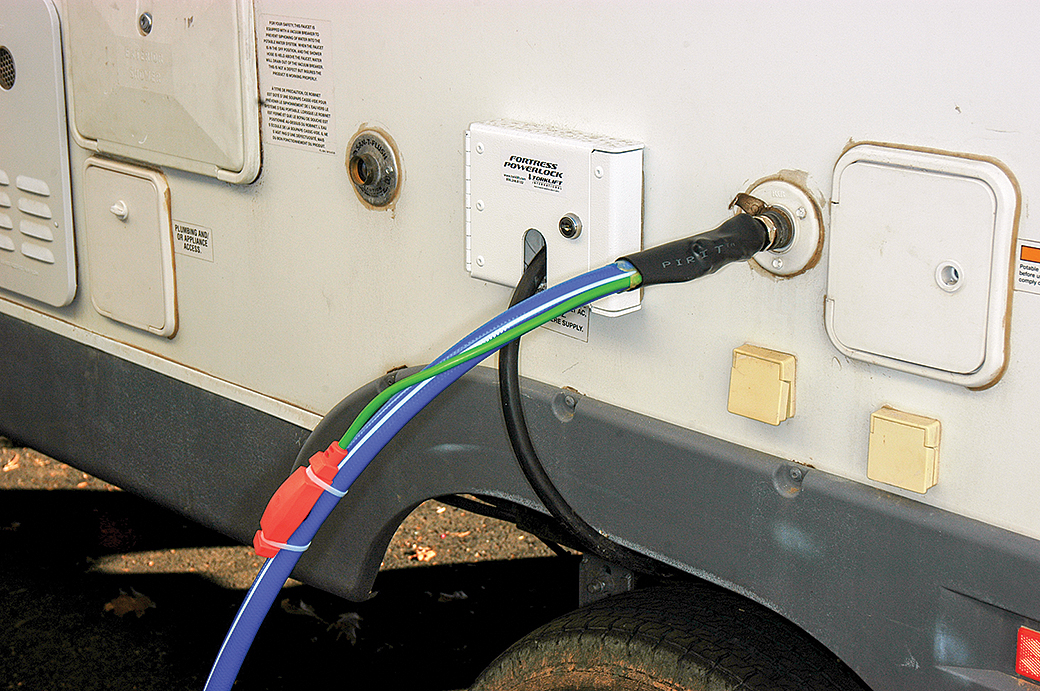 |
The Pirit Heated Hose is a high-quality product designed to ward off water freezing and interrupted service to the RV. |
|
|
|
Applying Frost King’s heavy-duty kit starts with cleaning all frame surfaces using a 50/50 solution of acetone and water (or alcohol). Once everything has been properly cleaned, double-sided tape is placed on surrounding window borders, using firm pressure. While waiting the 15 minutes for the tape to bond, begin cutting the plastic film to size, making sure to leave at least 1 extra inch on all sides for holding on to during installation. Now, starting with the upper corners, affix the sized plastic sheets to the window frames containing the double-sided tape, while working out as many wrinkles as possible and pressing firmly once again. The last step involves a hair dryer or heat gun on low and gently applying heat until the remaining wrinkles pull out and there’s clarity.
Adding this type of window insulation cuts down on ventilation possibilities because the windows are sealed tight, so you’ll need to make more use of rooftop vents as needed for fresh air. (See page 68 for another way to use window-insulation kits.)
One of the biggest RV enemies to warm interiors is the leaking of cold air from — you guessed it — poor insulation. Some of the areas often overlooked are open-air pathways from outer compartments, roof vents and skylights. To help keep out the cold, companies like Camco offer simple and effective roof-vent covers and insulators. From Camco’s four-part vent-liner lineup, the Sunshield RV Vent Cover and DualVent Cover are good options. The other two are insulators: the RV Vent Insulator uses a thick foam pad covered with faux fleece to stuff into the 14 x 14-inch roof vent, and the Sunshield Vent Insulator is lined with foil-bubble insulation on one side.
|
|
||
|
|
 |
|
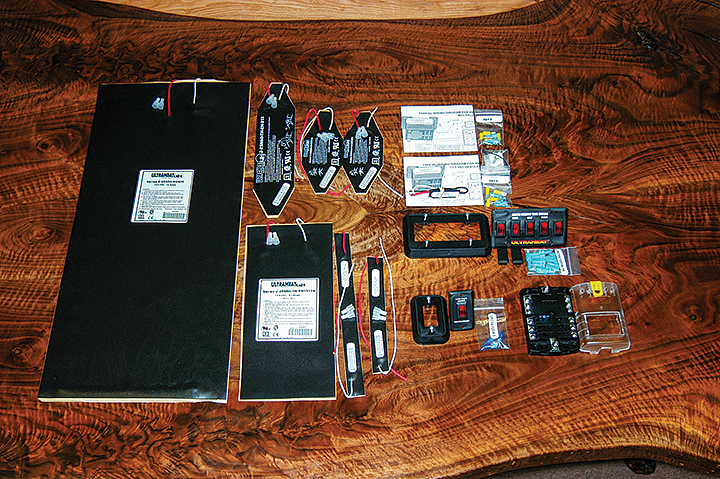
| (1) UltraHeat kits for holding tanks and pipes come with all the necessary hardware.
|
||
 |
||
 |
||
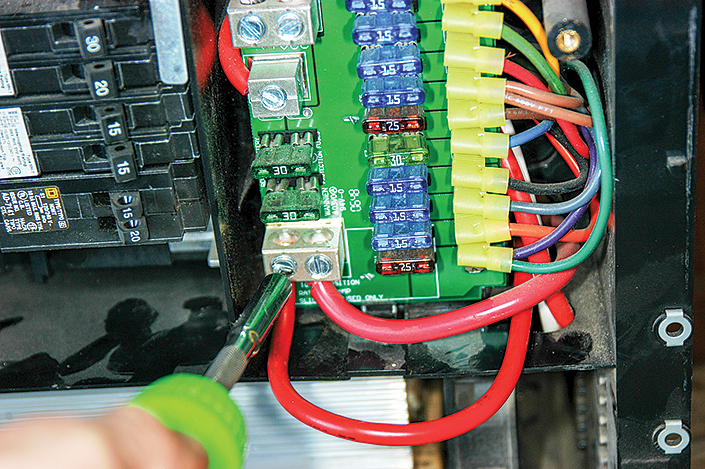
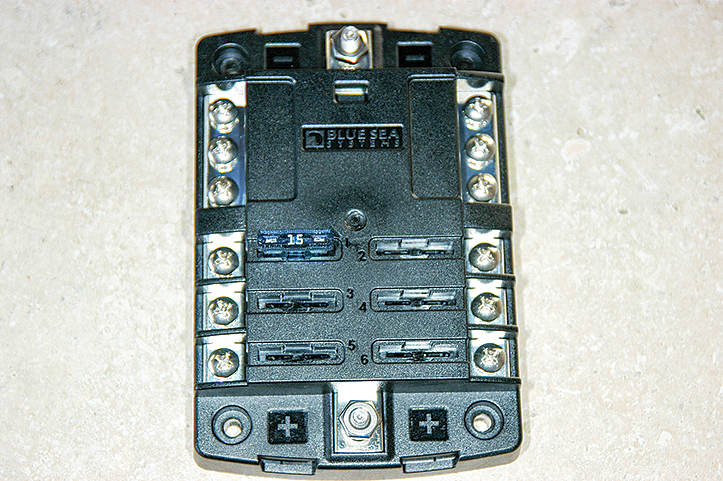
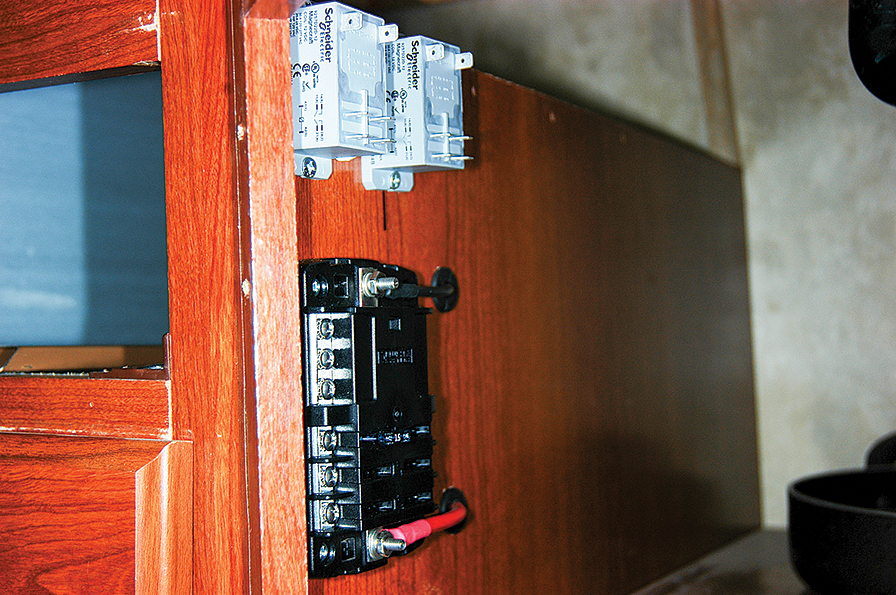
| (2) Power for the separate fuse panel is pulled from the RV’s distribution center; 10-gauge wire is used to connect power to the new fuse panel (3) purchased at a boating-supply store.
|
||
 |
||
 |
||
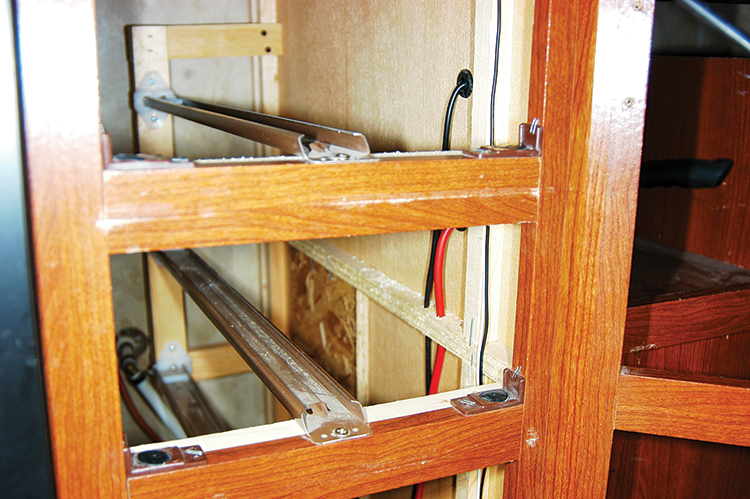
| (4 and 5) Routing wire from the heating pads will likely require some cabinet disassembly for proper access.
|
||
 |
||
| (6) Pads, like this one for the holding tank, are attached using preinstalled double-sided adhesive, which is plenty sticky if the surface is treated properly before installation.
|
||
 |
||
| (7) Each pad has wire pigtails for hooking up power.
|
||
 |
||
 |
||
 |
||
| (8, 9 and 10) Pads are installed on gray- and black-water pipes in areas susceptible to freezing.
|
||
 |
||
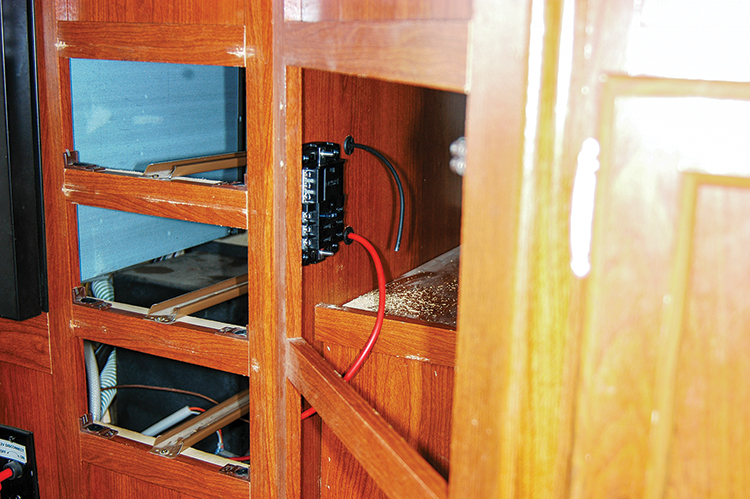
| (11) The new fuse panel is mounted on a wall inside a cabinet for easy access and (12) relays for the larger heating pads are installed above the new fuse panel.
|
||
 |
||
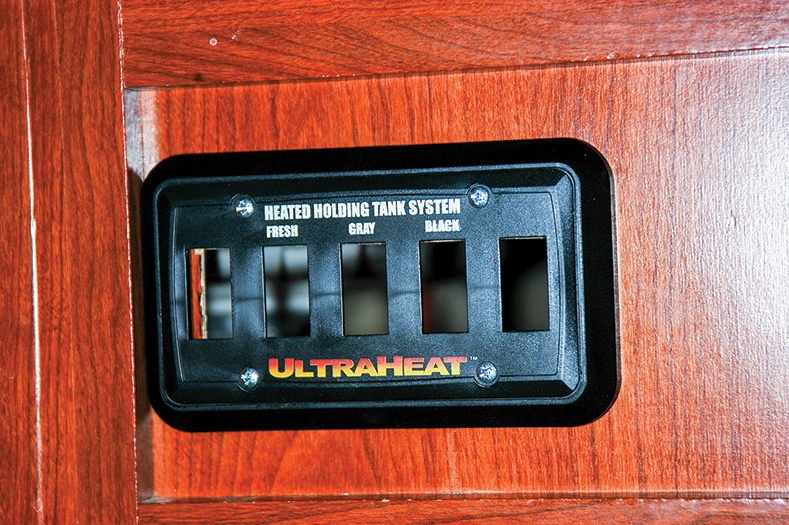
| (13) The switch panel makes controlling pads convenient.
|
||
 |
||
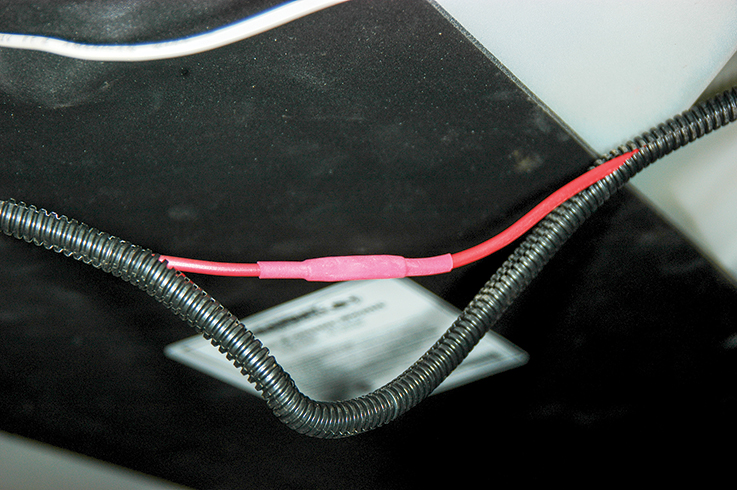
| (14) All connections were made with butt connectors and protected with shrink tubing. Split loom is used to protect wire. | ||
|
|
||
Installation of the two vent covers is quick and DIY-friendly. The Sunshield Vent Cover, which is no more than a precut piece of foil-bubble insulation, is held into position via hook-and-loop strips. Installing the Dual Vent Cover takes a little more time. Also comprised of precut foil-bubble insulation, it rests in a specially formed plastic housing, utilizing 90-degree clips and longer replacement vent screws. By securing the 90-degree clips onto the vent, the Dual Vent Cover can be placed into one of the two slots to control unwanted cold-air flow.
Another factor when camping is moisture control. Human breath, combined with the use of the shower, LP-gas stove/oven and possibly a catalytic heater can produce a lot of moisture inside an RV. Much of this moisture ends up dripping from roof vent and window frames, especially if they are made of metal. Obviously, the best method of moisture control is elimination.
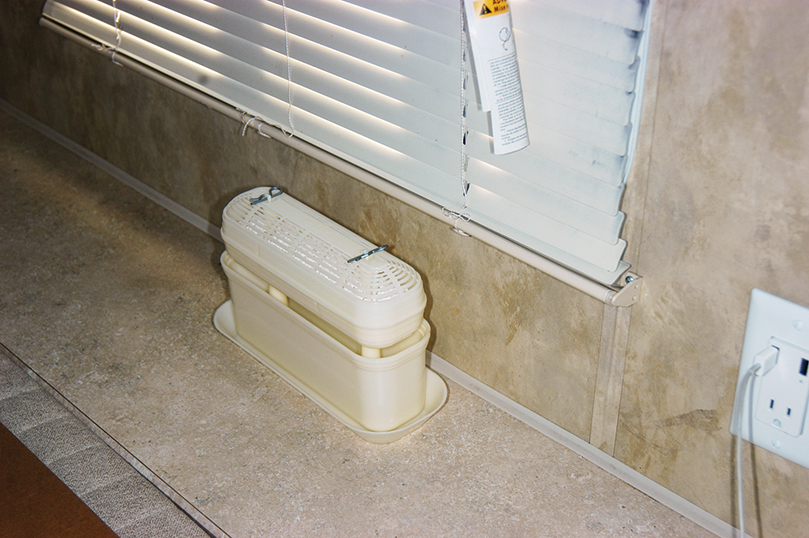
Dri-Z-Air has been supplying an RV moisture-removal system for many years and for a very good reason: it works. The Dri-Z-Air system consists of uniquely shaped Classic and Decorator plastic containers and a bag of moisture-attracting and consuming crystals. An optional tray for the Classic design is also available.
After choosing an ideal location for the Dri-Z-Air unit, such as near the kitchen window, the crystals are dumped into the bottom half of the container, followed by reassembling the top. All you do from there is routinely empty the tray of water and refill the container as the crystals disappear. Dri-Z-Air also helps prevent mold and mustiness.
If you have access to shorepower, a small household dehumidifier is also a highly functional and practical solution to eliminate interior humidity.
Outside, you’ll have to deal with the plumbing for all incoming and outgoing water and waste. Securing a plumbing line schematic from the manufacturer is very helpful, but don’t expect success in obtaining this information. Your first target should be the freshwater tank. We already know the tank is housed underneath the RV, but it may or may not be exposed and protected by insulation and provided with heat from the furnace ducting.
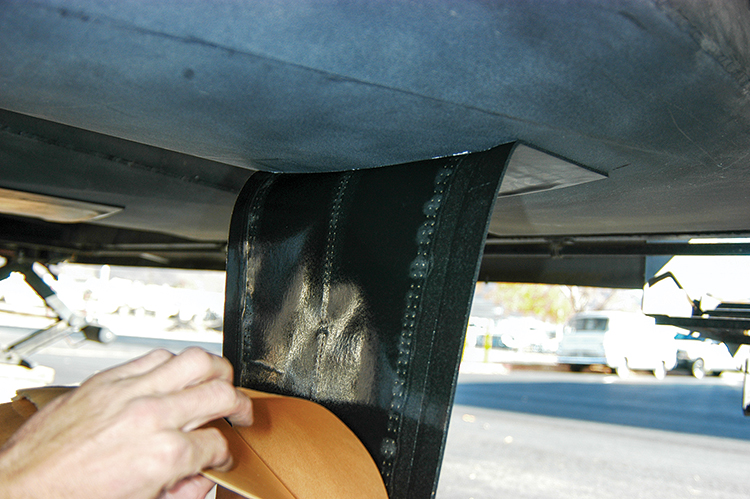
If the majority of your RV’s water system is completely exposed, like our test unit, then figuring out ways to cover, insulate and heat the tank and lines is mandatory for any kind of year-round camping capability. Your best defense is creating some kind of liner/elemental barrier for the tanks and the maze of plumbing lines, and there are several ways to do this. Ultimately, the overall design and execution is going to be heavily swayed by your budget. Some products and homemade remedies work well, and some should be avoided.
Over the years we’ve seen multiple underbelly layouts that have ranged from custom-crafted wooden liners to bungee-corded tarps holding in fiberglass insulation (a very bad idea). Others have used homemade underbellies made of multiple pieces of black corrugated plastic sheets, similar to what sign makers use, with some sort of insulation sandwiched between the plastic boards and the tanks, then screwed into place. Building in this fashion looks good and is not too pricey, but uncovered and exposed edges of these corrugated boards can trap water, which can freeze and complicate the situation, so you need to ensure these edges are sealed and protected from the environment.
Another product commonly used by the RV industry is Darco, an incredibly tough, rip-resilient, flexible, waterproof and very lightweight material. This stuff is not exactly the easiest material to find on the shelf, but many dealers can order it, and there are a number of Darco copycats out there that will suffice.
After selecting the outer material for protecting the underbelly components, an excellent choice of insulation would be to layer foil-bubble insulation and R-15 or higher fiberglass house insulation. To keep things together, use spray adhesive and apply it to one side of the foil-bubble insulation. After waiting a few minutes for the glue to tack up, lay your precut and sized home insulation on the foil-bubble material. This will keep everything easy to deal with and eliminate some contact with the itchy glass fibers as well as provide a good level of insulation. Spun fiberglass home-style insulation also traps and holds water like a sponge, so care must be taken to ensure any such material used on the RV’s underside is well protected from road spray and other water sources.
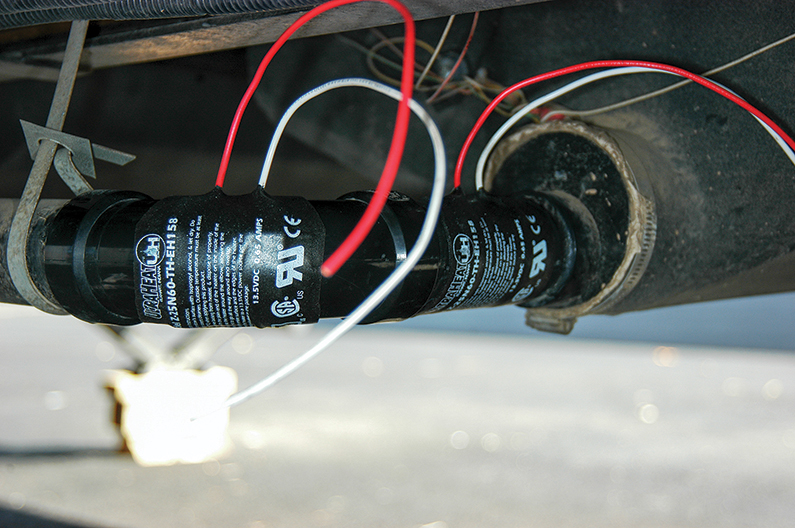
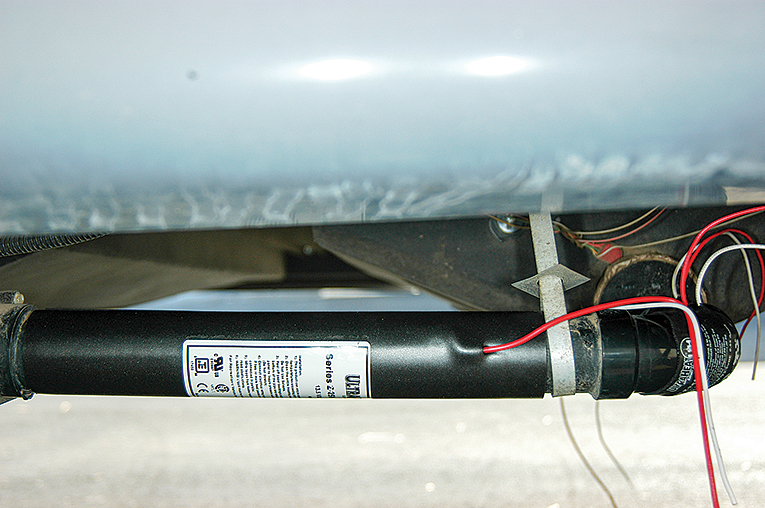
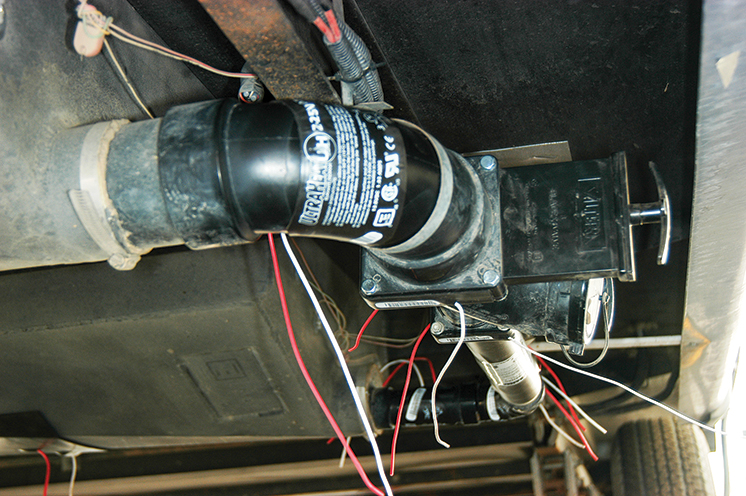
The use of holding-tank heating pads is another recommended option to ward off frozen contents. UltraHeat produces an entire array of RV-specific 12-volt DC heating mats, gate-valve heaters, and elbow and pipe heaters that do a good job of regulating temperature. UltraHeat products are made of high-quality materials to provide longevity, and installation can be done by most do-it-yourselfers. Each of the pads chosen for your application will include clearly color-printed and detailed wiring instructions and all the necessary terminals.
Also offered by UltraHeat to optimize the heat mats’ performance is a series of switches, switch housings, special relays and even temperature sensors to trigger the relays only when needed. Application relies on the extra-sticky double-sided adhesive (preinstalled), which seems to be quite industrial in strength and certainly won’t just fall off, provided it’s installed according to the instructions.
Installation of the UltraHeat mats begins with a clean surface for proper adhesion. UltraHeat says to use 90 percent isopropyl alcohol and allow time for drying. However, if the tanks and plumbing are out in the open, they will have a fair amount of road debris to remove before actually going to the alcohol. I found a foaming window cleaner from a local auto-parts store to work well, since it doesn’t leave any residue behind. Now the pads can be stuck onto the tanks and associated plumbing.
The next part requires the necessary wiring. Each pad is preinstalled with a small length of red and white wire appropriately sized for its amperage level. All larger pads, according to the company, should be wired through a series of circuit breakers, relays, switches and optional temperature sensors, while the smaller stature mats need only a fused and switched power source.
Since these pads and wiring draw a significant amount of amperage, it may be best to add a secondary fuse panel, which is tapped into the power-distribution/breaker/fuse box. This was absolutely necessary in our case, since there was no more room for additional fuses. We used a six-circuit unit available at boating-supply stores like West Marine. After getting the extra fuse panel secured and wired with at least 10-gauge power-supply wires, you’ll need to run a minimum 12-gauge hot wire from a 20-amp fuse to the relay, a switch and then on to the pads themselves. If utilizing the external temperature sensor, wire it in to the position on the relay for an optional switch. We opted to run a switch to the sensor, so it’s not on continuously.
Sources |
| Camco | www.camco.net Dri-Z-Air | www.drizair.com Frost King | www.frostking.com Pirit | www.pirithose.com UltraHeat | www.ultraheat.com |
The gate-valve heaters are intended to be run in 5- to 10-minute increments at the time of dumping, so they get their own fused circuit, minus a relay, but with a switch. Both gate valves can be wired together, as they are not high-amperage pads.
Once all the pads are wired correctly with the temperature sensor, you’ll have a holding tank and plumbing heating system that will turn itself on when ambient temperatures lower to 35 degrees Fahrenheit and off at 45 degrees, so long as the sensor switch is activated. When in use, the pads will quickly climb in temperature, reaching 80-plus degrees Fahrenheit. Heat pads are available for just about all freshwater and holding tanks.
Any such accessory that uses 12 volts DC is going to draw a fair amount of current and will quickly discharge a battery in a dry-camp situation. Unless you have a large solar charging system and/or a large bank of batteries available, these DC-powered heating devices are best used when connected to shorepower. A 12-volt battery that’s outside in subfreezing temperatures is going to have its power output diminished by the cold, and that will likewise aggravate the power situation when cold-weather dry camping.
About the only thing left to cover here is the freshwater-supply hose and its impressive ability to quickly freeze while hooked up to city water. A Pirit Heated Hose is probably the best solution to frustrating freeze-ups. Pirit offers a selection of well-built 120-volt AC heated hoses intended to provide water flow in just about any climatic condition.
The Pirit Heated Hose comes in 12-, 25-, 50- and 100-foot lengths, is thermostatically controlled to turn on when ambient temperatures approach freezing and provides heat throughout the entire length of the hose. To use the hose, simply hook up to the desired water connection and plug it into a GFCI-protected 120-volt AC outlet. Just like the heated tank pads, the Pirit Heated Hose easily reached measured temperatures of 80-plus degrees Fahrenheit within a matter of a couple minutes — the hose was warm from end to end. In lieu of using the Pirit Heated Hose, foam or fiberglass insulation can be used to wrap the hose. It won’t protect as well in extreme temperatures, but it does the job in moderately cold country.
Winter RV travel can be rewarding, as long as the inside is toasty and the plumbing system is protected from the cold. Waking up to a toilet that doesn’t flush or a tank that cannot be emptied is not fun. Using common elements found in home-improvement stores along with specialized equipment designed for RVs can go a long way toward making an otherwise three-season RV into a true all-weather RV, but be prepared to spend $1,000 or more for a complete package.
Here’s the bottom line on true four-season RV prep: get creative, do some research to find what will suit your winter travel needs, then proceed to insulate, insulate and insulate some more. Your efforts will be rewarded when resting in a warm rolling nest while peering out at crystal-kissed snowflakes.