A thorough check up will help ensure trouble-free days on the road during the upcoming travel season
The onset of spring, with its warmer days, beckons RVers to get their motorhomes ready to hit the road for new adventures. We’ve compiled a number of helpful tips for a thorough spring check-up that will ensure your house-on-wheels performs as well as possible throughout the upcoming travel season.

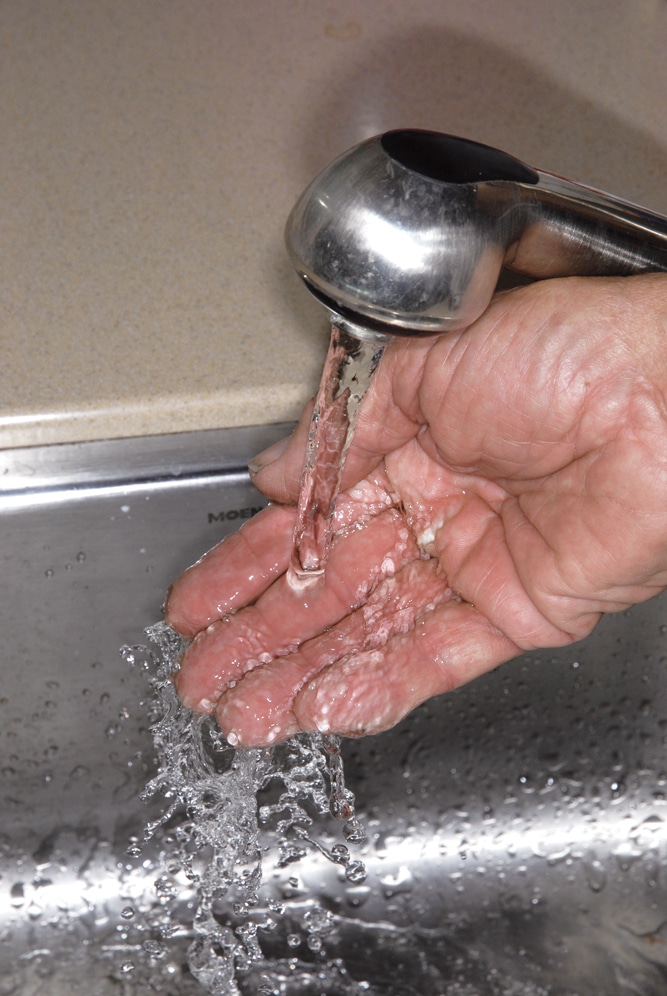
Flush the water system until all the antifreeze is gone. The water should run clear and smell clean.
Let’s start with de-winterization, for those who have stored their motorhome in preparation for freezing temperatures. Attention is first given to the water system; thoroughly drain and flush the antifreeze from the entire water system, including the toilet and water heater. Start by returning the water heater bypass valve to its normal mode/position. After the antifreeze has been flushed, household bleach (without extra cleaners) can be used to sanitize the freshwater tank. Use ¼-cup bleach diluted in water for every 15 gallons of tank capacity. Once the bleach is added (either via a gravity fill or pumped in), fill the water tank to the full mark, and pump the bleach-water solution through the entire system and allow it to stand for five to six hours.
Drain the water tank and open the low point valves to drain the water lines. Remove the plug or anode rod from the bottom of the water heater and allow the water to drain. This is a great time to replace an old, corroded anode rod (if there is only 25 percent of the material showing) and flush the water heater. You’ll also want to flush the freshwater system until you are sure that any foul taste and odor are gone. Baking soda added to the tank (about half a cup) will help remove any offensive odors. You may need to flush the system more than once. Leave the demand-water pump on (all faucets closed) for 48 hours to thoroughly check for any water leaks that may have shown up during storage. If the pump cycles with all faucets closed, there may be a leak in the system (or the pump needs repair).
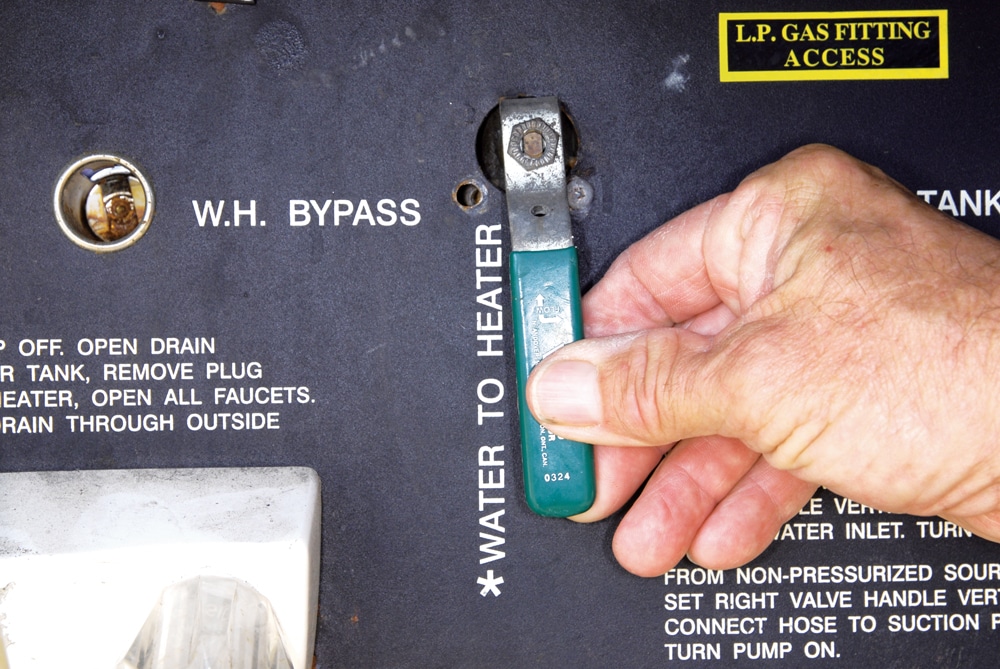
Make sure the water heater bypass valve is returned to the normal mode before pressurizing the system.
Now is a good time to give your motorhome a bath. Washing your coach will allow you to get up-close and personal with areas that are often out of sight, and thus, out of mind. Start on the roof. Care must be taken when walking on the roof, especially a rubber roof that is wet. Use a non-caustic product to clean a rubber roof. Membrane suppliers to the industry recommend using Spic and Span cleaner with a medium-bristle brush, and for tough stains, Murphy Oil Soap. If you have an aluminum or fiberglass roof, any type of car-wash product and the same medium-bristle brush will do the job. Pay close attention to the rubber membrane for any cracks or deterioration of the white surface coating.
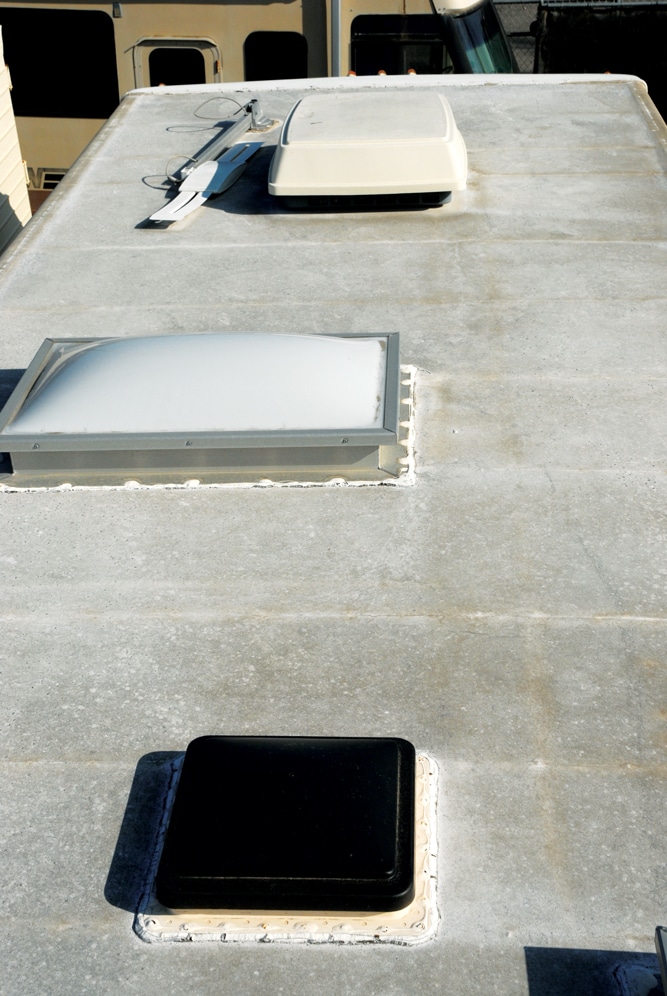
While scrubbing the roof, be on the look out for deteriorated caulking that will often show up around vents, seams and antennas. Also inspect the plastic vent lids and skylights for sunlight deterioration and cracks.
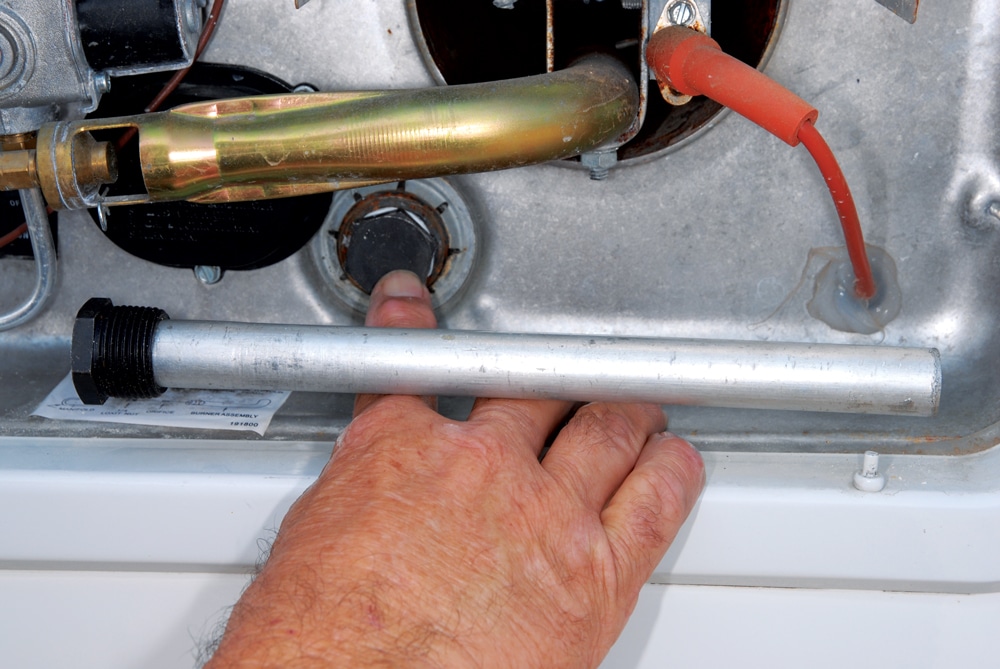
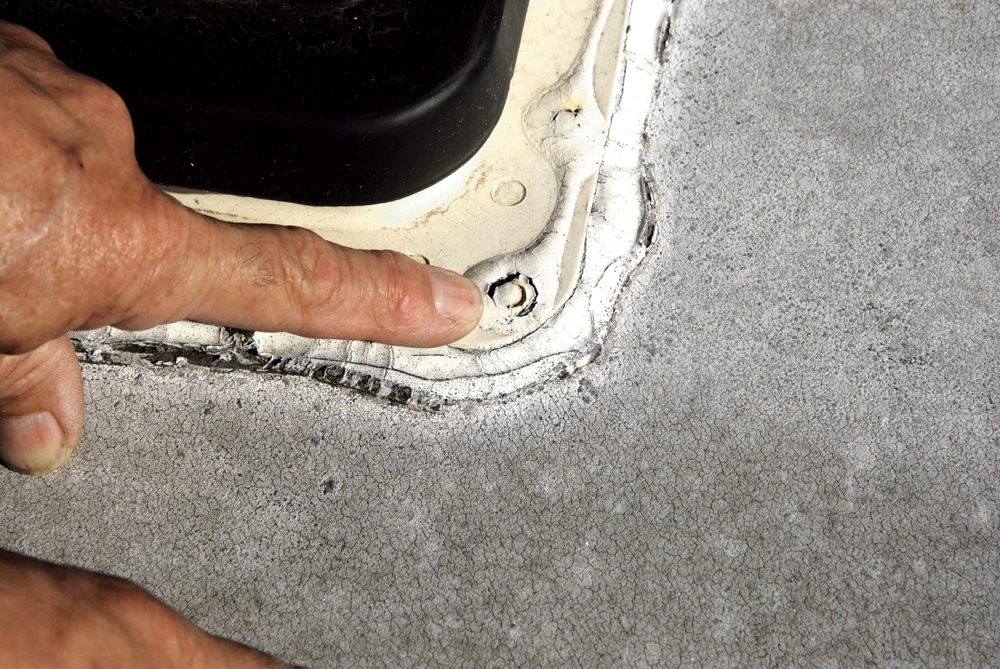
The Suburban water heater anode rod doubles as a drain plug. Replace the anode when only 25 percent of the
material is remaining.
Washing the motorhome and rinsing thoroughly around the windows will help locate possible leaks. Careful inspection of window seals and caulking around compartments and accessories is important. Now is also a good time to wax the exterior.
Routine tire inspection is a critical part of regular maintenance as well as an integral procedure during the spring checkup. Note the date of manufacture from the D.O.T code that is located on the outside tire sidewall, but sometimes found on the inside of the tire, depending on how it’s mounted. Every tire contains the week and year of manufacture.
The general rule of thumb is any steel belted radial will time out after seven years, regardless of tread condition. Some manufacturers recommend 10 years if the tires have been maintained properly and covered when not in use. During inspection, check every tire for cuts, cracks, or bubbles – including the inside sidewall. Front tires should be free from any signs of abnormal wear that may be caused by an alignment problem. Inflate the tires to the correct pressure. To determine the proper pressure, either refer to the motorhome manufacturer’s label near the driver’s seat (assuming the coach is not overloaded) or weigh the wheels individually and consult the tire manufacturer’s load and inflation tables.
After a thorough washing of the rubber roof membrane, inspect it carefully as it may need some type of maintenance.
Battery condition can be problematic after long periods of storage without proper charging. Battery maintenance not only ensures proper function, but will extend service life as well. The specific gravity can be checked using a hydrometer in open cell batteries, while a multimeter can be used to establish state of charge for sealed batteries. Remove any corrosion from the posts and the terminals; baking soda and water works well, but commercial cleaners and acid neutralizers are available. Replace any terminals that have been damaged by corrosion. Clean the battery trays and the hold-downs and paint if necessary. After cleaning, coat the battery terminals and posts with a protectant; this will help prevent future corrosion. When replacing batteries, always replace all of them, not just one of two, or two of four. Keep in mind that it is much easier to replace the batteries at home rather than being pressured to do so when on a trip.
Safety and efficiency are what we want from the propane system. Before opening the valve after winter storage, carefully inspect the regulator, rubber hoses and fittings, and inspect the LP-tank for cracks or corrosion. LP-gas regulators do not last forever, and are often overlooked. Some technicians recommend replacement every five years, but professional LP-gas suppliers can help make that determination. Have the gas pressure tested by a certified technician, and ask to have a leak-down test performed annually.
After careful inspection, the vents, seams, antennas, skylight or other accessories may need scraping and resealing.
Service all appliances after the propane system has been thoroughly tested. Start with the refrigerator; check the burner area for any debris or rust. If mothballs or dryer sheets were used, remove them before operating the refrigerator for the first time. Using compressed air, clean the burner tube and the flue. Check all the electrical connections for corrosion.
Illuminate the back of the refrigerator with a flashlight and look upward to check for any birds nests or other debris that may have found a winter home during storage. Start the refrigerator on gas, and listen for a flame to ignite. Let the refrigerator run on gas for several hours to be certain it will reach the set cooling temperature. Turn the gas off, open the doors of the refrigerator and let it sit for a few hours. Close the doors, select electric and allow to run long enough to verify that it works properly in this mode.
Before testing the forced air heating system, use a bright flashlight to look in to the exterior vent, checking for mud dauber nests or any other type of debris. Check the return air grille to be sure that it is free of any obstructions. Set the thermostat for 10 degrees higher than the ambient temperature and let the furnace run.
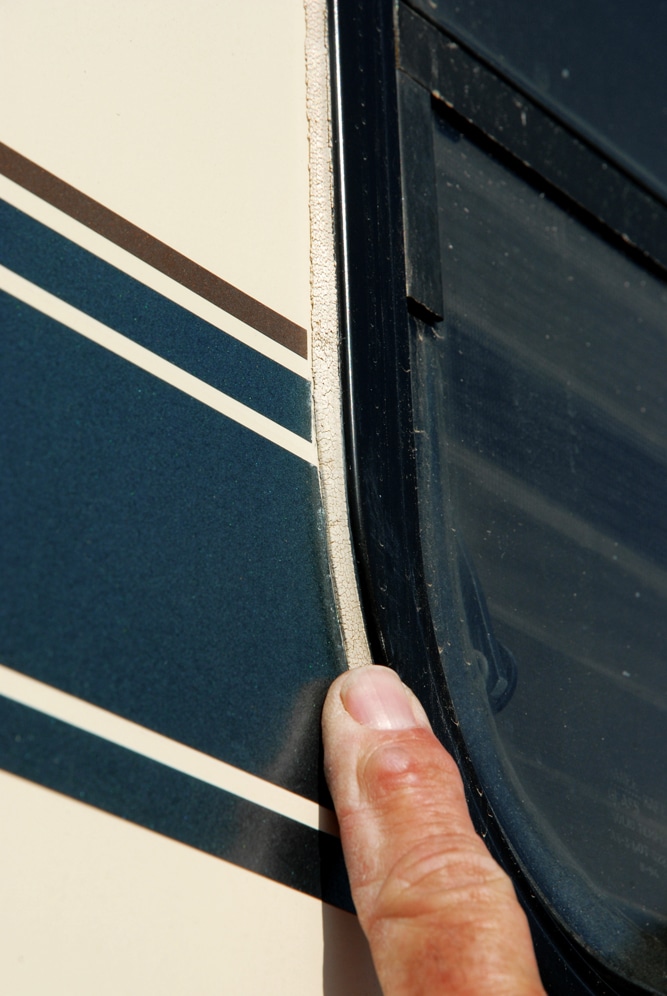
Look out for window caulking that has gone bad. If you see cracks, shrinkage and missing seals, scrape and recaulk
as needed before wet weather returns.
Listen for any variation in fan speed. If you notice a fluctuation in the fan speed, have the furnace checked by a professional. Use a bright flashlight to inspect the floor registers or heat ducts for any debris or obstructions. Let the furnace run for 10 to 15 minutes, and again listen for any variation in fan speed. If necessary, consult an RV repair technician to make sure the fan motor is not on its last legs.
Continuing the spring overhaul, clean the water heater flue and burner assembly with compressed air. Visually check the burner assembly and all LP-gas and electrical connections. Replace the burner and the spark probe assembly if they are rusted. Start the water heater on gas, and let it run through a full cycle to be sure that it is functioning properly. Check the TP valve, commonly known as a pop-off valve, for any leaks, corrosion or dripping during the heating cycle. If the TP valve is leaking, make sure the air space at the top of the hot water tank is restored before replacing the valve. To restore the air space, drain the tank and replace the plug/anode. Open a faucet in the system and allow the tank to fill.
If your water heater is equipped with an electric element, turn off the gas, run some hot water out of the tank and turn electric on. Be sure it heats to temperature.
Check the LP-gas, smoke and carbon monoxide warning detectors. Start by replacing the battery in the smoke detector (which should be done once a year). Push the test button in each device to verify proper operation. Most of these detectors will not last the lifetime of your coach; check with the manufacturer, or look on the back of the detector to see if there’s an expiration date. And don’t forget the fire extinguisher. It should be tested and replaced according to the manufacturer’s timeline as well.
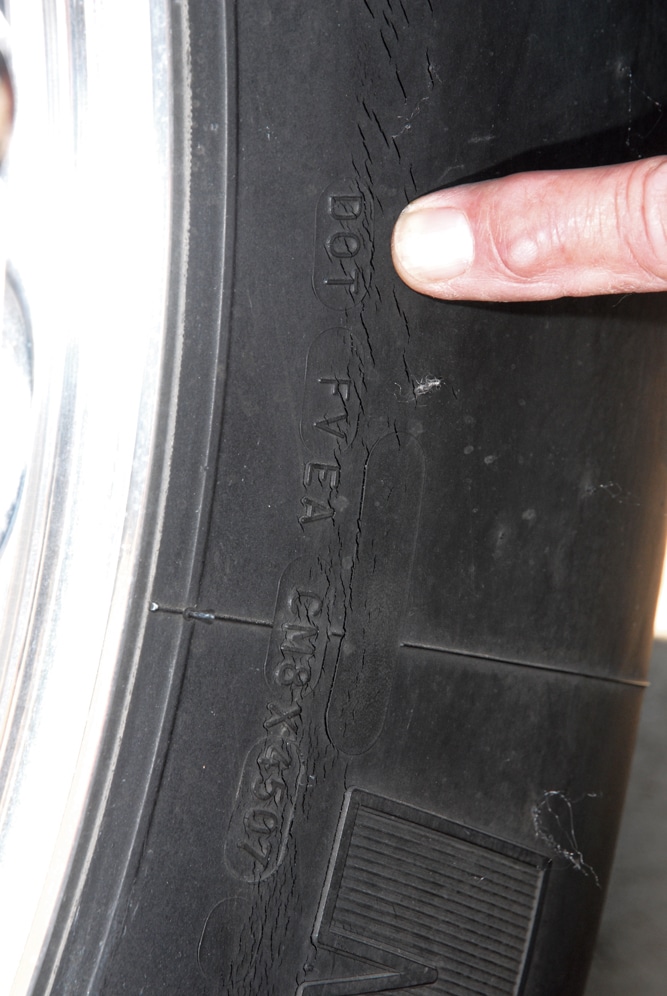
Check the D.O.T. code on all tires. The last digit indicates the year of manufacture. Steel-belted radials will need replacement if they are more than 7 years old.
With summer right around the corner, servicing the rooftop or basement air conditioner(s) is prudent. Clean or replace the intake filters first. Rooftop air-conditioners should have their shrouds removed and the condensers cleaned with compressed air (regulated to 80-90 psi). Be sure to check all connections and the fan motor for corrosion and rust. Grab that bright flashlight and check the inside evaporator for any buildup of dirt, oil or other debris that could affect the air conditioner’s efficiency. Using a vacuum cleaner, remove any loose debris or dirt. Straighten bent cooling fins. Use mild detergent to clean off any oil or sticky residue; warm water and mild soap may also be used to gently hand-wash intake filters that are in good condition. Plug in to shorepower or start the generator and run the air conditioner(s); carefully listen for any variation in fan speed. Check the temperature from the registers and be certain that the air is cold and the air-conditioner(s) is functioning properly.
Next, inspect ground fault circuit interrupter (GFCI) receptacles and all 120-volt AC outlets; there should be no loose or faulty outlets. Don’t forget the outlet that the refrigerator plugs in to. At this time, inspect the condition of the power cord (and any extension cord) for burns or a partially melted end; replace if either look unsafe.
Test the microwave oven. Using a glass of water, run the microwave for two minutes and be sure the water reaches a point of near boiling.
Grab the flashlight again and open all cupboards/closets and look for signs of moisture intrusion that may have occurred during winter. Also be on the look out for mold and mildew. Mold, and any water stains that have formed on the ceiling, can be cleaned with a product called InstaGone. Check under the galley, and open all drawers and inspect behind them with the flashlight as well. Look for mice, rat’s nests or dead critters.
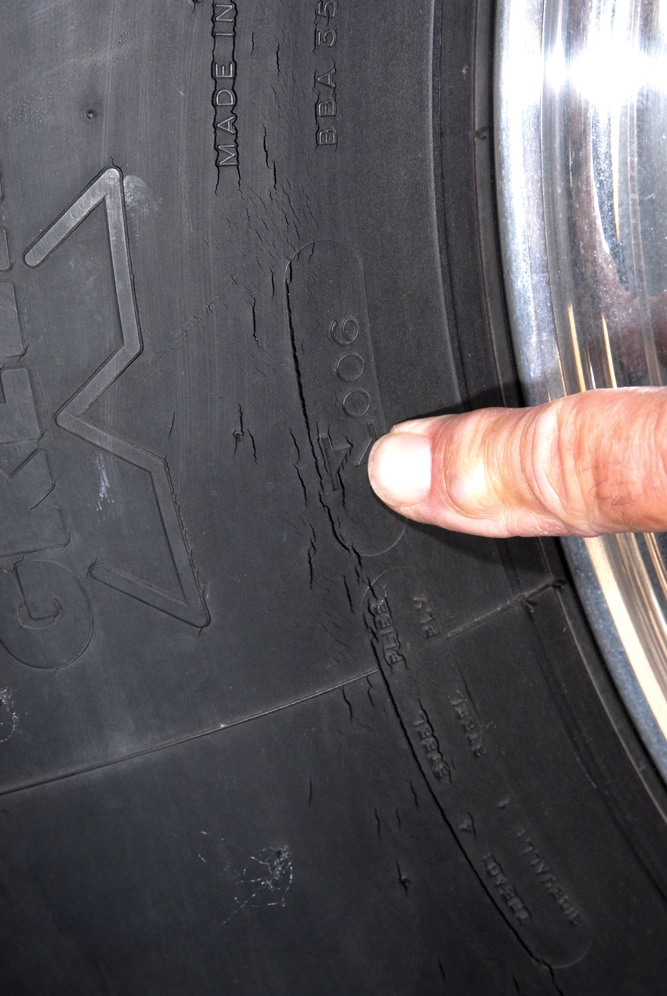
Large cracks like these on your tire’s sidewalls or treads are a sure sign that the tires will need to be replaced.
Checking the operation of the waste valves will help eliminate inopportune failures down the road. Fill the gray and black tanks to roughly half and add food dye. Let the water and food dye solution sit for two or three days with the valves closed and look for any signs of leakage. Freezing weather can damage the holding tanks as well as the dump valves.
Remove the sewer hose from its storage area and inspect for cracks on the seals, tube or fittings. Better to find out now that there is a pending problem than when your full black tank needs dumping.
With the correct oil or silicone spray, lubricate the electric step and slideout mechanisms per the manufacturer’s recommendations.
Open the patio and window awnings to check for proper operation and inspect the fabric for any damage or mildew that may have occurred during storage. Clean the fabric with Murphy Oil Soap or a mild detergent and let the material dry thoroughly before rolling up the awning. Using a ladder, check the fabric on all slideout toppers. Inspect the mounting hardware and spring mechanisms.
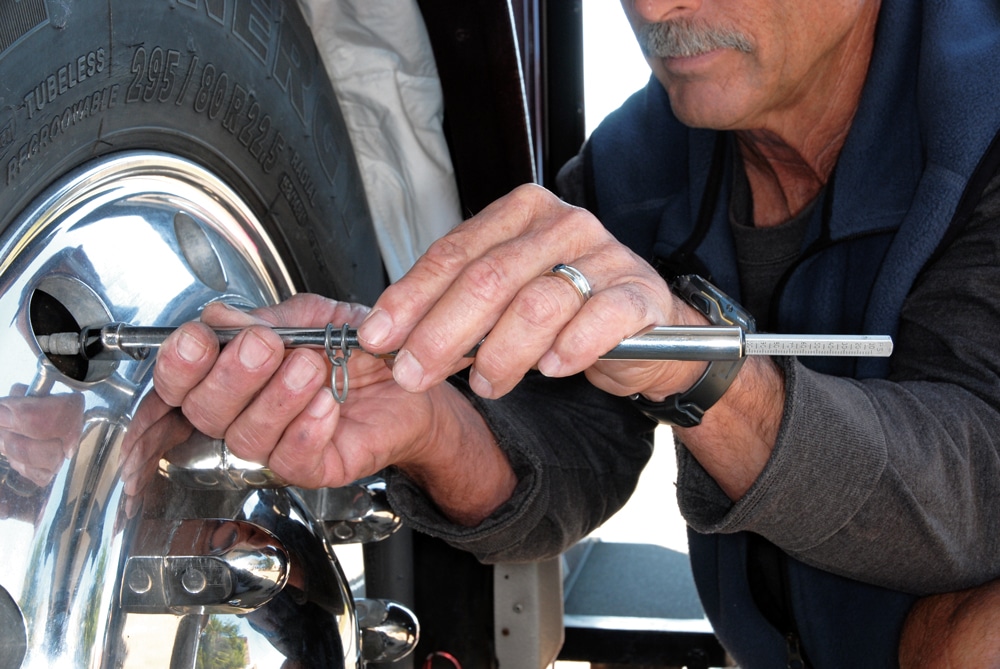
Check tire pressure to make sure that all of the tires are properly inflated before every trip.
Take a few minutes to check the turn signals, backup lights, taillights and clearance lights for any bulbs that may not be functioning. The two most common problems come from corrosion or a burned-out element. Check taillight and clearance light lenses for cracks or broken pieces and make sure the seals between the light fixtures and exterior surface have not been breached. If so, reseal with RV caulking. Check the high- and low-beam headlights. Visually inspect each headlight for any chips or cracks that may have occurred from rocks or other roadway debris.
Windshield wiper blades should be replaced annually. Operate the wiper blades and the windshield washer fluid system and make sure the washer nozzles are covering properly. Spray nozzles can become clogged and ineffective. Inspect the windshield carefully for any cracks they may have started; look for chips that can lead to larger cracks. Many smaller chips can be spot-repaired at a much lower cost than replacing the entire windshield.
It’s best to take your motorhome for a two- to three-hour test drive to make sure all drivetrain and suspension systems are working properly. Before taking that test drive, check all the fluids and replace if needed.
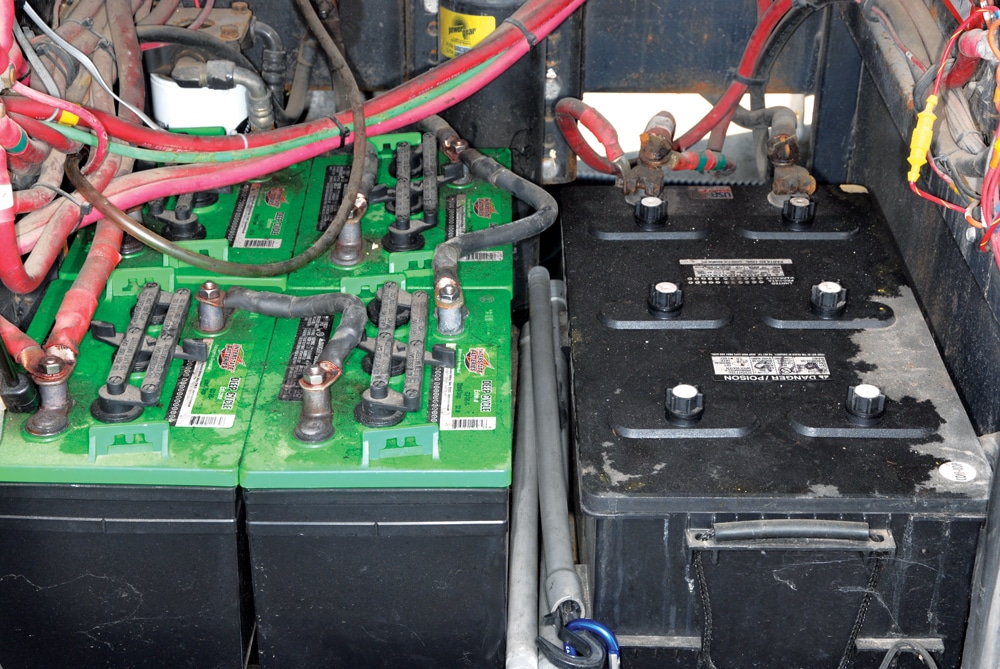
Clean all the starting and house batteries in the system and don’t overlook the compartment. Spray terminals and posts with a battery corrosion protectant.
During the test drive, pay close attention to all gauges, especially the alternator output to make sure that there are no major fluctuations in voltage. Check the engine air filter for blockage and possible visitation from critters; they can do a lot of costly damage. Run the in-dash air conditioner for an extended period time, even if it’s cold outside. A slow leak may not show up for an hour or two. Find a street or parking lot where there is no traffic, and apply the brakes at a low speed, hard enough to experience possible pulling. Address any alignment issues that may have been noticed during the test drive.
When summer arrives, you will probably enjoy using the generator to run the air conditioners while on the road or parked without hookups. So it’s important to check the engine oil level, then inspect the engine air filter. Look at the hour meter to determine if service is due. With your conditioner(s) on, run the generator for a good hour and a half. If there’s a problem with the carburetor or other component, it will show up at this time. If you have a diesel generator, you will need to check the antifreeze level as well. Remember, it’s important to “exercise” a generator; follow the manufacturer’s guidelines for operational intervals – usually once a month.
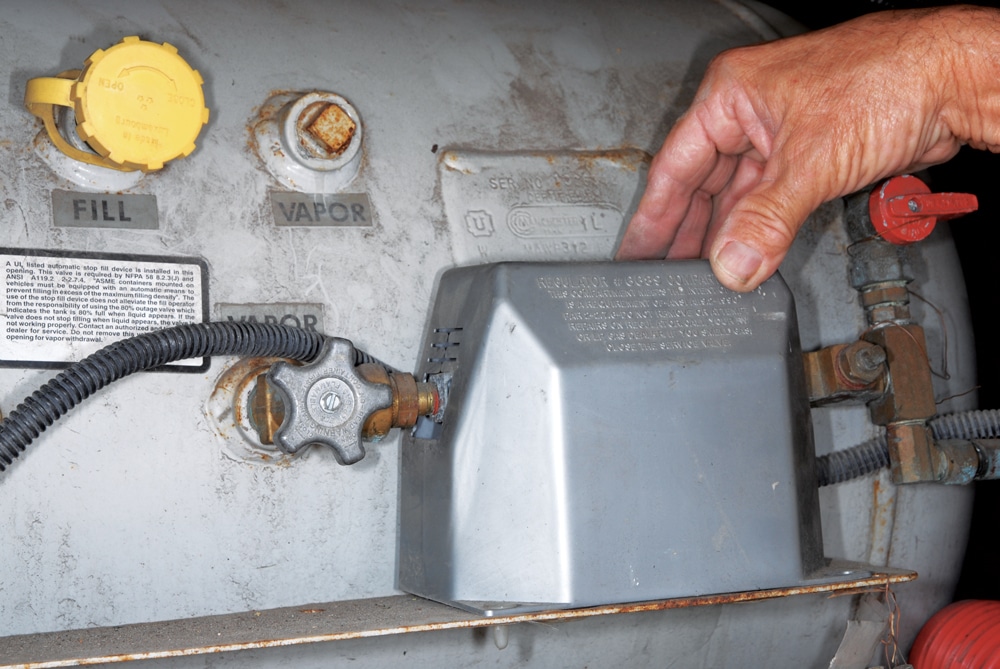
Remove the cover from the LP-gas pressure regulator and inspect the regulator for integrity and corrosion.
Taking the time to give your motorhome a thorough spring checkup will make for much more enjoyable travels. And finding the little problems before they become big headaches also keeps more money in your pocket!
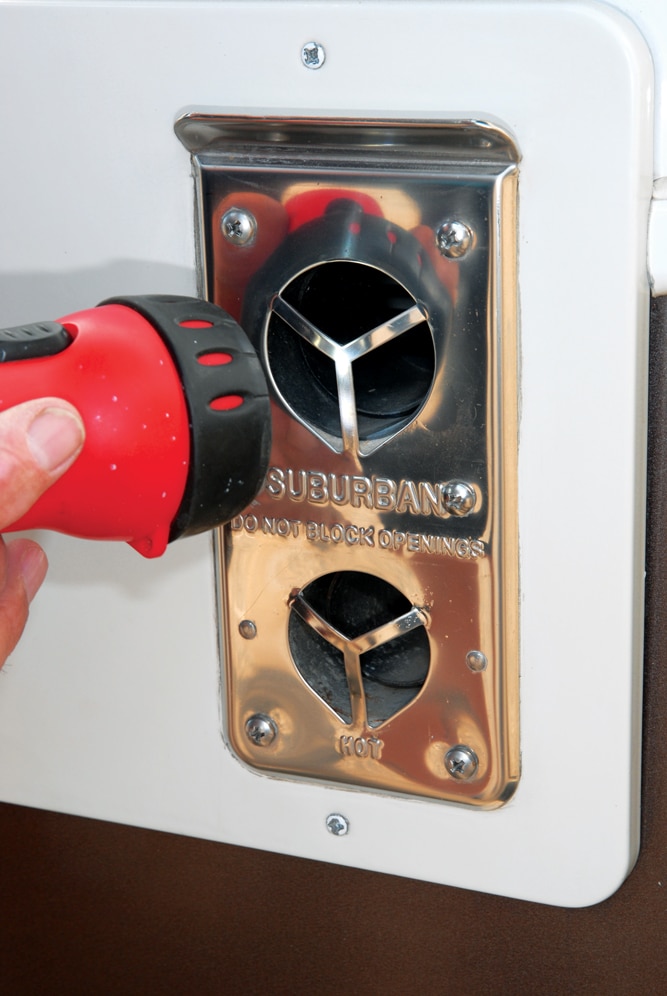
Using a flashlight, inspect the exterior furnace vent, looking for mud daubers and/or debris that need to be removed.
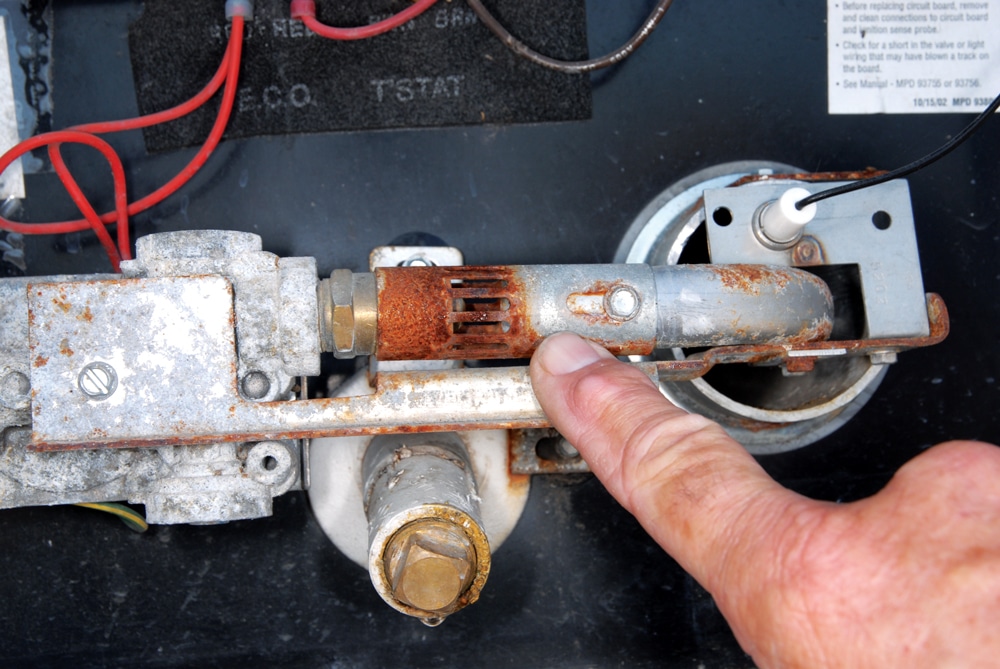
Inspect the water heater burner, gas valve and pressure relief valve, and replace any corroded or rusty parts. Operate the water heater one full cycle for a complete test.
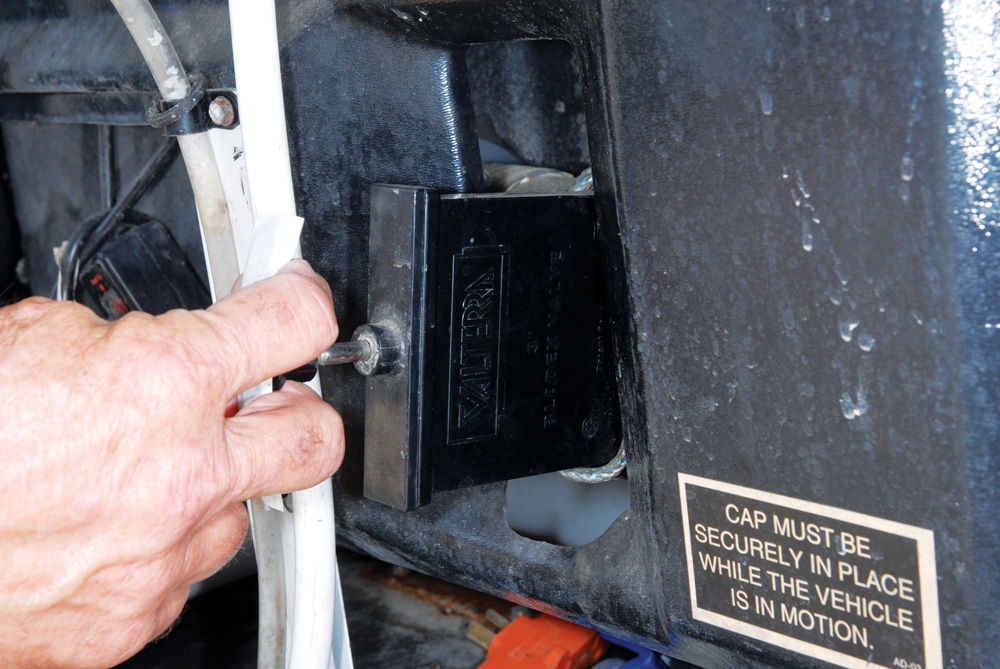
Operate all dump valves and replace if they stick and/or are difficult to pull. Inspect the valve and the area around the valve for any type of leak.
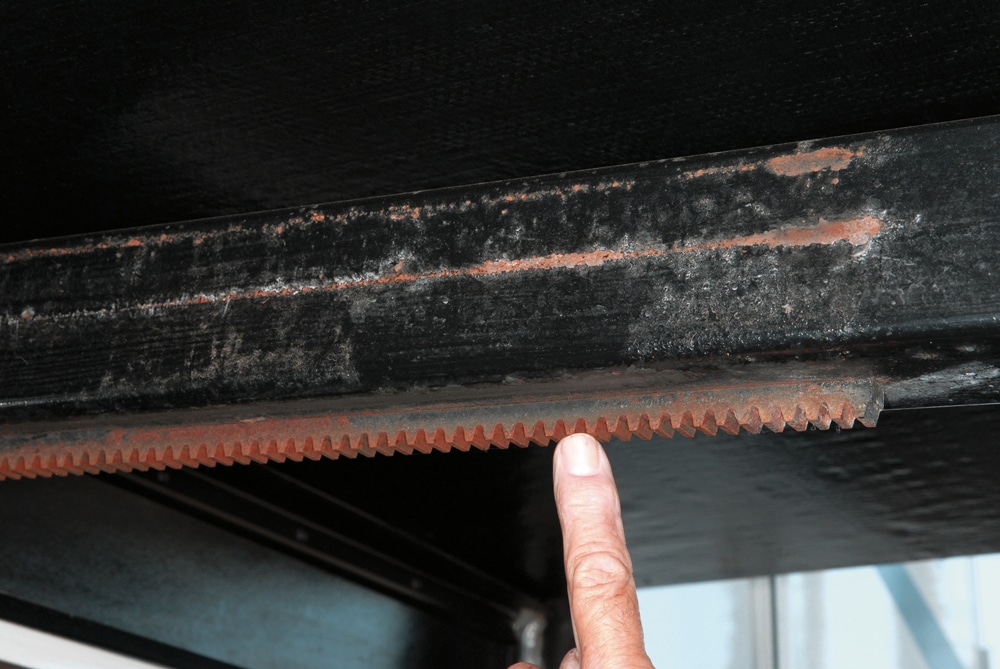
Check slideout mechanisms, rails and/or gears if you can see them. Follow the manufacturer’s recommended lubrications schedule if needed.
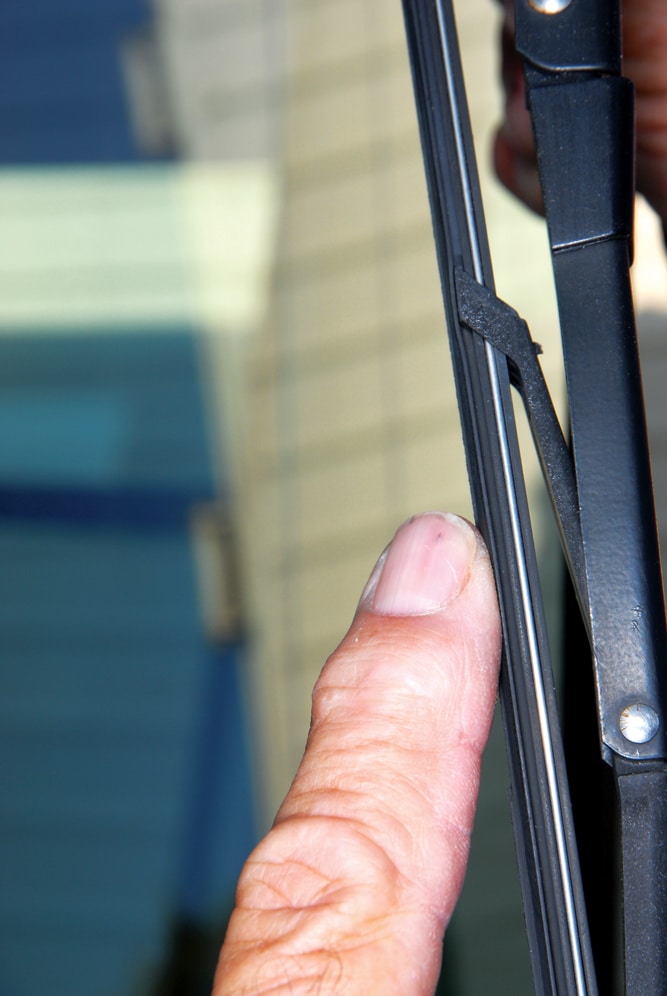
Replace wiper blades on an annual basis. Over time, rubber hardens and the edges break away, making the blade ineffective.
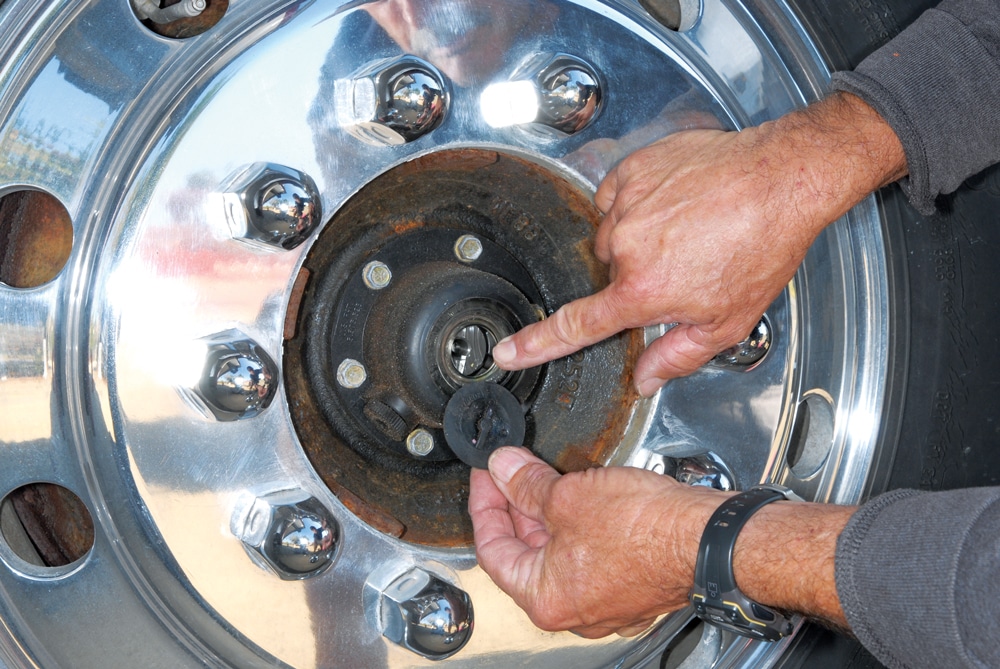
For motorhomes that have an oil bath front wheel bearing system, check oil level before every trip. This simple, five minute step is vital for proper function.
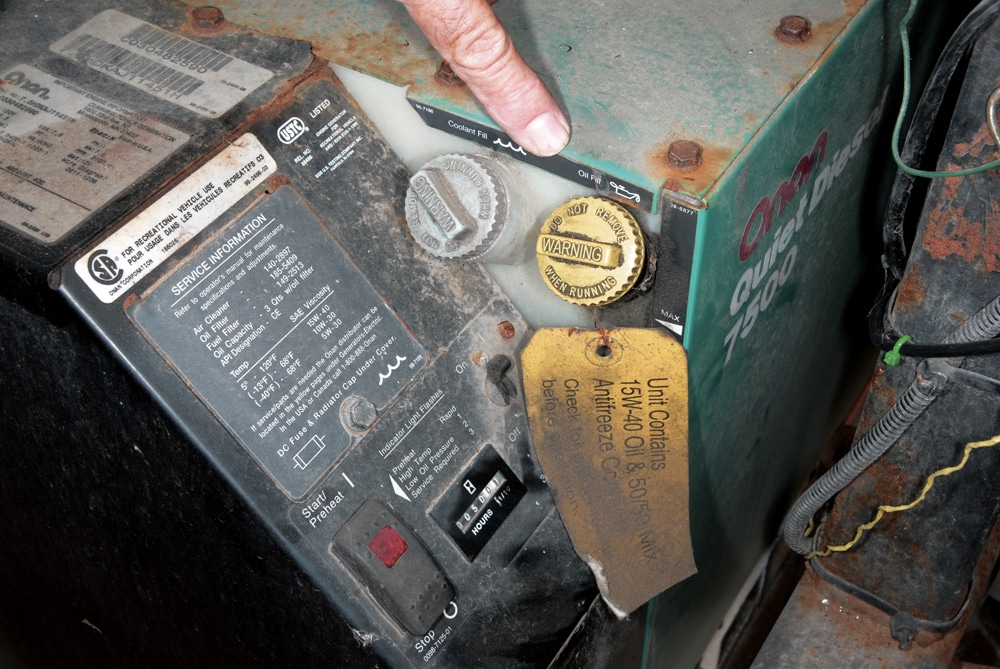
Familiarize yourself with the generator’s oil and antifreeze fluid levels. Keep a logbook of maintenance intervals and running time.
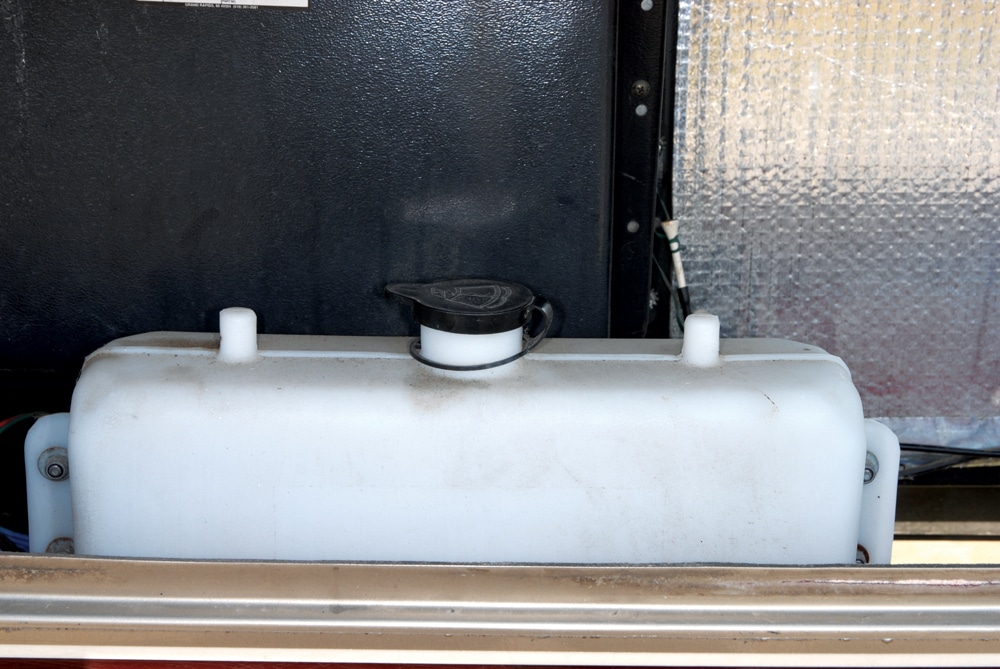
Although often ignored, inspect and test the windshield washer reservoir for cracks and proper fluid level.

Remove the generator’s dipstick and check oil level at least once a week
during use.
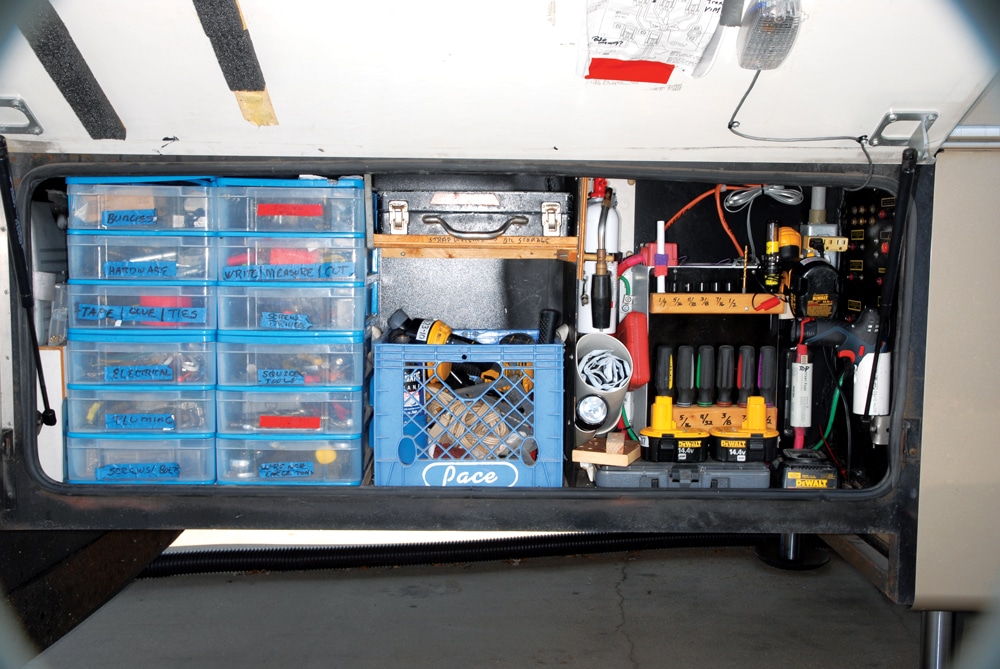
Keeping your tools and supplies organized will make maintenance and repairs easier and more efficient.
 Bill and Jenn Gehr, along with their two Boston bulldogs, are full-time RV adventurers who enjoy sharing their technical knowledge with fellow RVers.