RV Awning Replacement 101
A Step-by-Step Guide to Replace the Fabric on a Manual Awning
Image Caption:
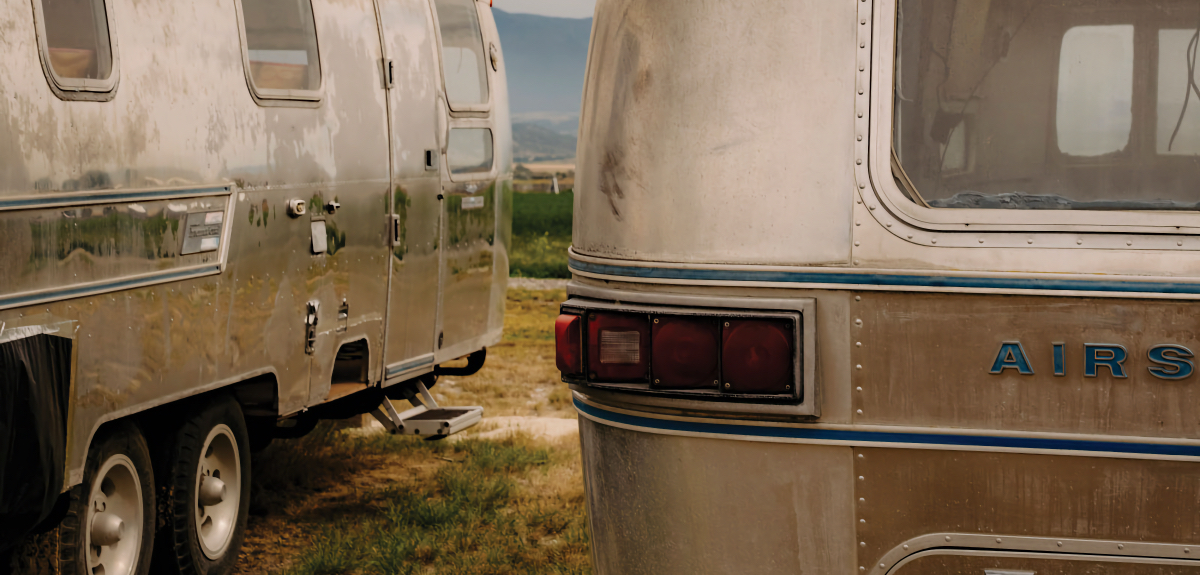
RV awning replacement is a key part of routine RV maintenance. After ten years of full-time use, the fabric on our RV’s original 17′ Domestic Sunchaser manual awning gave up the ghost. A lifetime of UV exposure weakened it; And one day when we opened it up, the awning ripped right off the roller. RV awning replacement is a straightforward job but several extra pairs of hands available at various stages of the project (which we had) makes it much easier.
Awning Fabric Tension and the Roller Torsion Assembly
The fabric on our manual RV awning is held in place with slide tracks that run along both the RV sidewall and the awning roller. Inside the roller, there is a coil spring torsion assembly that keeps tension on the fabric. As you open the awning, the fabric unrolls from the roller, and the spring tension of the torsion assembly inside the roller increases.
When the awning is fully deployed, the spring is under maximum tension. But, when we roll the awning back up again, the spring tension forces the roller to rotate so the fabric winds up tight against the drum until the roller is flush with the RV sidewall.
Step One: Remove the Awning from the RV
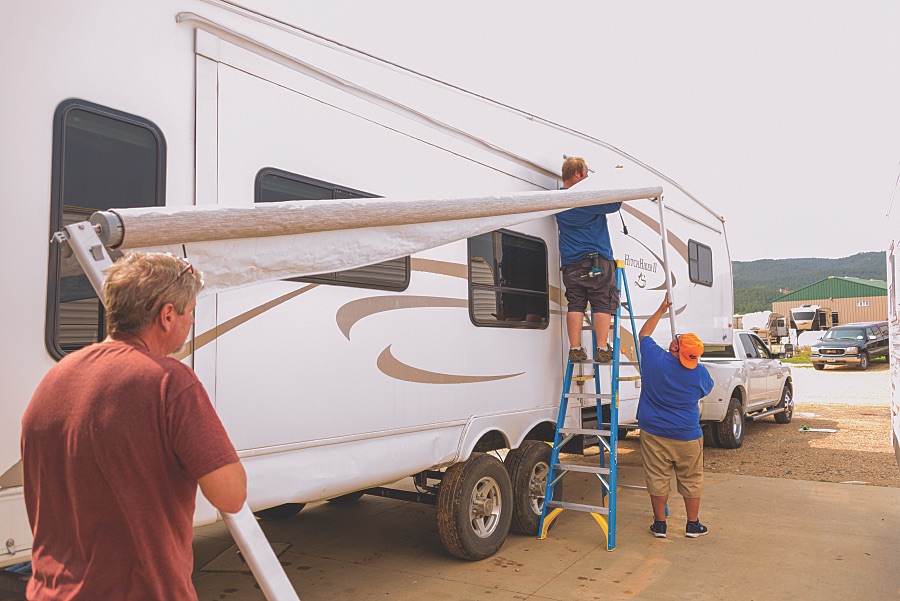
In order to remove the old awning fabric, we had to remove the entire awning from the RV. We had to detach both the awning roller and the two awning arms at either end from the RV sidewall and maneuvered them onto two sawhorses where the fabric removal and replacement would take place.
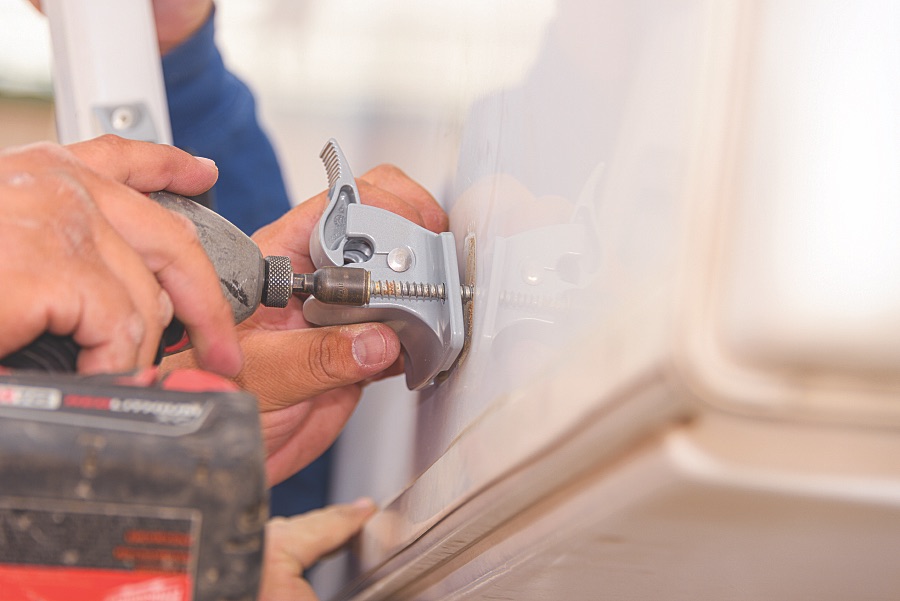
Two mounting brackets at the top and bottom attach the awning arms to the RV sidewall. To remove the top brackets, we unrolled the awning about one foot and unscrewed and removed both top brackets. Then we removed the bottom brackets and the process began to slide the awning fabric off the RV sidewall slide track.
With one person at each end of the awning holding up an awning arm, we slid the fabric off the RV sidewall slide track inch by inch. This took some coordination as one person worked his way down the slide track pushing the fabric along while the other pulled the fabric out from the opposite end.
As they slid the fabric off the track, both people walked the awning arms and fabric towards the back end of the RV. Once the fabric was completely removed from the slide track, they carried the entire awning by the two awning arms and laid the roller against two sawhorses for the next step.
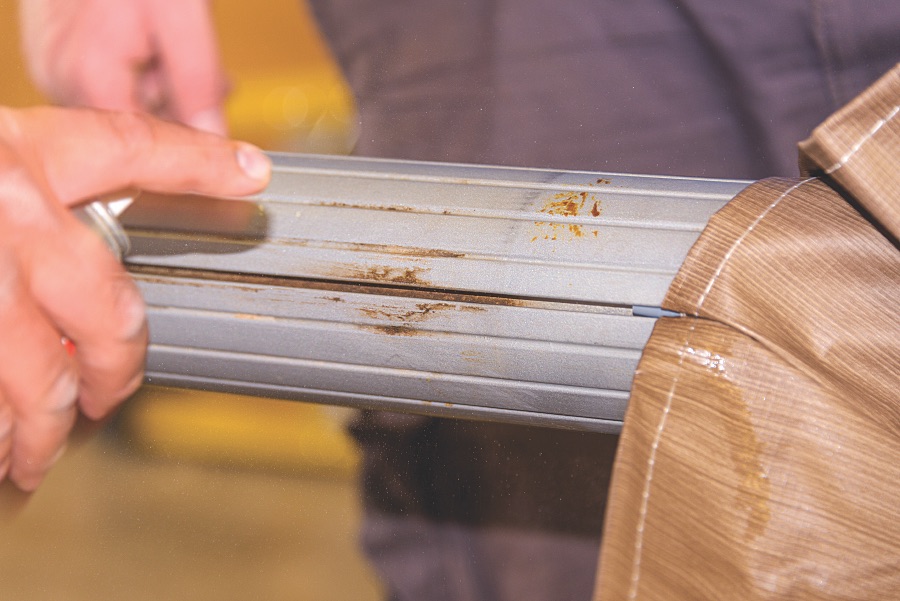
Step Two: Remove One Awning Arm, The Torsion Assembly, and the Old Fabric
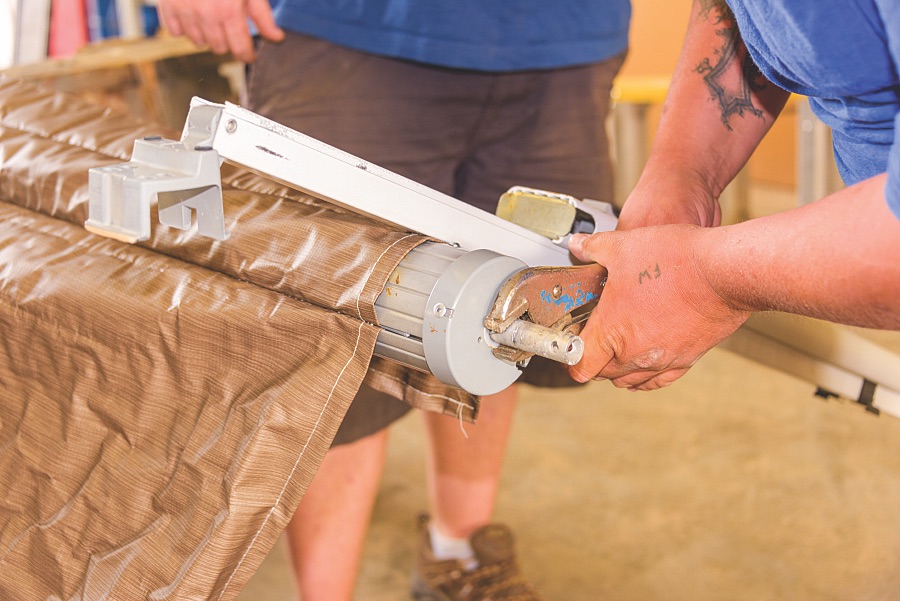
Now we needed to slide the old fabric out of the slide track on the awning roller. Inside the awning roller, there is a coil spring and rod torsion assembly which we had to remove from the roller to allow the fabric to be slid off the slide track. The torsion assembly has a locking mechanism at one end to control the spring tension and endcaps at both ends to hold the rod in the center of the roller. We also had to remove the awning arm and end cap at the non-locking end of the torsion assembly in order to slide the fabric off the roller slide track
After ensuring the locking end was in the locked position, we removed the bolt that holds the awning arm to the torsion assembly at the other, non-locking in order to detach the awning arm. We drilled out the rivets on the endcap at that end. This freed the whole torsion assembly from the roller so we could pull it out. We then placed the torsion assembly on the ground and, with the roller spanning the sawhorses, slid the old awning fabric out of the roller slide track.
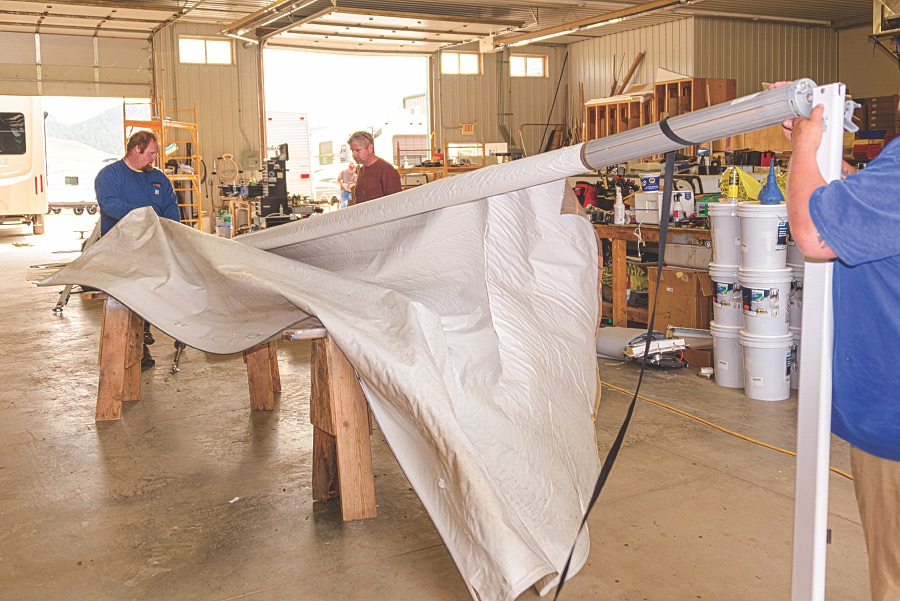
Step Three: Install the New Fabric
We unfolded the new awning fabric and laid it out in front of the sawhorses. We then sprayed the slide track on the roller with heavy-duty silicone to make it easier to slide the new fabric down the track. Working together, one person fed the fabric into the roller track while the other slid the new fabric down the track to the far end until it reached the locking mechanism, and secured the entire side of the awning fabric in the track.
Step Four: Re-Insert And Tension the Torsion Assembly and Reattach the Arms
Now we had to unbolt the second awning arm (at the non-locking end) from the roller and set it aside for a moment so we could slide the torsion assembly back inside and tension it. Then we riveted the endcap at the non-locking end back in place and screwed screws into each end of the track so the fabric wouldn’t slide out of the track in either direction.
Next, at the locking end, we used a vice grip to hold the end of the torsion assembly bar that was sticking out of the roller so we could rotate the bar 16 times to set the proper spring tension. Finally, with the fabric installed on the roller and the torsion assembly inside the roller properly tensioned, we bolted both awning arms back onto the torsion assembly bar and we wrapped the awning fabric loosely around the roller.
Step Five: Reinstall the Awning on the RV
We were now ready to install the awning on the trailer. First, we cleaned the slide track on the sidewall of the RV and sprayed it with heavy-duty silicone so the awning fabric would slide easily in the track.
Then we carried the awning by the awning arms and, along with a third person, positioned ourselves alongside the RV. One was at the front of the awning and one was at the back, both standing on the ground and holding the awning arms high up so the roller was level with the slide track on the RV sideway.
The third person stood on a ladder next to the RV door between them and fed the fabric into the awning track as the other two walked the awning arms forward. The person on the ladder fed the fabric into the track, while the front and back people holding the awning arms walked the awning forward until they had fed all the fabric into the track and both arms were in position for reattachment to the sidewall of the RV. Then we screwed the top and bottom awning arm brackets back onto the RV sidewall and we completed our job.
To test it out, we rolled the awning all the way out and then all the way back in. The spring tension was just right, and the new fabric looked fantastic. New fabric dressed up our old manual awning and it was now ready to give us many more years of great shade! Our RV awning replacement was a great success. Now get out there and try it on your RV!